A Nostalgic Treat Straight from the Teletubbyland Kitchen
I’ll be honest — the moment I decided to recreate Tubby Custard, I felt a wave of pure childhood nostalgia. You remember it, right? That cheerful pink pudding the Teletubbies couldn’t stop giggling about. When I was little, I was absolutely fascinated by it — the color, the creamy texture, the joyful “Tubby Custard, Tubby Custard!” chant. Now, as an adult, I wanted to bring that magic back, but in a way that actually tastes amazing.
And let me tell you — this homemade version does not disappoint. It’s velvety, lightly sweet, and has that whimsical pink hue that just makes you smile. The best part? It’s simple, comforting, and totally customizable — you can make it fruity, creamy, or even dairy-free if you like.
What Is Tubby Custard?
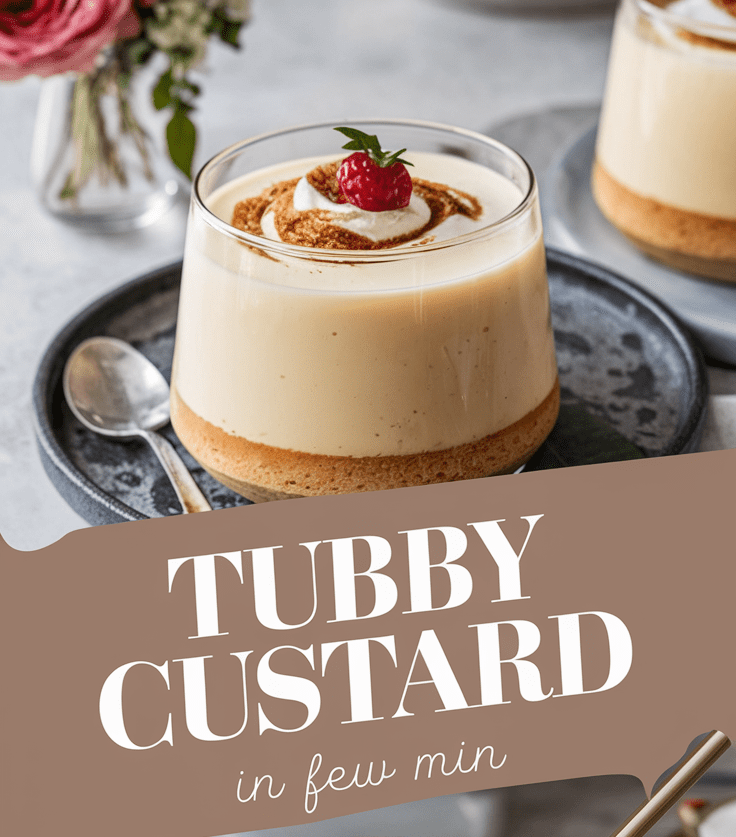
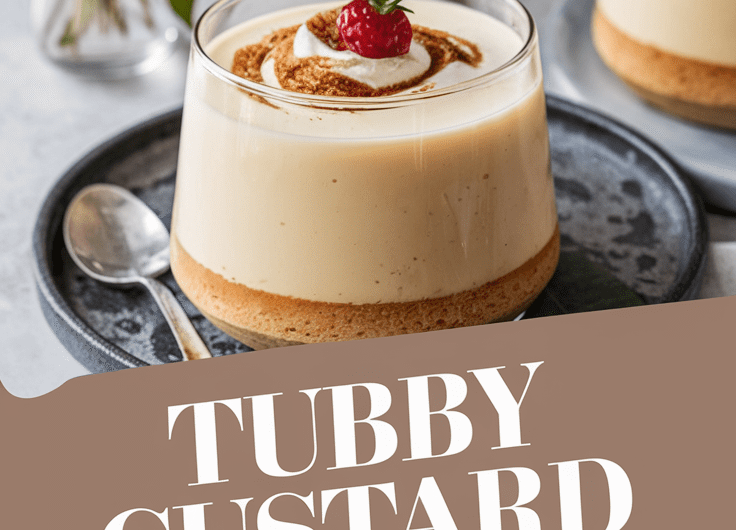
Tubby Custard is the fictional dessert from the Teletubbies — a creamy, pink, pudding-like custard. While the show never revealed its exact flavor, most fans imagine it tasting like a sweet, vanilla-strawberry custard. My version takes inspiration from classic custard recipes but adds a fun pink twist using real strawberry puree (or food coloring if you want to keep it quick and easy).
It’s smooth, slightly thick, and perfect for kids and adults who still have a soft spot for Saturday morning nostalgia.
Why This Recipe Is Special
For me, this recipe is a little piece of joy. It brings a playful childhood memory into the real world — and turns it into something delicious you can actually eat. It’s also a great recipe for when you want to make something quick and comforting, but still unique enough to make you smile.
❤️ Why You’ll Love This Recipe
- Nostalgic and fun – A whimsical treat that brings back your favorite TV memories.
- Creamy and smooth – Silky texture that melts on your tongue.
- Simple ingredients – No fancy stuff, just pantry basics.
- Customizable – Adjust sweetness, flavor, or color to your taste.
- Kid-friendly – A delightful dessert that kids will go crazy for.
- Quick to make – Ready in under 20 minutes from start to finish.
🧰 Tools You’ll Need
You don’t need much — just a few simple tools that make the process smooth:
- Medium saucepan – To heat the custard evenly without burning.
- Whisk – To keep the mixture lump-free and silky.
- Measuring cups and spoons – Accuracy is key when making custard.
- Fine mesh strainer (optional) – For extra smoothness if you’re feeling fancy.
- Mixing bowl – To temper the egg yolks if needed.
- Serving dishes or ramekins – Because presentation counts, even for Tubby Custard!
🧁 Ingredients (for 4 servings)
IngredientUSMetricNotes
Whole milk 2 cups 480 ml Makes the custard rich and creamy
Heavy cream ½ cup 120 ml Adds luxurious smoothness
Sugar ⅓ cup 65 g Adjust to taste
Cornstarch 2 tbsp 16 g Helps thicken the custard
Egg yolks 3 large — Adds richness and that classic custard feel
Vanilla extract 1 tsp 5 ml Brings warmth and depth
Strawberry puree or syrup 2 tbsp 30 ml For flavor and color
Pink food coloring (optional) A drop or two — For that iconic Tubby Custard look
Salt A pinch — Balances the sweetness
👩🍳 Step-by-Step Instructions
1. Warm the milk and cream
Pour the milk and cream into a saucepan and heat gently over medium-low heat. You want it warm but not boiling — think gentle steam, not bubbles.
(Tip: if it starts to simmer, turn it down right away! Custard doesn’t like high heat.)
2. Whisk the egg yolks, sugar, and cornstarch
In a separate bowl, whisk together the egg yolks, sugar, and cornstarch until smooth and pale. This step ensures your custard will be creamy, not grainy.
I like to whisk until it looks a bit like thick frosting — that’s when I know it’s ready.
3. Temper the eggs
Now comes the delicate part — but don’t worry, I’ll guide you through it!
Slowly pour about half of the warm milk mixture into the egg mixture while whisking constantly. This keeps the eggs from scrambling.
Once it’s well combined, pour everything back into the saucepan.
4. Cook until thick
Return the pan to low heat and keep whisking. The mixture will gradually thicken — it usually takes about 5–7 minutes. You’ll know it’s ready when it coats the back of a spoon and leaves a trail when you run your finger through it.
(Don’t rush it — slow and steady wins the custard race!)
5. Add flavor and color
Remove from heat and stir in the vanilla extract, strawberry puree (or syrup), and a drop of pink food coloring if you like. The color will instantly turn that dreamy Tubby pink.
6. Strain (optional) and chill
For a silky-smooth texture, strain the custard through a fine mesh sieve into a bowl. Cover with plastic wrap (pressed right against the surface to avoid a skin forming) and chill for at least 1 hour.
🍓 Serving Ideas
- Serve chilled in little cups with a sprinkle of crushed freeze-dried strawberries.
- Top with whipped cream and fresh berries for a more grown-up version.
- Pour it warm over sponge cake or brownies for a cozy dessert.
- For a fun party treat, spoon into small jars with colorful sprinkles.
🔄 Variations & Customizations
- Vegan version: Use coconut milk and a cornstarch-only base (no eggs).
- Chocolate twist: Add 2 tablespoons of melted white chocolate.
- Fruity spin: Replace strawberry with raspberry, cherry, or even dragon fruit puree for a vibrant hue.
- Lower sugar: Use a sugar substitute or reduce by 1 tablespoon — it’s still delicious.
🧊 Storage & Make-Ahead Tips
- Fridge: Store covered in the refrigerator for up to 3 days.
- Make-ahead: You can prepare the custard the day before serving — it actually sets even better overnight.
- Reheat: Gently warm in a saucepan over low heat, whisking constantly. Don’t microwave — it can curdle easily.
💡 Pro Tips & Mistakes to Avoid
Let me share a few secrets I learned along the way:
- Don’t boil it! Once the mixture boils, it can curdle or separate. Gentle heat only.
- Whisk constantly to keep the texture smooth and prevent lumps.
- Use fresh eggs — they make a noticeable difference in flavor and consistency.
- Taste before coloring — depending on your strawberry syrup, you might not need extra sweetness.
- If it’s too thick, add a splash of milk and whisk it in while warm.
📋 Recipe Summary
- Yield: 4 servings
- Prep Time: 5 minutes
- Cook Time: 10 minutes
- Chill Time: 1 hour
- Total Time: ~1 hour 15 minutes
Nutrition (per serving):
Calories: ~230 | Protein: 6g | Fat: 10g | Carbs: 28g | Sugar: 22g
💬 Final Thoughts
If you grew up watching the Teletubbies, making this Tubby Custard is pure joy — it’s like taking a spoonful of childhood wonder. I promise, once you try it, you’ll understand why those four colorful friends couldn’t get enough of it.
Tubby Custard Recipe
4
servings5
minutes10
minutes230
kcalI’ll be honest — the moment I decided to recreate Tubby Custard, I felt a wave of pure childhood nostalgia. You remember it, right? That cheerful pink pudding the Teletubbies couldn’t stop giggling about. When I was little, I was absolutely fascinated by it — the color, the creamy texture, the joyful “Tubby Custard, Tubby Custard!” chant. Now, as an adult, I wanted to bring that magic back, but in a way that actually tastes amazing.
Ingredients
Whole milk 2 cups 480 ml Makes the custard rich and creamy
Heavy cream ½ cup 120 ml Adds luxurious smoothness
Sugar ⅓ cup 65 g Adjust to taste
Cornstarch 2 tbsp 16 g Helps thicken the custard
Egg yolks 3 large — Adds richness and that classic custard feel
Vanilla extract 1 tsp 5 ml Brings warmth and depth
Strawberry puree or syrup 2 tbsp 30 ml For flavor and color
Pink food coloring (optional) A drop or two — For that iconic Tubby Custard look
Salt A pinch — Balances the sweetness
Directions
- Warm the milk and cream
- Pour the milk and cream into a saucepan and heat gently over medium-low heat. You want it warm but not boiling — think gentle steam, not bubbles.
- (Tip: if it starts to simmer, turn it down right away! Custard doesn’t like high heat.)
- Whisk the egg yolks, sugar, and cornstarch
- In a separate bowl, whisk together the egg yolks, sugar, and cornstarch until smooth and pale. This step ensures your custard will be creamy, not grainy.
- like to whisk until it looks a bit like thick frosting — that’s when I know it’s ready.
- Temper the eggs
- Now comes the delicate part — but don’t worry, I’ll guide you through it!
- Slowly pour about half of the warm milk mixture into the egg mixture while whisking constantly. This keeps the eggs from scrambling.
- Once it’s well combined, pour everything back into the saucepan.
- Cook until thick
- Return the pan to low heat and keep whisking. The mixture will gradually thicken — it usually takes about 5–7 minutes. You’ll know it’s ready when it coats the back of a spoon and leaves a trail when you run your finger through it.
- (Don’t rush it — slow and steady wins the custard race!)
- Add flavor and color
- Remove from heat and stir in the vanilla extract, strawberry puree (or syrup), and a drop of pink food coloring if you like. The color will instantly turn that dreamy Tubby pink.
- Strain (optional) and chill
- For a silky-smooth texture, strain the custard through a fine mesh sieve into a bowl. Cover with plastic wrap (pressed right against the surface to avoid a skin forming) and chill for at least 1 hour.
Notes
- Don’t boil it! Once the mixture boils, it can curdle or separate. Gentle heat only.
Whisk constantly to keep the texture smooth and prevent lumps.
Use fresh eggs — they make a noticeable difference in flavor and consistency.
Taste before coloring — depending on your strawberry syrup, you might not need extra sweetness.
If it’s too thick, add a splash of milk and whisk it in while warm.