Honestly, I think this might be the best dessert mashup I have ever made. I used to be torn between making a sophisticated Italian dessert or just slumping on the couch with a pan of fudgy brownies. This recipe solves that dilemma perfectly. It takes the elegance of Tiramisu and grounds it with the comforting, dense chewiness of a brownie. In my opinion, if you love coffee and chocolate, this is going to be your new obsession.
What Is This Recipe?
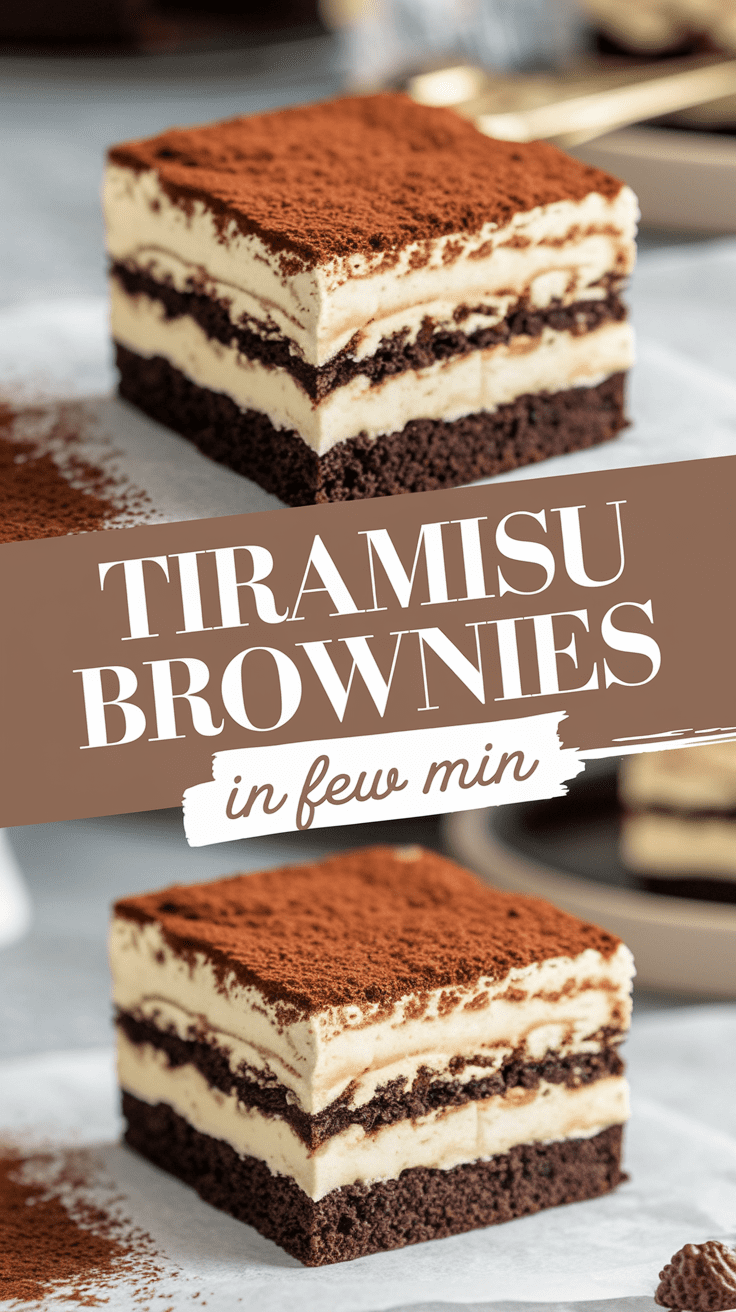
Essentially, we are ditching the traditional, sometimes soggy ladyfingers found in classic Tiramisu and replacing them with a rich, espresso-infused chocolate brownie base. Once that base is baked and cooled, we top it with a thick, billowy layer of sweetened mascarpone cream and finish it with a generous dusting of cocoa powder.
Why It’s Special
What makes this recipe stand out is the texture. You get that satisfying “tooth-sink” feeling of a dense brownie followed immediately by the light, airy cloud of the cream topping. It feels fancy enough to bring to a dinner party, but I promise you, it is sturdy enough to eat with your hands while standing in the kitchen at midnight (which I have definitely done).
Why You’ll Love This Recipe
- The “Mocha” Factor: I use instant espresso powder in the brownie batter. It doesn’t just make it taste like coffee; it actually amplifies the chocolate flavor, making it taste more like chocolate than a regular brownie does.
- No Raw Eggs: Unlike traditional Tiramisu, which often uses raw yolks in the cream, this topping is egg-free, using whipped cream and mascarpone for stability.
- Foolproof Fancy: It looks like something from a bakery window, but if you can mix a bowl of batter and whip cream, you can nail this.
- Make-Ahead Magic: Because the flavors meld together in the fridge, these actually taste better the next day.
Tools You’ll Need
You don’t need a professional kitchen for this, just a few basics.
- 8×8 inch (20×20 cm) Baking Pan: Metal is best for sharp edges, but glass works too (just keep an eye on the baking time).
- Electric Mixer (Hand or Stand): This is crucial for the topping. You need to whip air into the cream to make it fluffy.
- Parchment Paper: Do not skip this! You’ll need to create a “sling” to lift the brownies out of the pan later.
- Fine Mesh Sieve: For that iconic dusting of cocoa powder on top.
Ingredients
For the Espresso Brownie Base
- Unsalted Butter: 1/2 cup (115g) – Melted and slightly cooled.
- Granulated Sugar: 1 cup (200g) – For that classic crinkly top.
- Eggs: 2 large – Room temperature helps them mix better.
- Vanilla Extract: 1 teaspoon.
- All-Purpose Flour: 1/2 cup (65g) – We use less flour to keep them fudgy.
- Cocoa Powder (Unsweetened): 1/2 cup (45g) – Dutch-processed gives a darker color, but regular works fine.
- Instant Espresso Powder: 1 tablespoon – This is the secret weapon. Dissolve it in the melted butter for best results.
- Salt: 1/4 teaspoon – To balance the sweet.
For the Mascarpone Cream Topping
- Mascarpone Cheese: 8 oz (225g) – Crucial: Let this come to room temperature so it blends smoothly. Cold mascarpone equals lumpy frosting.
- Heavy Whipping Cream: 1/2 cup (120ml) – Cold, straight from the fridge.
- Powdered Sugar: 1/2 cup (60g).
- Vanilla Extract: 1/2 teaspoon.
Garnish
- Unsweetened Cocoa Powder: 1 tablespoon.
Step-by-Step Instructions
Part 1: The Brownie Base
1. Prep your station. Preheat your oven to 350°F (175°C). Grease your pan and line it with parchment paper, leaving an overhang on two sides. I like to use binder clips to hold the paper in place so it doesn’t flop into the batter (just remember to remove them before baking!).
2. Melt and mix. In a large bowl, combine your melted butter and the instant espresso powder. Whisk them until the powder dissolves—I love the smell that hits you right here; it smells like a busy coffee shop. Stir in the sugar until combined.
3. Add the binders. Whisk in the eggs and vanilla extract. You want to whisk this vigorously for about a minute. Tip: This incorporates air and helps create that shiny, crackly crust we all love on brownies.
4. Fold in the dry goods. Sift the flour, cocoa powder, and salt right into the wet mixture. Switch to a spatula here. Gently fold the ingredients together just until the white streaks of flour disappear. Don’t overmix! If you work the batter too hard, your brownies will be tough rather than fudgy.
5. Bake. Pour the batter into your prepared pan and smooth the top. Bake for 25–30 minutes. You’ll know they are done when a toothpick inserted into the center comes out with a few moist crumbs attached (not wet batter).
6. The hardest part: Waiting. Let the brownies cool completely in the pan. I know, it’s torture, but if you put the cream topping on warm brownies, it will melt into a sad puddle. I usually pop the pan in the fridge after 30 minutes to speed this up.
Part 2: The Tiramisu Topping
7. Whip the cream. In a medium bowl, beat the heavy cream until stiff peaks form. Set this aside for a moment.
8. Cream the cheese. In a larger bowl, beat the room-temperature mascarpone, powdered sugar, and vanilla until smooth and creamy. It should only take a minute.
9. Lighten the mixture. Gently fold the whipped cream into the mascarpone mixture. Use a light hand here—you want to keep all that air you just whipped into the cream so the topping stays fluffy.
Part 3: Assembly
10. Spread and dust. Once the brownies are stone-cold, lift them out of the pan using the parchment handles. Spread the mascarpone cream over the top in an even layer. Finally, use your sieve to dust a generous layer of cocoa powder over the entire surface.
11. Slice. Cut into 9 large squares or 16 smaller bites.
Serving Ideas & Variations
- The “Adult” Version: If you want to mimic the booze in real Tiramisu, add 1 tablespoon of Marsala wine or coffee liqueur (like Kahlúa) to the brownie batter along with the eggs.
- Extra Crunch: Sometimes I chop up a few ladyfinger cookies and fold them into the brownie batter before baking for a surprise texture.
- Serving: Serve these with a hot shot of espresso or a cold glass of milk. The bitterness of the coffee cuts right through the richness of the cream.
Storage & Make-Ahead
- Fridge is King: Because of the mascarpone and cream, these must be stored in the refrigerator.
- Storage: Keep them in an airtight container for up to 4 days.
- Freezing: I don’t recommend freezing these once assembled. The texture of the mascarpone cream tends to get weird and grainy when thawed. You can, however, freeze the baked brownie base for up to 3 months, then thaw and top it when you’re ready.
Pro Tips & Mistakes to Avoid (My Secrets to You)
The “Clean Cut” Trick: You know how brownies can get messy when you cut them? Run your knife under hot water, dry it off, and then make a cut. Wipe the knife clean between every single cut. It takes time, but you get those perfect, sharp bakery-style edges.
Lumpy Frosting: I mentioned this before, but I’ll say it again because I’ve messed this up: If your mascarpone is cold, it will not mix with the sugar properly. You’ll end up with tiny cheese lumps. If you forgot to take it out of the fridge, microwave it for 10 seconds (no more!) to soften it.
Don’t Overbake: Tiramisu is supposed to be luscious. It is better to underbake the brownie base slightly than to overbake it. You want a fudgy foundation, not a cakey one.
The Logistics
- Yield: 9 to 16 brownies
- Prep Time: 20 minutes
- Cook Time: 30 minutes
- Total Time: 50 minutes (plus cooling time)
- Calories: Approx. 320 kcal per serving
There you have it! I really hope you give these Tiramisu Brownies a shot. It’s one of those recipes that looks intimidating but is actually incredibly forgiving. If you make them, I’d love to hear how they turned out—especially if you decided to add the booze!

Tiramisu Brownies
4
servings20
minutes30
minutes320
kcalEssentially, we are ditching the traditional, sometimes soggy ladyfingers found in classic Tiramisu and replacing them with a rich, espresso-infused chocolate brownie base. Once that base is baked and cooled, we top it with a thick, billowy layer of sweetened mascarpone cream and finish it with a generous dusting of cocoa powder.
Ingredients
For the Espresso Brownie Base
Unsalted Butter: 1/2 cup (115g) – Melted and slightly cooled.
Granulated Sugar: 1 cup (200g) – For that classic crinkly top.
Eggs: 2 large – Room temperature helps them mix better.
Vanilla Extract: 1 teaspoon.
All-Purpose Flour: 1/2 cup (65g) – We use less flour to keep them fudgy.
Cocoa Powder (Unsweetened): 1/2 cup (45g) – Dutch-processed gives a darker color, but regular works fine.
Instant Espresso Powder: 1 tablespoon – This is the secret weapon. Dissolve it in the melted butter for best results.
Salt: 1/4 teaspoon – To balance the sweet.
For the Mascarpone Cream Topping
Mascarpone Cheese: 8 oz (225g) – Crucial: Let this come to room temperature so it blends smoothly. Cold mascarpone equals lumpy frosting.
Heavy Whipping Cream: 1/2 cup (120ml) – Cold, straight from the fridge.
Powdered Sugar: 1/2 cup (60g).
Vanilla Extract: 1/2 teaspoon.
Directions
- Part 1: The Brownie Base
- Prep your station. Preheat your oven to 350°F (175°C). Grease your pan and line it with parchment paper, leaving an overhang on two sides. I like to use binder clips to hold the paper in place so it doesn't flop into the batter (just remember to remove them before baking!).
- Melt and mix. In a large bowl, combine your melted butter and the instant espresso powder. Whisk them until the powder dissolves—I love the smell that hits you right here; it smells like a busy coffee shop. Stir in the sugar until combined.
- Add the binders. Whisk in the eggs and vanilla extract. You want to whisk this vigorously for about a minute. Tip: This incorporates air and helps create that shiny, crackly crust we all love on brownies.
- Fold in the dry goods. Sift the flour, cocoa powder, and salt right into the wet mixture. Switch to a spatula here. Gently fold the ingredients together just until the white streaks of flour disappear. Don't overmix! If you work the batter too hard, your brownies will be tough rather than fudgy.
- Bake. Pour the batter into your prepared pan and smooth the top. Bake for 25–30 minutes. You’ll know they are done when a toothpick inserted into the center comes out with a few moist crumbs attached (not wet batter).
- The hardest part: Waiting. Let the brownies cool completely in the pan. I know, it’s torture, but if you put the cream topping on warm brownies, it will melt into a sad puddle. I usually pop the pan in the fridge after 30 minutes to speed this up.
- Part 2: The Tiramisu Topping
- Whip the cream. In a medium bowl, beat the heavy cream until stiff peaks form. Set this aside for a moment.
- Cream the cheese. In a larger bowl, beat the room-temperature mascarpone, powdered sugar, and vanilla until smooth and creamy. It should only take a minute.
- Lighten the mixture. Gently fold the whipped cream into the mascarpone mixture. Use a light hand here—you want to keep all that air you just whipped into the cream so the topping stays fluffy.
- Part 3: Assembly
- 10. Spread and dust. Once the brownies are stone-cold, lift them out of the pan using the parchment handles. Spread the mascarpone cream over the top in an even layer. Finally, use your sieve to dust a generous layer of cocoa powder over the entire surface.
- 11. Slice. Cut into 9 large squares or 16 smaller bites.
Notes
- The "Clean Cut" Trick: You know how brownies can get messy when you cut them? Run your knife under hot water, dry it off, and then make a cut. Wipe the knife clean between every single cut. It takes time, but you get those perfect, sharp bakery-style edges.
Lumpy Frosting: I mentioned this before, but I'll say it again because I’ve messed this up: If your mascarpone is cold, it will not mix with the sugar properly. You'll end up with tiny cheese lumps. If you forgot to take it out of the fridge, microwave it for 10 seconds (no more!) to soften it.
Don't Overbake: Tiramisu is supposed to be luscious. It is better to underbake the brownie base slightly than to overbake it. You want a fudgy foundation, not a cakey one.