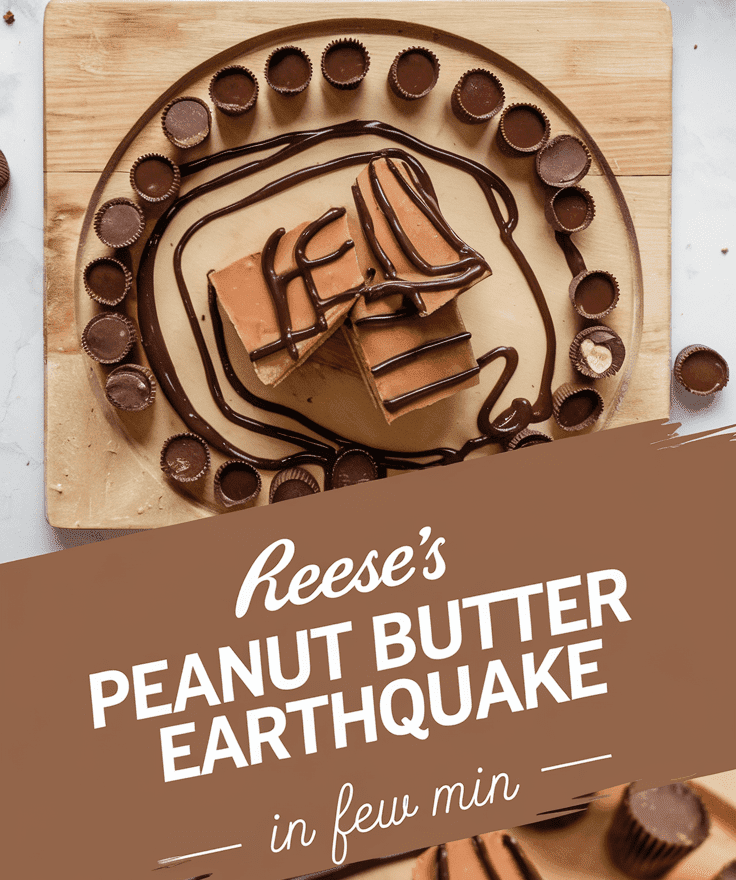
There are desserts that make you smile, and then there’s this Reese’s Peanut Butter Earthquake. I’ll be honest—this is one of those recipes I make when I want something outrageous, gooey, and guaranteed to impress everyone at the table. It’s a total showstopper, yet somehow easy enough for a lazy weekend bake. I’ve made it for parties, potlucks, and even just random Tuesday cravings, and every single time someone asks, “What is this magic?”
What Is Reese’s Peanut Butter Earthquake?
This dessert is so much more than just the usual piece of peanut butter. It’s something gorgeous inside out because of the collaborative flavors of the rich chocolate cake base, the creamy peanut butter layer, and loads of Reese’s cups inside the batter, causing scrumptious candy pockets. Each bite is exceptional. Some bites can give you chocolate, while others are all about the peanut butter, and some are full of pudding-like insanity. And the beauty of it is how perfectly imperfect it is.
Why This Recipe Is Special
This dessert is so much more than just the usual piece of peanut butter. It’s something gorgeous inside out because of the collaborative flavors of the rich chocolate cake base, the creamy peanut butter layer, and loads of Reese’s cups inside the batter causing scrumptious candy pockets. Each bite is exceptional. Some bites can give you chocolate, while others are all about the peanut butter, and some are full of pudding-like insanity. And the beauty of it is how perfectly imperfect it is.
Why You’ll Love This Recipe
- Flavor Explosion: Deep chocolate, creamy peanut butter, melty candy—what’s not to love?
- Low Effort, Big Reward: You’ll look like you spent hours in the kitchen, but it’s surprisingly simple.
- Crowd Favorite: Perfect for birthdays, holidays, or whenever you want to wow a crowd.
- One Bowl Wonder: Fewer dishes, more dessert.
- No Decorating Needed: The “earthquake” look is built right in—cracks, swirls, and all.
Tools You’ll Need
Let’s keep it simple. You probably have most of these already:
- 9×13-inch (33×23 cm) baking dish – The perfect size for those gooey layers to bake evenly.
- Mixing bowls (2-3) – One for the cake batter, one for the filling, and maybe one for melting butter.
- Electric mixer or whisk – Helps blend the peanut butter filling until smooth.
- Rubber spatula – For scraping every delicious bit of batter.
- Measuring cups and spoons – Precision matters here, especially for the peanut butter and cream cheese.
- Cooling rack – Optional, but helps the cake cool evenly (if you can wait that long).
Ingredients
Here’s what you’ll need to make this masterpiece:
For the Chocolate Cake Layer
- 1 box (15.25 oz / 432 g) chocolate fudge cake mix
- 1 cup (240 ml) milk
- ½ cup (115 g) unsalted butter, melted
- 2 large eggs
For the Peanut Butter Cream Cheese Layer
- 8 oz (226 g) cream cheese, softened
- ½ cup (125 g) creamy peanut butter
- 2 cups (240 g) powdered sugar
- ¼ cup (57 g) unsalted butter, softened
Mix-ins and Toppings
- 1 cup (175 g) Reese’s peanut butter cups, chopped
- ½ cup (90 g) chocolate chips
- Optional: a drizzle of melted peanut butter or hot fudge for topping after baking
Step-by-Step Instructions
1. Preheat and Prep
Preheat your oven to 350°F (175°C). Lightly grease your 9×13-inch baking dish or line it with parchment paper. I like to use butter for greasing—it adds a hint of flavor.
2. Make the Cake Base
In a large bowl, mix together the chocolate cake mix, milk, melted butter, and eggs. Stir until smooth, but don’t overmix—just combine until no dry streaks remain. It should look thick and glossy.
Pour this batter into your baking dish and spread it evenly. This is your foundation—the deep, fudgy base that’s going to hold everything together.
3. Create the Peanut Butter Layer
In another bowl, beat the cream cheese, peanut butter, butter, and powdered sugar until smooth and fluffy. This step smells incredible—like peanut butter frosting heaven.
Spoon dollops of this mixture over the cake batter. Don’t worry about making it even; those uneven swirls are what create the “earthquake” effect.
4. Add the Candy Chaos
Sprinkle the chopped Reese’s cups and chocolate chips over the top. I always add a few extra peanut butter cups—it’s impossible to overdo it here.
5. Bake to Perfection
Bake for 40–45 minutes, until the edges are set but the center still jiggles slightly. It’ll puff up, crack, and look a little wild—that’s exactly what you want. The top should be golden in spots, with pockets of melted peanut butter and chocolate.
6. Cool (If You Can Wait)
Let the cake cool for about 20–30 minutes before slicing. It’s rich and molten when warm, but it firms up beautifully once it cools. You can serve it warm with a scoop of vanilla ice cream or chill it for a firmer, fudgier texture.
Serving Ideas
- Serve warm with a dollop of vanilla or chocolate ice cream.
- Add a drizzle of hot fudge, caramel sauce, or melted peanut butter.
- Finish prettily by dusting with powdered sugar.
- Make it a party dessert bar-cut into squares and top each with a mini Reese’s
Variations and Customizations
- Nut-Free: Use a nut-free chocolate spread like sunflower butter instead of peanut butter.
- Add crushed pretzels or chopped peanuts for extra crunch.
- Double chocolate: Just stir in a few spoonfuls of cocoa powder to the cake mix before baking for a more luxurious bake.
- Mini Version: Make them in cupcake tins for little portions: bake for 20-25 minutes.
Storage and Make-Ahead Tips
- Room temp: up to 2 days tightly covered. Refrigerator: 5 days maximum. Chill for a firmer texture.
- Freezer: Slice and wrap individually. Keep up to 2 months in the freezer.
- Thaw overnight in the refrigerator or microwave for 15-20 seconds.
- Bonus to make ahead: You can layer together one day ahead, cover tightly, and refrigerate before baking. Add 5-10 minutes to bake time to account for the cool custard.
Pro Tips and Mistakes to Avoid
- Don’t overmix the cake batter. It should be thick, not runny.
- Softened cream cheese is a must. Cold cream cheese will give you lumps instead of creamy swirls.
- Watch the bake time. Every oven is different; start checking at 40 minutes.
- Let it rest. Cutting too soon can make it fall apart (I know it’s hard to wait).
- Go wild with toppings. This cake thrives on creativity—Reese’s Pieces, peanut butter chips, or even crushed Oreos all work.
Recipe Summary
- Yield: 12–15 servings
- Prep Time: 15 minutes
- Cook Time: 45 minutes
- Total Time: 1 hour
- Calories: ~420 per serving (depending on toppings)
Final Thoughts
If you please, the look of this truly eye-popping, earth-shaking dessert prises us right out of our chairs. Reese’s Peanut Butter Earthquake is gooey, fancy, and stupidly satisfying. It lies just defiled enough to be thought of with love. The moment you’ll slice through to split it open, just at that vision, the few fouled-up swirls shall confirm it.

Reese’s Peanut Butter Earthquake
4
servings15
minutes45
minutes420
kcalThis dessert is so much more than just the usual piece of peanut butter. It's something gorgeous inside out because of the collaborative flavors of the rich chocolate cake base, the creamy peanut butter layer, and loads of Reese's cups inside the batter, causing scrumptious candy pockets. Each bite is exceptional. Some bites can give you chocolate, while others are all about the peanut butter, and some are full of pudding-like insanity. And the beauty of it is how perfectly imperfect it is.
Ingredients
For the Chocolate Cake Layer
1 box (15.25 oz / 432 g) chocolate fudge cake mix
1 cup (240 ml) milk
½ cup (115 g) unsalted butter, melted
2 large eggs
For the Peanut Butter Cream Cheese Layer
8 oz (226 g) cream cheese, softened
½ cup (125 g) creamy peanut butter
2 cups (240 g) powdered sugar
¼ cup (57 g) unsalted butter, softened
Mix-ins and Toppings
1 cup (175 g) Reese’s peanut butter cups, chopped
½ cup (90 g) chocolate chips
Optional: a drizzle of melted peanut butter or hot fudge for topping after baking
Directions
- Preheat and Prep
- Preheat your oven to 350°F (175°C). Lightly grease your 9x13-inch baking dish or line it with parchment paper. I like to use butter for greasing—it adds a hint of flavor.
- Make the Cake Base
- In a large bowl, mix together the chocolate cake mix, milk, melted butter, and eggs. Stir until smooth, but don’t overmix—just combine until no dry streaks remain. It should look thick and glossy.
- Pour this batter into your baking dish and spread it evenly. This is your foundation—the deep, fudgy base that’s going to hold everything together.
- Create the Peanut Butter Layer
- In another bowl, beat the cream cheese, peanut butter, butter, and powdered sugar until smooth and fluffy. This step smells incredible—like peanut butter frosting heaven.
- Spoon dollops of this mixture over the cake batter. Don’t worry about making it even; those uneven swirls are what create the “earthquake” effect.
- Add the Candy Chaos
- Sprinkle the chopped Reese’s cups and chocolate chips over the top. I always add a few extra peanut butter cups—it’s impossible to overdo it here.
- Bake to Perfection
- Bake for 40–45 minutes, until the edges are set but the center still jiggles slightly. It’ll puff up, crack, and look a little wild—that’s exactly what you want. The top should be golden in spots, with pockets of melted peanut butter and chocolate.
- Cool (If You Can Wait)
- Let the cake cool for about 20–30 minutes before slicing. It’s rich and molten when warm, but it firms up beautifully once it cools. You can serve it warm with a scoop of vanilla ice cream or chill it for a firmer, fudgier texture.