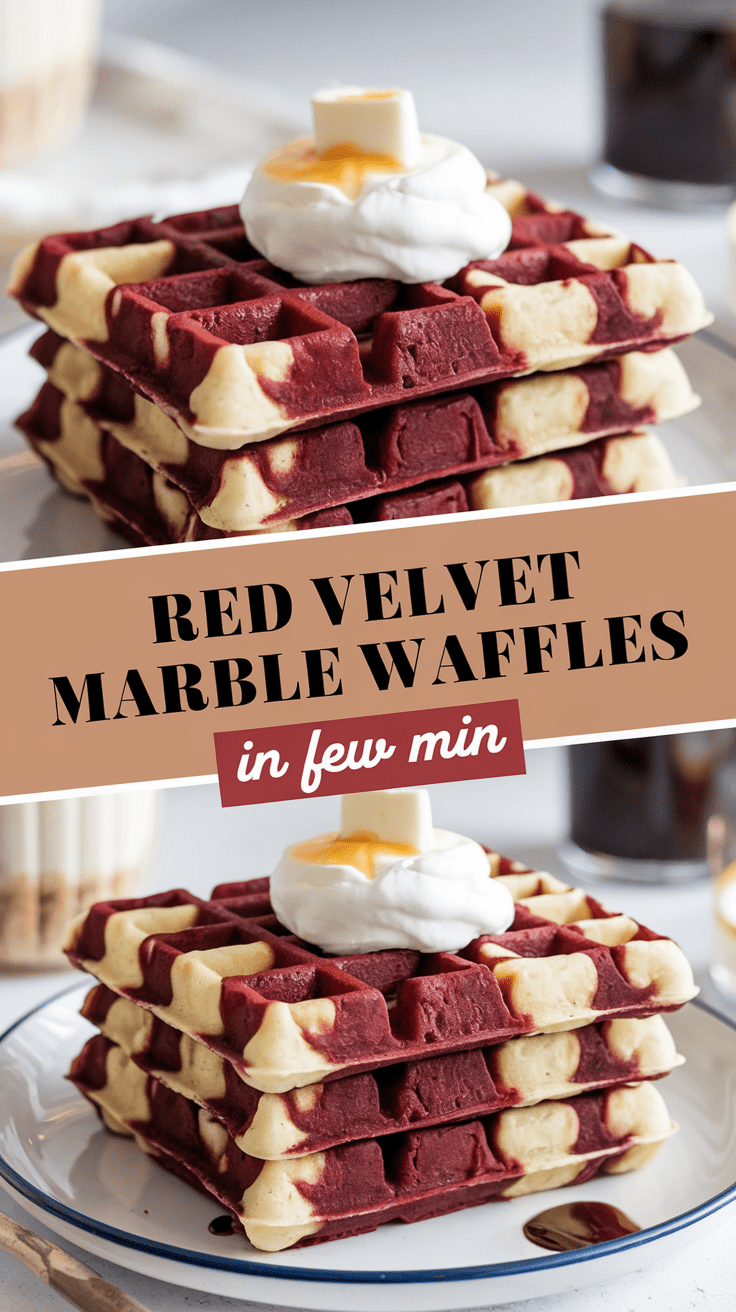
I’ve got to be honest with you—these Red Velvet Marble Waffles might just be the prettiest breakfast I’ve ever made, and I’m not usually someone who chooses food based on looks. But these? They’re a whole moment. They balance rich, cocoa-kissed red velvet with light and fluffy vanilla batter, and every waffle comes out with a marbled pattern that feels like you painted it on purpose… even though the batter basically does all the work for you.
At their core, these waffles are just a fun, cozy twist on classic red velvet cake, but the marbling adds this playful bakery-style vibe. I love recipes that look impressive but secretly take almost no extra effort, and this one nails that sweet spot. You get color, flavor, texture, and a little drama—without doing backflips in the kitchen.
And honestly? If you’re someone who likes serving food that makes people go “oh WOW,” this is your recipe.
What Are Red Velvet Marble Waffles?
Think of them as classic buttermilk waffles, but half the batter is turned into red velvet with a little cocoa and red coloring. You swirl the two together right in the waffle iron, and suddenly you’ve created a stack of waffles that look like they belong in a boutique brunch café. They’re soft inside, crisp outside, and lightly sweet with that signature red velvet tang.
Why These Waffles Are Special
You get the fun swirl of two flavors, the visual pop of bold red marbling, and the comfort of warm waffles fresh off the iron. They’re perfect for slow mornings, Valentine’s Day breakfasts, anniversaries, or honestly just because you woke up craving something cute.
Why You’ll Love This Recipe
- Beautiful marbled look with almost zero effort
- Classic red velvet flavor without being overly sweet
- Light, tender texture that still crisps around the edges
- Easy ingredients you probably already have
- Kid-friendly, brunch-friendly, date-friendly—basically universal
- Customizable with toppings, mix-ins, and flavor twists
Tools You’ll Need
- Waffle maker: Any style works, but a Belgian iron gives you deep pockets for the syrup.
- Mixing bowls (2–3): You’ll need one for the main batter and one for the red velvet portion.
- Whisk: To mix your wet and dry ingredients smoothly.
- Measuring cups and spoons or a scale: I like using a scale for precision, but either works.
- Rubber spatula: Helps fold the batter gently without overmixing.
- Small spoon: For dolloping marbled swirls into the waffle iron.
Ingredients (US & Metric)
Dry Ingredients
- 2 cups (240g) all-purpose flour
- 2 tablespoons (25g) granulated sugar
- 1 tablespoon (8g) cocoa powder
- 1 tablespoon (15g) baking powder
- 1/2 teaspoon (3g) salt
Wet Ingredients
- 2 large eggs
- 1 3/4 cups (420ml) buttermilk
- 1/3 cup (75g) melted butter or neutral oil
- 1 teaspoon (5ml) vanilla extract
- 1–2 teaspoons (5–10ml) red food coloring
For Serving (optional but amazing)
- Cream cheese glaze
- Powdered sugar
- Fresh berries
- Whipped cream
- Warm maple syrup
How to Make Red Velvet Marble Waffles
1. Preheat your waffle iron
Get it nice and hot—this gives you that golden exterior. Most irons have an indicator light, so just let it do its thing.
2. Whisk your dry ingredients
In a large bowl, whisk the flour, sugar, cocoa powder, baking powder, and salt. This keeps clumps from forming later.
3. Mix the wet ingredients
In another bowl, whisk the eggs, buttermilk, melted butter, and vanilla until smooth.
4. Combine wet and dry
Pour the wet mixture into the dry. Gently mix with a whisk or spatula until just combined. A few small lumps are fine—overmixing leads to tough waffles.
5. Create the red velvet portion
Scoop about 1 cup (around 240ml) of batter into a separate bowl. Add the red food coloring and stir gently until it’s fully blended.
6. Marble the batter
Here’s the fun part. Once the waffle maker is ready, scoop some regular batter onto the iron, then drop spoonfuls of red velvet batter on top. Use a toothpick or the spoon tip to swirl lightly. Don’t overdo it or the colors will blend.
7. Cook your waffles
Close the waffle maker and cook according to its instructions—usually 3–5 minutes. You’ll smell them when they’re almost done. They should lift easily when ready.
8. Repeat
Keep swirling and cooking until all the batter is used. If the waffles need to stay crisp, hold them in a warm oven (200°F / 95°C).
Serving Ideas
- Drizzle warm cream cheese glaze on top
- Add chocolate chips or white chocolate drizzle
- Serve with fresh berries to brighten things up
- Add a scoop of vanilla ice cream if you want dessert-for-breakfast energy
- Top with whipped cream and chocolate shavings for a café look
Variations & Customizations
- Pink Velvet: Use less cocoa and less red coloring.
- Chocolate Swirl: Add more cocoa to the red batter for a deeper chocolate note.
- Funfetti: Sprinkle rainbow sprinkles into the vanilla batter.
- Mocha Twist: Add 1 teaspoon espresso powder to the red velvet batter.
- Almond or orange extract: Adds a lovely aromatic twist.
Storage & Make-Ahead
- Fridge: Store leftovers in an airtight container for up to 3 days.
- Freezer: Freeze waffles in a single layer, then store in bags for up to 2 months.
- Reheat: Toast in a toaster or warm in a 350°F (175°C) oven for 5–7 minutes.
Pro Tips (and Mistakes to Avoid)
- Don’t overmix the batter—you’ll lose that fluffy texture.
- Add the food coloring gradually so you control how vibrant the red becomes.
- Grease the waffle iron lightly if yours tends to stick.
- Don’t swirl too aggressively; gentle motions give the prettiest marble.
- If your waffles come out pale, your iron may not be hot enough—give it time to reheat between batches.
Recipe Summary
- Yield: 6–8 waffles
- Prep time: 10 minutes
- Cook time: 15 minutes
- Total time: 25 minutes
Nutrition (per waffle, approx.)
- Calories: ~290
- Fat: 12g
- Carbs: 36g
- Protein: 6g
Final Thoughts
If you try these Red Velvet Marble Waffles, I’d genuinely love to hear how they turned out for you. They’re one of those recipes that feel like a treat but are totally doable on a normal morning. Snap a picture, share it, or just drop a comment about how your marbling skills turned out—I’m cheering for you already.

Red Velvet Marble Waffles
4
servings10
minutes15
minutes290
kcalAt their core, these waffles are just a fun, cozy twist on classic red velvet cake, but the marbling adds this playful bakery-style vibe. I love recipes that look impressive but secretly take almost no extra effort, and this one nails that sweet spot. You get color, flavor, texture, and a little drama—without doing backflips in the kitchen.
Ingredients
Dry Ingredients
2 cups (240g) all-purpose flour
2 tablespoons (25g) granulated sugar
1 tablespoon (8g) cocoa powder
1 tablespoon (15g) baking powder
1/2 teaspoon (3g) salt
Wet Ingredients
2 large eggs
1 3/4 cups (420ml) buttermilk
1/3 cup (75g) melted butter or neutral oil
1 teaspoon (5ml) vanilla extract
1–2 teaspoons (5–10ml) red food coloring
For Serving (optional but amazing)
Cream cheese glaze
Powdered sugar
Fresh berries
Whipped cream
Warm maple syrup
Directions
- Preheat your waffle iron
- Get it nice and hot—this gives you that golden exterior. Most irons have an indicator light, so just let it do its thing.
- Whisk your dry ingredients
- In a large bowl, whisk the flour, sugar, cocoa powder, baking powder, and salt. This keeps clumps from forming later.
- Mix the wet ingredients
- In another bowl, whisk the eggs, buttermilk, melted butter, and vanilla until smooth.
- Combine wet and dry
- Pour the wet mixture into the dry. Gently mix with a whisk or spatula until just combined. A few small lumps are fine—overmixing leads to tough waffles.
- Create the red velvet portion
- Scoop about 1 cup (around 240ml) of batter into a separate bowl. Add the red food coloring and stir gently until it’s fully blended.
- Marble the batter
- Here’s the fun part. Once the waffle maker is ready, scoop some regular batter onto the iron, then drop spoonfuls of red velvet batter on top. Use a toothpick or the spoon tip to swirl lightly. Don’t overdo it or the colors will blend.
- Cook your waffles
- Close the waffle maker and cook according to its instructions—usually 3–5 minutes. You’ll smell them when they’re almost done. They should lift easily when ready.
- Repeat
- Keep swirling and cooking until all the batter is used. If the waffles need to stay crisp, hold them in a warm oven (200°F / 95°C).
Notes
- Don’t overmix the batter—you’ll lose that fluffy texture.
Add the food coloring gradually so you control how vibrant the red becomes.
Grease the waffle iron lightly if yours tends to stick.
Don’t swirl too aggressively; gentle motions give the prettiest marble.
If your waffles come out pale, your iron may not be hot enough—give it time to reheat between batches.