A Little Introduction (and My Honest Take)
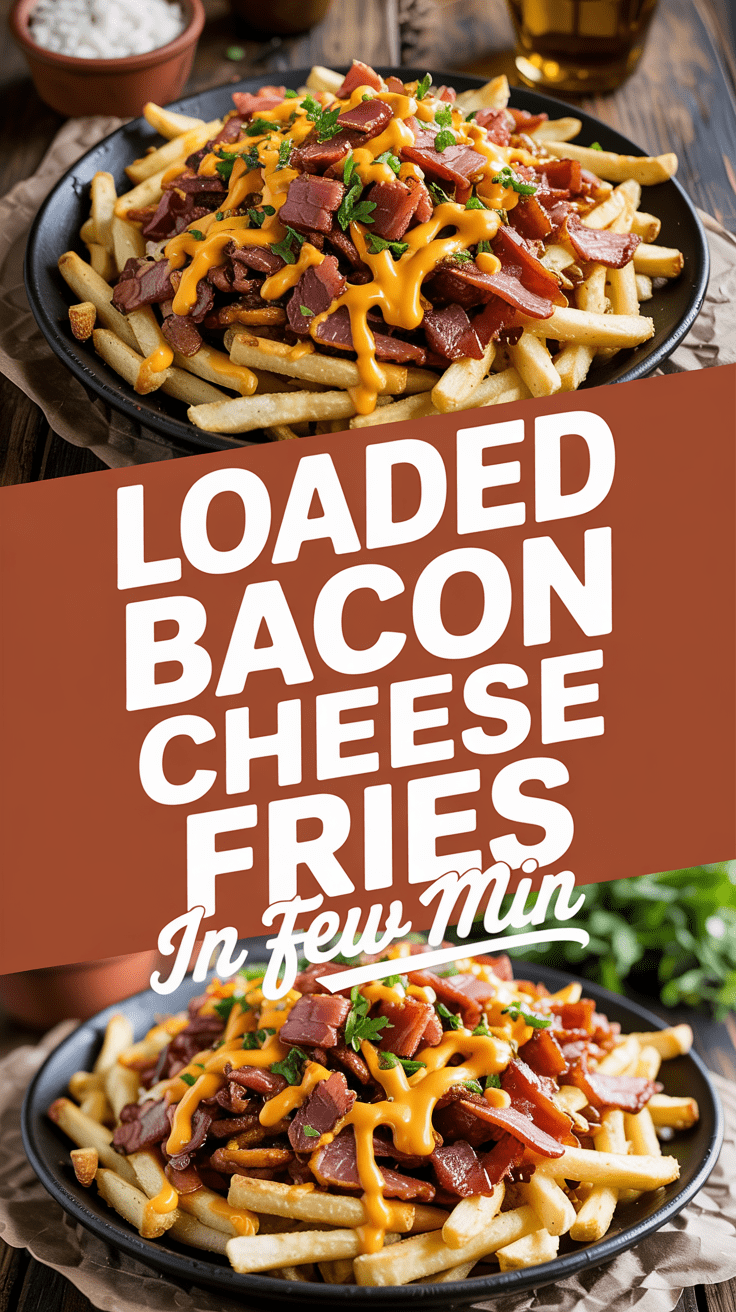
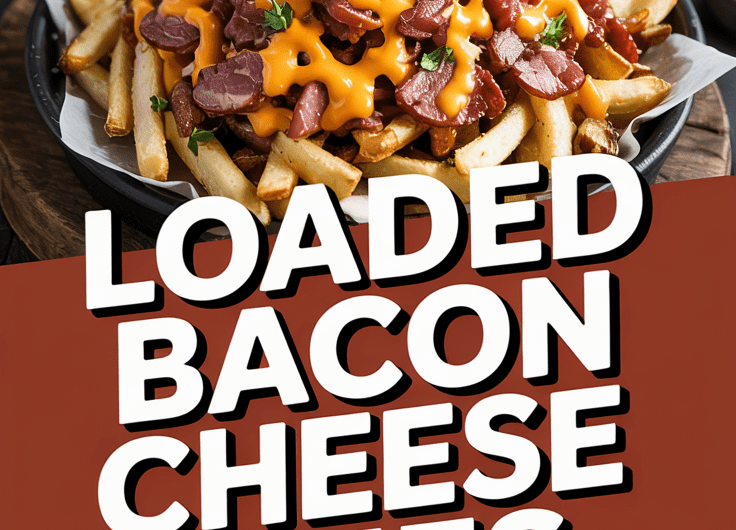
I’ll be real with you — these Loaded Bacon Cheese Fries are not a “light lunch” or a “wholesome salad moment.” Nope. These are unapologetically cheesy, crispy, smoky, and downright addictive. I make them when I need comfort food that doesn’t pretend to be anything other than what it is: golden fries buried under melty cheese, crisp bacon, and a drizzle of creamy ranch or sour cream. Every bite feels like the food version of a happy sigh.
What This Recipe Is All About
This recipe is the ultimate snack-meets-meal situation. You start with crispy fries (baked or fried — your call), layer them with freshly cooked bacon and gooey cheese, and bake until everything fuses into bubbly perfection. It’s the kind of dish that’s made for sharing but almost impossible to actually share.
It’s perfect for game nights, movie marathons, late-night cravings, or whenever you want to impress someone with something outrageously good yet incredibly simple.
Why This Recipe Is Special
What makes these bacon cheese fries stand out is the balance — the salty crunch of bacon, the rich creaminess of cheese, the crisp texture of fries, and that cooling touch from sour cream or ranch on top. You get layers of texture and flavor in every forkful. Plus, everything comes together in under 30 minutes, using just one pan and a handful of familiar ingredients.
Why You’ll Love This Recipe
You’re going to fall hard for this one — and here’s why:
- Ridiculously flavorful: Every bite hits you with bacon’s smoky saltiness, melty cheese, and crisp fries.
- Easy to make: You don’t need fancy tools or chef skills. Just basic ingredients and an oven.
- Crowd-pleaser: Whether it’s family night or game day, these fries vanish fast.
- Customizable: Swap toppings, add sauces, go wild. It’s your canvas of comfort food.
- Fast & fuss-free: 25 minutes from craving to devouring.
Tools You’ll Need
I’ll walk you through this with simple tools — nothing fancy, just kitchen basics:
- Baking sheet or oven-safe skillet – To bake and assemble your fries. A cast iron pan gives extra crispiness.
- Parchment paper or foil – For easy cleanup and no sticking.
- Tongs or spatula – To toss and flip fries evenly.
- Cheese grater – Because freshly grated cheese melts so much better than pre-shredded.
- Knife and cutting board – For chopping bacon and green onions.
- Small bowl – To mix or drizzle your toppings like ranch or sour cream.
Ingredients (US & Metric)
For the Fries:
- 1 lb (450 g) frozen French fries (or homemade if you’re feeling ambitious)
- 1 tbsp (15 ml) olive oil
- Salt and black pepper, to taste
For the Toppings:
- 6 slices bacon (about 150 g), chopped and cooked until crisp
- 1 ½ cups (170 g) shredded cheddar cheese (or a mix of cheddar and mozzarella)
- ¼ cup (60 ml) sour cream or ranch dressing, for drizzling
- 2 green onions (scallions), sliced
- Optional: 1 tbsp (15 g) jalapeños, diced for heat
- Optional: ½ tsp (2 g) smoked paprika for extra flavor
Step-by-Step Instructions
1. Cook the Fries
Preheat your oven to 425°F (220°C).
Spread the fries out in a single layer on your baking sheet. Drizzle with olive oil, sprinkle a little salt and pepper, and toss them gently.
Bake for 20–25 minutes, flipping halfway through until they’re golden and crisp.
(If you’re air frying, go for 400°F/200°C for 15–18 minutes.)
Tip: The crispier your fries, the better they’ll hold up under all that cheesy goodness.
2. Cook the Bacon
While your fries are baking, cook the chopped bacon in a skillet over medium heat until crispy.
Drain on paper towels. Try not to eat all the bacon pieces — I know, it’s hard.
3. Melt the Magic (Assemble & Bake)
Once your fries are done, sprinkle half the cheese over them, scatter the bacon pieces, then top with the remaining cheese.
Pop everything back into the oven for 5–7 minutes, just until the cheese is melted, bubbly, and heavenly.
4. Add Toppings
Remove from the oven and let it cool for just a minute (trust me, molten cheese burns are no joke).
Drizzle your sour cream or ranch over the top, sprinkle green onions, and if you’re feeling spicy, add jalapeños or a dusting of smoked paprika.
5. Serve and Enjoy
Grab a fork (or just dive in). These fries are best eaten hot and fresh — that glorious mix of textures won’t last forever!
Serving Ideas
- Appetizer platter: Serve with sliders or wings for a game day feast.
- Late-night snack: Perfect with a cold soda or chilled beer.
- Brunch twist: Add a fried egg on top — seriously, try it once.
- Loaded version: Throw on pulled chicken, chili, or BBQ sauce for a meal-sized upgrade.
Variations & Customizations
- Cheese swaps: Try Monterey Jack, mozzarella, or even pepper jack for extra zing.
- Meat lovers: Add cooked sausage, ground beef, or shredded BBQ chicken.
- Veggie style: Skip the bacon and add roasted peppers, onions, and corn.
- Sauce lovers: Ranch, chipotle mayo, garlic aioli — go wild!
Storage & Make-Ahead Tips
- Storage: Keep leftovers in an airtight container in the fridge for up to 2 days.
- Reheating: Bake at 400°F (200°C) for 8–10 minutes to crisp them up again. (Avoid microwaving — it makes fries soggy!)
- Make-ahead: You can cook the bacon and grate the cheese in advance. When you’re ready to serve, just assemble and bake.
Pro Tips & Mistakes to Avoid
Secrets I’ve Learned (a.k.a. Don’t Skip These!):
- Use freshly grated cheese. It melts smoother because it doesn’t have that anti-caking coating.
- Don’t overcrowd your fries. They need space to crisp, not steam.
- Layer smartly. Cheese-bacon-cheese — it helps everything melt evenly and stick together.
- Serve immediately. These fries lose their magic fast once cooled.
- Try smoked bacon. It adds an extra depth of flavor that’s chef’s kiss good.
Common Mistakes:
- Using soggy fries (always bake or fry them crisp).
- Overbaking after adding cheese (it can turn oily).
- Forgetting seasoning — a pinch of salt on each layer matters!
Recipe Notes
- Yield: About 3–4 servings
- Prep Time: 10 minutes
- Cook Time: 20 minutes
- Total Time: 30 minutes
Per Serving (approximate):
Calories: 480 | Protein: 16g | Carbs: 34g | Fat: 30g
Final Thoughts
If comfort food had a personality, Loaded Bacon Cheese Fries would be the friend who shows up with a big grin and says, “Let’s forget our worries and just eat.” I promise, once you make these, you’ll start finding excuses to make them again — parties, rainy days, Tuesdays… anything counts.
Loaded Bacon Cheese Fries
4
servings10
minutes20
minutes480
kcalThis recipe is the ultimate snack-meets-meal situation. You start with crispy fries (baked or fried — your call), layer them with freshly cooked bacon and gooey cheese, and bake until everything fuses into bubbly perfection. It’s the kind of dish that’s made for sharing but almost impossible to actually share.
Ingredients
For the Fries:
1 lb (450 g) frozen French fries (or homemade if you’re feeling ambitious)
1 tbsp (15 ml) olive oil
Salt and black pepper, to taste
For the Toppings:
6 slices bacon (about 150 g), chopped and cooked until crisp
1 ½ cups (170 g) shredded cheddar cheese (or a mix of cheddar and mozzarella)
¼ cup (60 ml) sour cream or ranch dressing, for drizzling
2 green onions (scallions), sliced
Optional: 1 tbsp (15 g) jalapeños, diced for heat
Optional: ½ tsp (2 g) smoked paprika for extra flavor
Directions
- Cook the Fries
- Preheat your oven to 425°F (220°C).
- Spread the fries out in a single layer on your baking sheet. Drizzle with olive oil, sprinkle a little salt and pepper, and toss them gently.
- Bake for 20–25 minutes, flipping halfway through until they’re golden and crisp.
- (If you’re air frying, go for 400°F/200°C for 15–18 minutes.)
- Tip: The crispier your fries, the better they’ll hold up under all that cheesy goodness.
- Cook the Bacon
- While your fries are baking, cook the chopped bacon in a skillet over medium heat until crispy.
- Drain on paper towels. Try not to eat all the bacon pieces — I know, it’s hard.
- Melt the Magic (Assemble & Bake)
- Once your fries are done, sprinkle half the cheese over them, scatter the bacon pieces, then top with the remaining cheese.
- Pop everything back into the oven for 5–7 minutes, just until the cheese is melted, bubbly, and heavenly.
- Add Toppings
- Remove from the oven and let it cool for just a minute (trust me, molten cheese burns are no joke).
- Drizzle your sour cream or ranch over the top, sprinkle green onions, and if you’re feeling spicy, add jalapeños or a dusting of smoked paprika.
- Serve and Enjoy
- Grab a fork (or just dive in). These fries are best eaten hot and fresh — that glorious mix of textures won’t last forever!
Notes
- Secrets I’ve Learned (a.k.a. Don’t Skip These!):
Use freshly grated cheese. It melts smoother because it doesn’t have that anti-caking coating.
Don’t overcrowd your fries. They need space to crisp, not steam.
Layer smartly. Cheese-bacon-cheese — it helps everything melt evenly and stick together.
Serve immediately. These fries lose their magic fast once cooled.
Try smoked bacon. It adds an extra depth of flavor that’s chef’s kiss good.
Common Mistakes:
Using soggy fries (always bake or fry them crisp).
Overbaking after adding cheese (it can turn oily).
Forgetting seasoning — a pinch of salt on each layer matters!