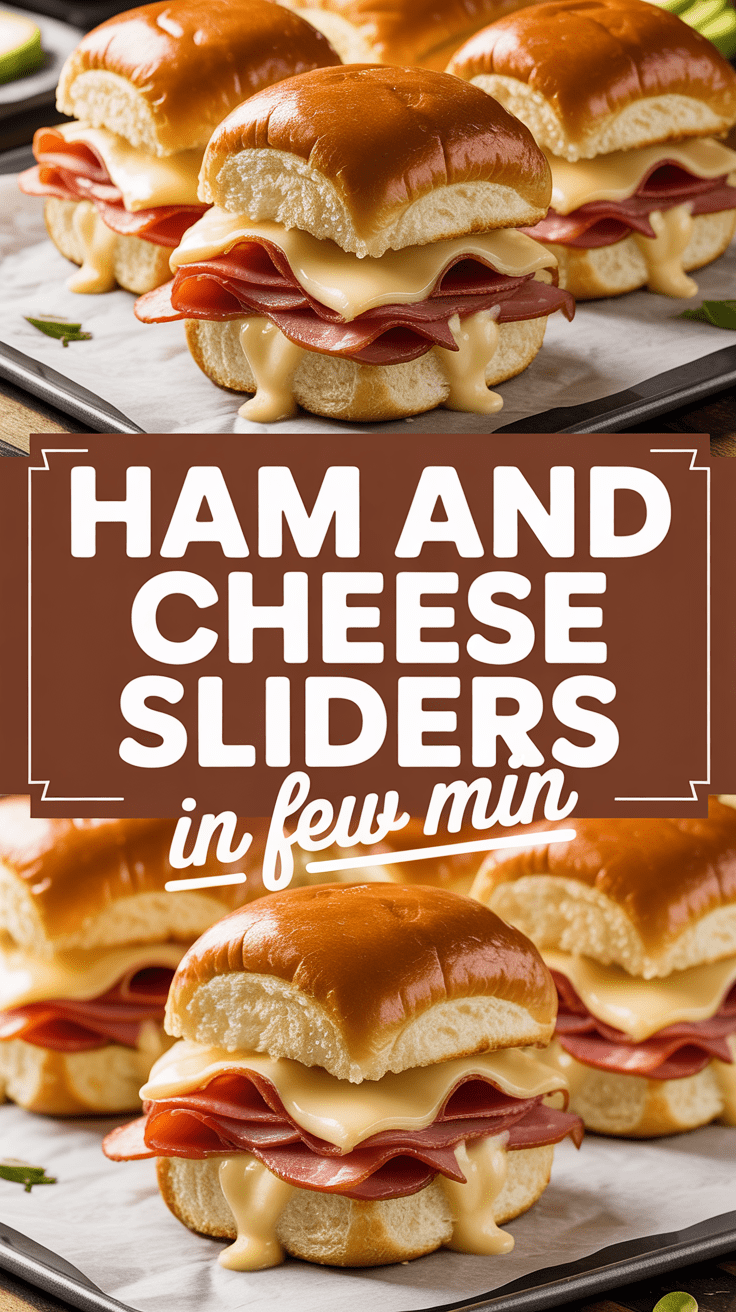
Ham and cheese sliders have a special magic, They do comfort food and every one of them hits the note. I have prepared these tiny sandwiches an immense number of times—game days, lazy Sundays, potlucks, even weeknight dinners when I am too tired to prepare something big. And every single time, they are gone before I can even put them on the table. They are warm, buttery, melty, and ridiculously satisfying beyond words.
What Are Ham and Cheese Sliders?
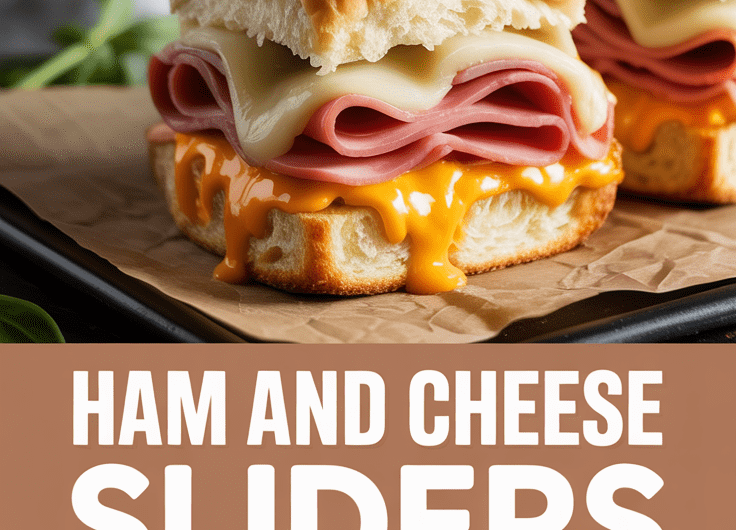
Ham and cheese sliders are small sandwiches (mini) consisting of soft rolls (mainly Hawaiian rolls), scrumptious ham, and melting cheese layered in between, and finally glazed with a buttery Dijon mix before baking. What do you get? An irresistible mix of snack and meal, a variety of different golden, pull-apart tray of gooey, savory perfection.
Why This Recipe Is Special
This recipe is the one I usually make—basic, certain not to fail, and the opportunity for endless variations. The butter-to-mustard ratio is properly dialed in so that it is flavorful without being overwhelming for the glaze. I often use a combination of Swiss and cheddar for that perfect creamy-sharp balance instead of one cheese only. You could easily scale it up to serve at parties or make a smaller batch for family dinner.
Why You’ll Love This Recipe
You’re going to love these sliders because they check all the boxes:
- Quick to make: 10 minutes of prep, 20 minutes of baking.
- Crowd-pleaser: Great for parties, potlucks, or tailgates—everyone loves them.
- Customizable: Swap meats, cheeses, or glazes to suit your taste.
- Make-ahead friendly: Perfect for prepping earlier in the day.
- Warm, buttery flavor: That sweet-and-savory glaze makes them unforgettable.
Tools You’ll Need
Here’s everything I grab before starting:
- Baking dish or sheet pan (9×13 in / 23×33 cm): Holds all the sliders snugly so they bake evenly.
- Serrated knife: For slicing the rolls without squishing them.
- Small saucepan: To melt the butter and mix the glaze.
- Basting brush or spoon: Helps you evenly spread the buttery topping.
- Aluminum foil: Keeps the sliders moist during baking.
- Spatula: For serving those cheesy, pull-apart squares cleanly.
Ingredients
For the Sliders:
- 12 Hawaiian sweet rolls (or any soft dinner rolls)
- 8 oz (225 g) sliced ham (deli-style or leftover baked ham)
- 6 oz (170 g) Swiss cheese, sliced (or cheddar, provolone, etc.)
For the Butter Glaze:
- ½ cup (115 g) unsalted butter, melted
- 1 ½ tablespoons Dijon mustard
- 1 tablespoon Worcestershire sauce
- 1 tablespoon brown sugar
- 1 teaspoon poppy seeds (optional but classic)
- ½ teaspoon onion powder
- Salt and pepper to taste
Optional Add-ons:
- Caramelized onions for a sweet kick
- Pickles or jalapeños for heat
- A sprinkle of fresh parsley for color
Step-by-Step Instructions
1. Preheat and Prepare
Set your oven to 350°F (175°C). Lightly grease your baking dish or line it with parchment paper for easy cleanup.
2. Slice the Rolls
With a serrated knife, cut the entire pack of rolls in half horizontally, keeping them attached as if it was a big sandwich sheet. Place the bottom half in your baking dish.
(Tip: Go slowly here. You want even halves so the cheese melts evenly.)
3. Layer the Ham and Cheese
Lay out the ham slices evenly on the rolls. Be generous—overlapping is actually welcomed. Then top with cheese slices. I prefer mixing Swiss for its creamy texture and cheddar for a sharper taste.
4. Add the Top Layer
The upper half of the rolls should be placed over the cheese while gently pressing down.
5. Make the Butter Glaze
On low heat, butter is to be melted in a small saucepan. Then, using a whisk, incorporate Dijon mustard, Worcestershire sauce, brown sugar, poppy seeds, onion powder, and a bit of salt and pepper. What an aroma! It is nothing but divine.
6. Brush and Soak
A basting brush can be used to apply the glaze to the tops of the rolls. Every part must be covered with a rich buttery coat—this is the point where the good comes out.
(If you have extra glaze, drizzle it around the edges so it soaks into the rolls.)
7. Bake Covered
Foil should be used to cover the dish, and it should be baked for 15 minutes. This will allow the cheese to melt even without turning brown at this time.
8. Bake Uncovered
Take off the foil and continue baking for another 5–7 minutes, until the tops are golden and slightly crunchy.
9. Cool Slightly and Serve
Get rid of the sandwiches after a few minutes of rest. Then, take your spatula and pull apart those sandwiches that are warm and cheesy.
Serving Ideas
These sliders are perfect for just about any occasion:
- Lunch with chips, coleslaw, or a simple salad on the side.
- Easy dinner with fries and a cold drink.
- Put them on a platter for party appetizers—they will be gone before you know it.
- Warm them up with some tomato soup on cold days.
Variations and Customizations
- Meat Swap: Turkey, roast beef, or pulled chicken instead of ham.
- Cheese Choices: Mozzarella, provolone, or pepper jack will work too.
- Glaze Upgrade: Honey or minced garlic for a classic enhancement.
- Breakfast Version: Go for bacon instead of ham and include scrambled eggs.
- Spicy Twist: Stir hot sauce into the glaze or sprinkle crushed red pepper on it.
Make-Ahead, Storage & Reheating
- Make-Ahead: Assemble the sliders up to 6 hours ahead, cover tightly, and refrigerate. Brush with glaze just before baking.
- Storage: Store leftovers in an airtight container in the fridge for up to 3 days.
- Reheat: Wrap in foil and bake at 325°F (160°C) for 10–12 minutes, or microwave individual sliders for 30 seconds.
Pro Tips & Mistakes to Avoid
Pro Tips:
- Use soft rolls—they soak up flavor without drying out.
- Let the butter cool slightly before brushing so it doesn’t make the tops soggy.
- Press the layers gently before baking to help them hold together.
- A baking dish that fits snugly prevents cheese from leaking too much.
Mistakes to Avoid:
- Don’t skip the foil step—the cheese will harden instead of melting smoothly.
- Avoid using cold ham or cheese straight from the fridge; it prevents even heating.
- Don’t overbake—once the tops are golden, you’re done.
Recipe Details
- Yield: 12 sliders (serves 4–6)
- Prep Time: 10 minutes
- Cook Time: 20–25 minutes
- Total Time: 30–35 minutes
Approximate Nutrition (per slider):
Calories: 230 | Fat: 13g | Carbs: 15g | Protein: 12g | Sodium: 480mg
Final Thoughts
These ham and cheese sliders are the kind of recipe that brings people together. They’re simple, shareable, and always comforting—whether you’re feeding friends or just treating yourself. I’ve made them countless times, and honestly, they never disappoint.
Ham and Cheese Sliders
4
servings10
minutes20
minutes210
kcalHam and cheese sliders are small sandwiches (mini) consisting of soft rolls (mainly Hawaiian rolls), scrumptious ham, and melting cheese layered in between, and finally glazed with a buttery Dijon mix before baking. What do you get? An irresistible mix of snack and meal, a variety of different golden, pull-apart tray of gooey, savory perfection.
Ingredients
For the Sliders:
12 Hawaiian sweet rolls (or any soft dinner rolls)
8 oz (225 g) sliced ham (deli-style or leftover baked ham)
6 oz (170 g) Swiss cheese, sliced (or cheddar, provolone, etc.)
For the Butter Glaze:
½ cup (115 g) unsalted butter, melted
1 ½ tablespoons Dijon mustard
1 tablespoon Worcestershire sauce
1 tablespoon brown sugar
1 teaspoon poppy seeds (optional but classic)
½ teaspoon onion powder
Salt and pepper to taste
Optional Add-ons:
Caramelized onions for a sweet kick
Pickles or jalapeños for heat
A sprinkle of fresh parsley for color
Directions
- Step-by-Step Instructions
- Preheat and Prepare
- Set your oven to 350°F (175°C). Lightly grease your baking dish or line it with parchment paper for easy cleanup.
- Slice the Rolls
- With a serrated knife, cut the entire pack of rolls in half horizontally, keeping them attached as if it was a big sandwich sheet. Place the bottom half in your baking dish.
- (Tip: Go slowly here. You want even halves so the cheese melts evenly.)
- Layer the Ham and Cheese
- Lay out the ham slices evenly on the rolls. Be generous—overlapping is actually welcomed. Then top with cheese slices. I prefer mixing Swiss for its creamy texture and cheddar for a sharper taste.
- Add the Top Layer
- The upper half of the rolls should be placed over the cheese while gently pressing down.
- Make the Butter Glaze
- On low heat, butter is to be melted in a small saucepan. Then, using a whisk, incorporate Dijon mustard, Worcestershire sauce, brown sugar, poppy seeds, onion powder, and a bit of salt and pepper. What an aroma! It is nothing but divine.
- Brush and Soak
- basting brush can be used to apply the glaze to the tops of the rolls. Every part must be covered with a rich buttery coat—this is the point where the good comes out.
- (If you have extra glaze, drizzle it around the edges so it soaks into the rolls.)
- Bake Covered
- Foil should be used to cover the dish, and it should be baked for 15 minutes. This will allow the cheese to melt even without turning brown at this time.
- Bake Uncovered
- Take off the foil and continue baking for another 5–7 minutes, until the tops are golden and slightly crunchy.
- Cool Slightly and Serve
- Get rid of the sandwiches after a few minutes of rest. Then, take your spatula and pull apart those sandwiches that are warm and cheesy.
Notes
- Pro Tips:
Use soft rolls—they soak up flavor without drying out.
Let the butter cool slightly before brushing so it doesn’t make the tops soggy.
Press the layers gently before baking to help them hold together.
A baking dish that fits snugly prevents cheese from leaking too much.
Mistakes to Avoid:
Don’t skip the foil step—the cheese will harden instead of melting smoothly.
Avoid using cold ham or cheese straight from the fridge; it prevents even heating.
Don’t overbake—once the tops are golden, you’re done.