I’ve always had a soft spot for Halloween treats that balance creepy and cute—and these Halloween Dirt Cups absolutely nail it. They’re layered with silky chocolate pudding, crushed Oreos that look like “dirt,” and a fluffy whipped topping that makes every spoonful irresistible. The best part? You don’t need to be a pastry chef to make them. They’re quick, fun, and totally customizable, whether you’re making them for kids, a party, or just because you’re craving something festive.
A Little About the Recipe
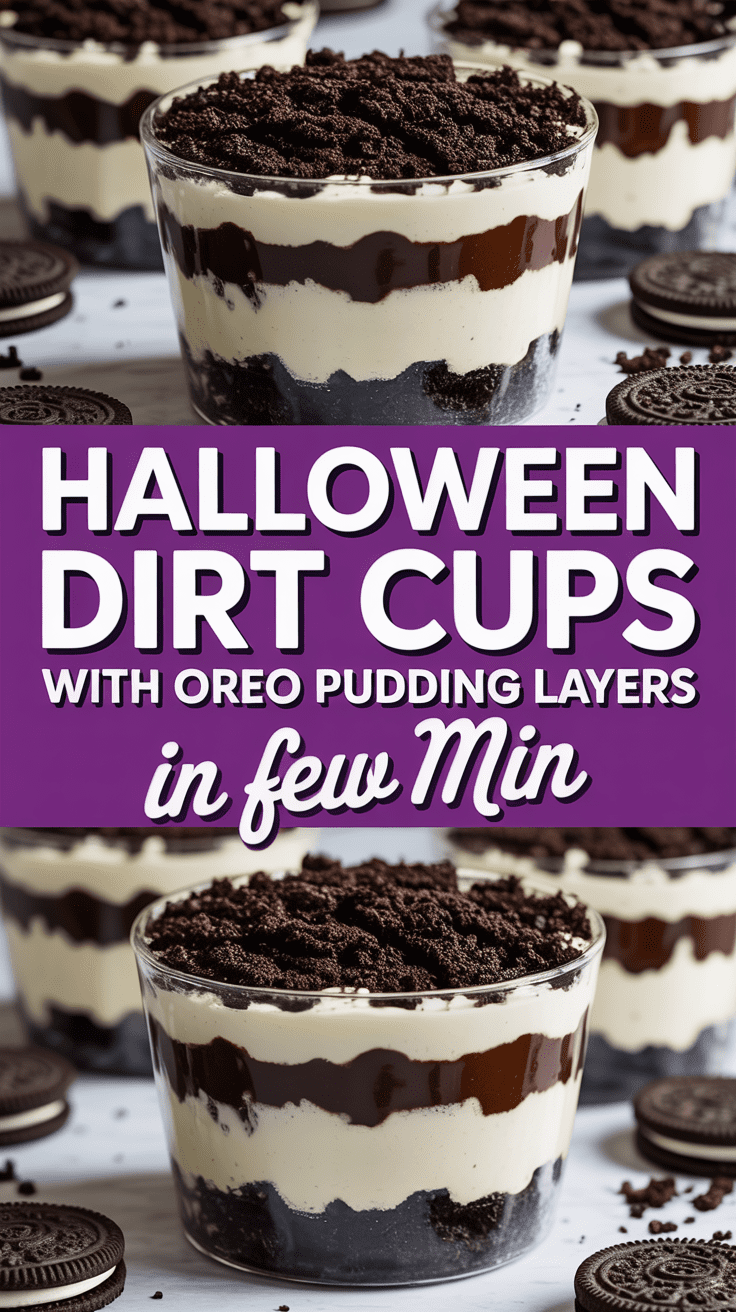
These Halloween Dirt Cups are a spooky twist on the classic pudding dessert. Think of it as a mini edible garden: crushed cookies become the “soil,” chocolate pudding forms rich, creamy layers beneath, and Halloween candies or gummy worms crawl on top for that eerie (but adorable) finishing touch. You can make them in individual cups or one big dish to scoop out later.
I love that this recipe is pure nostalgia—it takes me right back to Halloween parties as a kid, but still feels fun and satisfying as an adult.
What Makes This Recipe Special
It’s not just the taste (though it’s incredibly chocolatey and smooth); it’s the presentation and the creativity behind it. You can decorate each cup differently—some with candy bones, some with ghosts, others with gummy worms—and they’ll all look amazing. Plus, this recipe is no-bake, which means no stress. Just layer, chill, and serve.
Why You’ll Love This Recipe
- Simple to Make: No oven, no stove, and barely any cleanup.
- Fun for All Ages: Perfect for getting kids involved. They’ll love crushing Oreos and decorating.
- Customizable: You can use different puddings, candies, or toppings.
- Make-Ahead Friendly: These cups chill beautifully, so you can prep them before your party.
- Deliciously Creamy and Crunchy: Every bite has that perfect mix of textures.
Tools You’ll Need
You don’t need anything fancy—just a few basics:
- Mixing bowls: One large for the pudding mix and one for the whipped topping.
- Whisk or electric mixer: To get the pudding perfectly smooth.
- Spatula: Helps fold in the whipped topping gently.
- Plastic or glass cups (8 oz / 240 ml): Ideal for individual servings.
- Food processor or ziplock bag: For crushing Oreos into “dirt.”
- Spoon or piping bag: To layer pudding and crushed cookies neatly.
Ingredients
For 6-8 servings:
- 1 box (3.9 oz / 110 g) instant chocolate pudding mix
- 2 cups (480 ml) cold milk
- 1 cup (240 ml) heavy cream or whipped topping (like Cool Whip)
- 20 Oreo cookies (about 180 g), crushed
- 1 tablespoon (15 g) butter, melted (optional, for a softer “soil”)
- Halloween candies for decoration — gummy worms, candy pumpkins, candy eyes, etc.
Step-by-Step Instructions
1. Crush the Oreos
Start by placing your Oreo cookies in a food processor and pulse until you get fine crumbs. If you don’t have a processor, pop them into a ziplock bag and crush them with a rolling pin. (It’s oddly satisfying!) Set aside half for layering and half for topping.
2. Make the Pudding
In a large bowl, whisk together the instant pudding mix and cold milk for about 2 minutes until smooth and thickened. Let it rest for 5 minutes so it can fully set.
3. Add Whipped Topping
Gently fold in the whipped topping using a spatula until the pudding turns light and fluffy. Don’t overmix—it’s fine if there are a few streaks of whipped cream.
4. Layer the Cups
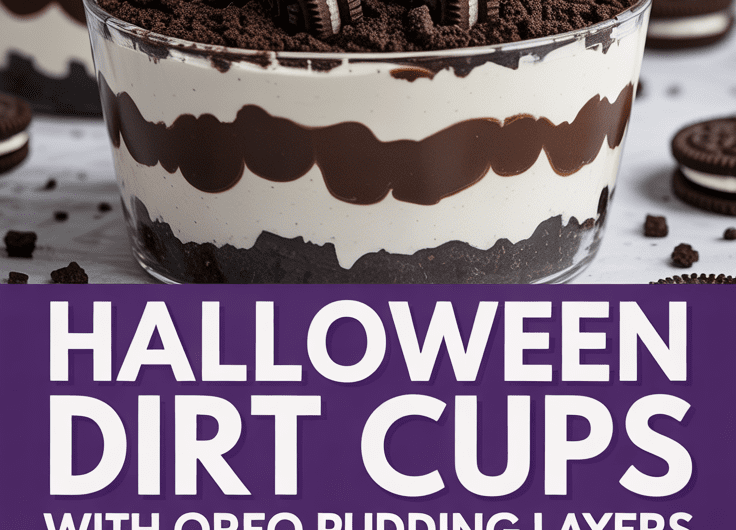
Start by spooning a layer of crushed Oreos at the bottom of each cup. Then add a generous layer of pudding mixture. Repeat with another layer of “dirt” and pudding until the cups are almost full. Finish with a final sprinkle of Oreo crumbs on top.
5. Decorate
Now comes the fun part! Add gummy worms crawling out of the dirt, candy bones poking through, or a candy pumpkin sitting on top. You can even pipe on little ghosts with whipped cream if you’re feeling fancy.
6. Chill and Serve
Refrigerate the cups for at least 30 minutes before serving. This helps the layers set and lets the flavors meld together.
Serving Ideas
- Serve them with small spoons for a “digging through dirt” effect.
- Place them on a Halloween-themed tray with dry ice for a spooky fog presentation.
- Use clear glass jars or mini mason jars if you want them to look extra fancy.
Variations and Customizations
- Flavor twist: Try vanilla pudding with crushed chocolate graham crackers for a lighter version.
- Add layers: Mix in peanut butter, caramel, or Nutella between the pudding layers for extra richness.
- Themed versions: Make a Christmas “snow cup” using vanilla pudding and crushed white cookies, or a summer “beach cup” with crushed graham crackers and gummy fish.
Storage and Make-Ahead Tips
- Make-ahead: Prepare the pudding and crush the Oreos a day before. Assemble the cups up to 6 hours before serving for best texture.
- Storage: Keep refrigerated and covered for up to 3 days.
- Freezing: Not recommended—pudding texture changes once frozen and thawed.
Pro Tips (and Mistakes to Avoid)
- Tip 1: Don’t over-crush the Oreos—you want a mix of fine crumbs and small chunks for the best texture.
- Tip 2: If you’re using fresh whipped cream, beat it until soft peaks form—not stiff—so it blends easily into the pudding.
- Tip 3: Chill the pudding mixture before layering to prevent it from running into the cookie crumbs.
- Mistake to Avoid: Assembling too early. The cookies can get soggy if they sit too long in the pudding. Assemble a few hours before serving for the perfect bite.
Recipe Summary
- Yield: 6–8 cups
- Prep time: 15 minutes
- Chill time: 30 minutes
- Total time: 45 minutes
- Difficulty: Easy
- Calories: ~290 per serving
Final Thoughts
I can’t tell you how many smiles this recipe has created in my kitchen. It’s simple, nostalgic, and just plain fun. Whether you’re making it for a classroom treat, a Halloween party, or a cozy night in with family, these Halloween Dirt Cups with Oreo Pudding Layers bring that perfect mix of sweet, creamy, and crunchy.
Halloween Dirt Cups Recipe with Oreo Pudding Layers
4
servings15
minutes290
kcalThese Halloween Dirt Cups are a spooky twist on the classic pudding dessert. Think of it as a mini edible garden: crushed cookies become the “soil,” chocolate pudding forms rich, creamy layers beneath, and Halloween candies or gummy worms crawl on top for that eerie (but adorable) finishing touch. You can make them in individual cups or one big dish to scoop out later.
Ingredients
1 box (3.9 oz / 110 g) instant chocolate pudding mix
2 cups (480 ml) cold milk
1 cup (240 ml) heavy cream or whipped topping (like Cool Whip)
20 Oreo cookies (about 180 g), crushed
1 tablespoon (15 g) butter, melted (optional, for a softer “soil”)
Halloween candies for decoration — gummy worms, candy pumpkins, candy eyes, etc.
Directions
- Crush the Oreos
- Start by placing your Oreo cookies in a food processor and pulse until you get fine crumbs. If you don’t have a processor, pop them into a ziplock bag and crush them with a rolling pin. (It’s oddly satisfying!) Set aside half for layering and half for topping.
- Make the Pudding
- In a large bowl, whisk together the instant pudding mix and cold milk for about 2 minutes until smooth and thickened. Let it rest for 5 minutes so it can fully set.
- Add Whipped Topping
- Gently fold in the whipped topping using a spatula until the pudding turns light and fluffy. Don’t overmix—it’s fine if there are a few streaks of whipped cream.
- Layer the Cups
- Start by spooning a layer of crushed Oreos at the bottom of each cup. Then add a generous layer of pudding mixture. Repeat with another layer of “dirt” and pudding until the cups are almost full. Finish with a final sprinkle of Oreo crumbs on top.
- Decorate
- Now comes the fun part! Add gummy worms crawling out of the dirt, candy bones poking through, or a candy pumpkin sitting on top. You can even pipe on little ghosts with whipped cream if you’re feeling fancy.
- Chill and Serve
- Refrigerate the cups for at least 30 minutes before serving. This helps the layers set and lets the flavors meld together.
Notes
- Tip 1: Don’t over-crush the Oreos—you want a mix of fine crumbs and small chunks for the best texture.
Tip 2: If you’re using fresh whipped cream, beat it until soft peaks form—not stiff—so it blends easily into the pudding.
Tip 3: Chill the pudding mixture before layering to prevent it from running into the cookie crumbs.
Mistake to Avoid: Assembling too early. The cookies can get soggy if they sit too long in the pudding. Assemble a few hours before serving for the perfect bite.