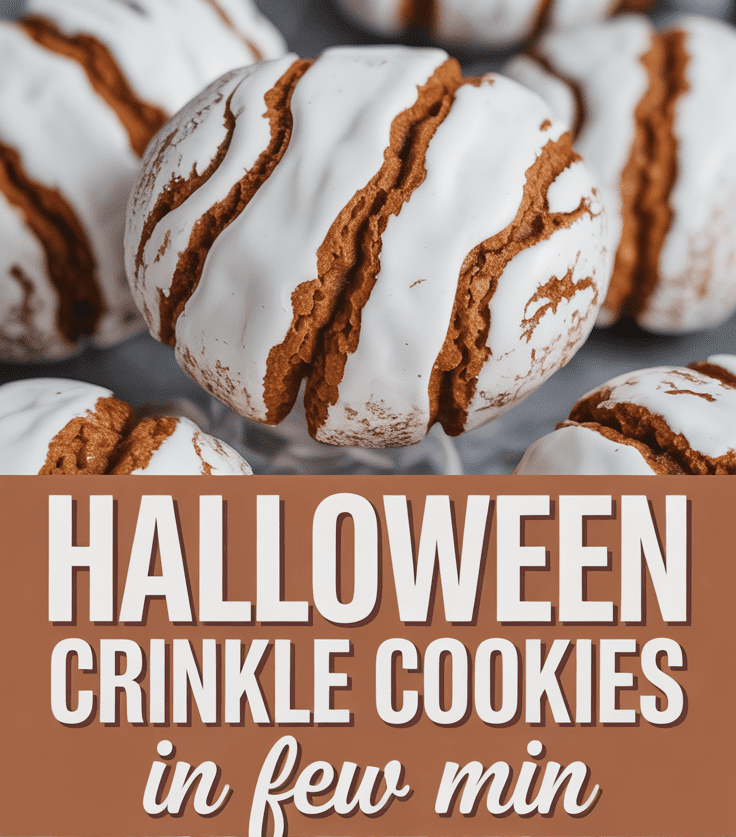
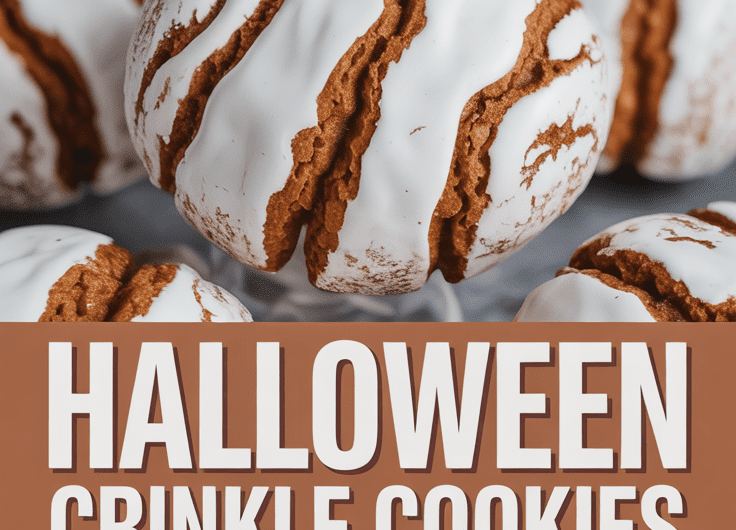
There’s just something magical about pulling a tray of crinkle cookies out of the oven—the way the sugary tops crack open to reveal those soft, fudgy centers always makes me smile. And when it comes to Halloween, I can’t resist adding a spooky twist. These Halloween Crinkle Cookies are my little festive secret: chewy, chocolatey, and dusted with hauntingly beautiful colors that make them look like they came straight from a witch’s kitchen (in the best way possible).
A Little About the Recipe
These cookies start with a classic chocolate crinkle base but get a wicked Halloween makeover. Instead of the usual white powdered sugar, I mix in Halloween colors—think orange, purple, or even black—for that eerie, festive pop. The result? Cookies that taste like rich brownies but look like they’ve been enchanted for a Halloween party.
Why This Recipe Is Special
This isn’t your average cookie recipe—it’s a conversation starter. Every bite has that perfect blend of crispy edges and gooey chocolatey middle, and they’re ridiculously easy to make. Plus, you don’t need to be a professional baker to pull these off. Even if you’ve never made crinkle cookies before, I’ll guide you step by step so yours come out spooky-perfect.
Why You’ll Love This Recipe
- Chocolate Lovers’ Dream: Each cookie is rich, soft, and full of cocoa goodness.
- Festive and Fun: Perfect for Halloween parties, bake sales, or just making your kitchen feel more spirited.
- No Fancy Skills Needed: Simple steps, clear guidance, and easy-to-find ingredients.
- Customizable Colors: You can play around with your powdered sugar shades—orange, purple, green, or black!
- Make-Ahead Friendly: The dough chills beautifully, so you can prep in advance and bake when you’re ready.
Tools You’ll Need
- Mixing Bowls (2): One for wet ingredients, one for dry. Helps keep your mixing tidy and smooth.
- Electric Mixer or Whisk: For creaming the butter and sugar. A mixer makes it easier, but a whisk and some arm power work too.
- Rubber Spatula: Perfect for scraping down the sides of the bowl—trust me, you don’t want to waste any batter.
- Baking Sheets: Line them with parchment paper to prevent sticking.
- Small Cookie Scoop or Spoon: Keeps all your cookies evenly sized.
- Measuring Cups and Spoons: Accuracy matters, especially for baking.
- Food Coloring & Powdered Sugar: For the spooky magic touch.
Ingredients
For the Cookies
- 1 cup (125g) all-purpose flour
- ½ cup (50g) unsweetened cocoa powder
- 1 teaspoon baking powder
- ¼ teaspoon salt
- ¾ cup (150g) granulated sugar
- ¼ cup (60ml) vegetable oil
- 2 large eggs
- 1 teaspoon vanilla extract
For the Coating
- ½ cup (60g) powdered sugar
- A few drops of gel food coloring (orange, purple, green, or black)
Step-by-Step Instructions
1. Mix the Dry Ingredients
In a medium bowl, whisk together flour, cocoa powder, baking powder, and salt. This ensures everything blends evenly—no lumps of cocoa hiding in your cookies later.
2. Combine Wet Ingredients
In a separate large bowl, beat sugar, oil, eggs, and vanilla extract until smooth and slightly thickened. If you’re using a hand mixer, beat on medium speed for about 2 minutes. It should look glossy and unified.
3. Bring It Together
Gradually add the dry ingredients into the wet mixture. Mix until just combined—don’t overmix, or your cookies will lose their soft texture. The dough will be thick and sticky (that’s a good sign!).
4. Chill the Dough
Cover the bowl with plastic wrap and refrigerate for at least 2 hours, or overnight if you can. This step is crucial—it makes the dough easier to handle and helps those signature cracks form during baking.
5. Prep the Coating
Divide the powdered sugar into separate small bowls and tint each with food coloring. I like using gel colors for a bold look. Stir until fully blended and vibrant.
6. Preheat and Shape
Preheat your oven to 350°F (175°C). Line your baking sheets with parchment paper.
Scoop tablespoon-sized balls of chilled dough, roll them between your palms, then coat generously in the colored powdered sugar. Don’t be shy—the thicker the coating, the better the crackle effect!
7. Bake
Place the coated dough balls about 2 inches apart on your baking sheet. Bake for 10–12 minutes. You’ll know they’re done when the tops are beautifully cracked and the edges are set but the centers are still soft.
8. Cool and Admire
Let them cool on the baking sheet for a few minutes before transferring to a wire rack. The colors will deepen slightly as they cool—so if they look light at first, give them a minute.
Serving Ideas
- Stack them on a Halloween-themed plate with some candy eyeballs sprinkled around.
- Wrap a few in orange cellophane bags tied with black ribbon for party favors.
- Pair them with a glass of cold milk, hot cocoa, or pumpkin spice latte for a cozy fall vibe.
Variations & Customization
- Flavor Twist: Add ½ teaspoon of espresso powder to enhance the chocolate flavor.
- Monster Mash: Press candy eyes on top right after baking for a spooky touch.
- Color Play: Mix multiple colors in the sugar for a marbled effect.
- Minty Magic: Add ¼ teaspoon of peppermint extract for a cool Halloween chill.
Storage & Make-Ahead Tips
- Room Temperature: Store in an airtight container for up to 5 days.
- Freezer Friendly: Freeze unbaked dough balls for up to 2 months. When ready to bake, roll in colored sugar and bake straight from frozen—just add 1–2 extra minutes.
- Make-Ahead: You can make the dough 1–2 days in advance. Keep it chilled until you’re ready to bake.
Pro Tips & Mistakes to Avoid
Pro Tips:
- Chill your dough properly—it’s the secret behind those perfect crinkles.
- Use gel food coloring for vivid Halloween hues (liquid colors can water down the sugar).
- Coat each ball right before baking so the sugar doesn’t dissolve.
- Bake one tray at a time for the most even results.
Mistakes to Avoid:
- Don’t skip chilling—it prevents your cookies from spreading flat.
- Avoid overbaking; they should look slightly underdone in the center.
- Don’t skimp on the powdered sugar coat—thin layers won’t give that signature crackle look.
Recipe Summary
Yield: 18–20 cookies
Prep Time: 15 minutes
Chill Time: 2 hours
Bake Time: 12 minutes
Total Time: About 2 hours 30 minutes
Per Cookie (approx.):
Calories: 110 | Carbs: 16g | Fat: 4g | Protein: 2g
A Little Goodbye Magic
If you’ve made it this far, I can already tell—you’re going to nail these Halloween Crinkle Cookies. They’re festive, chocolatey, and just the right amount of spooky. Once you see that crackly surface and take your first bite, you’ll understand why I can’t stop making them every October. So go ahead, whip up a batch, have fun with the colors, and let your kitchen smell like Halloween night.
Halloween Crinkle Cookies
4
servings15
minutes12
minutes110
kcalThese cookies start with a classic chocolate crinkle base but get a wicked Halloween makeover. Instead of the usual white powdered sugar, I mix in Halloween colors—think orange, purple, or even black—for that eerie, festive pop. The result? Cookies that taste like rich brownies but look like they’ve been enchanted for a Halloween party.
Ingredients
For the Cookies
1 cup (125g) all-purpose flour
½ cup (50g) unsweetened cocoa powder
1 teaspoon baking powder
¼ teaspoon salt
¾ cup (150g) granulated sugar
¼ cup (60ml) vegetable oil
2 large eggs
1 teaspoon vanilla extract
For the Coating
½ cup (60g) powdered sugar
A few drops of gel food coloring (orange, purple, green, or black)
Directions
- Mix the Dry Ingredients
- In a medium bowl, whisk together flour, cocoa powder, baking powder, and salt. This ensures everything blends evenly—no lumps of cocoa hiding in your cookies later.
- Combine Wet Ingredients
- In a separate large bowl, beat sugar, oil, eggs, and vanilla extract until smooth and slightly thickened. If you’re using a hand mixer, beat on medium speed for about 2 minutes. It should look glossy and unified.
- Bring It Together
- Gradually add the dry ingredients into the wet mixture. Mix until just combined—don’t overmix, or your cookies will lose their soft texture. The dough will be thick and sticky (that’s a good sign!).
- Chill the Dough
- Cover the bowl with plastic wrap and refrigerate for at least 2 hours, or overnight if you can. This step is crucial—it makes the dough easier to handle and helps those signature cracks form during baking.
- Prep the Coating
- Divide the powdered sugar into separate small bowls and tint each with food coloring. I like using gel colors for a bold look. Stir until fully blended and vibrant.
- Preheat and Shape
- Preheat your oven to 350°F (175°C). Line your baking sheets with parchment paper.
- Scoop tablespoon-sized balls of chilled dough, roll them between your palms, then coat generously in the colored powdered sugar. Don’t be shy—the thicker the coating, the better the crackle effect!
- Bake
- Place the coated dough balls about 2 inches apart on your baking sheet. Bake for 10–12 minutes. You’ll know they’re done when the tops are beautifully cracked and the edges are set but the centers are still soft.
- Cool and Admire
- Let them cool on the baking sheet for a few minutes before transferring to a wire rack. The colors will deepen slightly as they cool—so if they look light at first, give them a minute.
Notes
- Pro Tips:
Chill your dough properly—it’s the secret behind those perfect crinkles.
Use gel food coloring for vivid Halloween hues (liquid colors can water down the sugar).
Coat each ball right before baking so the sugar doesn’t dissolve.
Bake one tray at a time for the most even results.
Mistakes to Avoid:
Don’t skip chilling—it prevents your cookies from spreading flat.
Avoid overbaking; they should look slightly underdone in the center.
Don’t skimp on the powdered sugar coat—thin layers won’t give that signature crackle look.