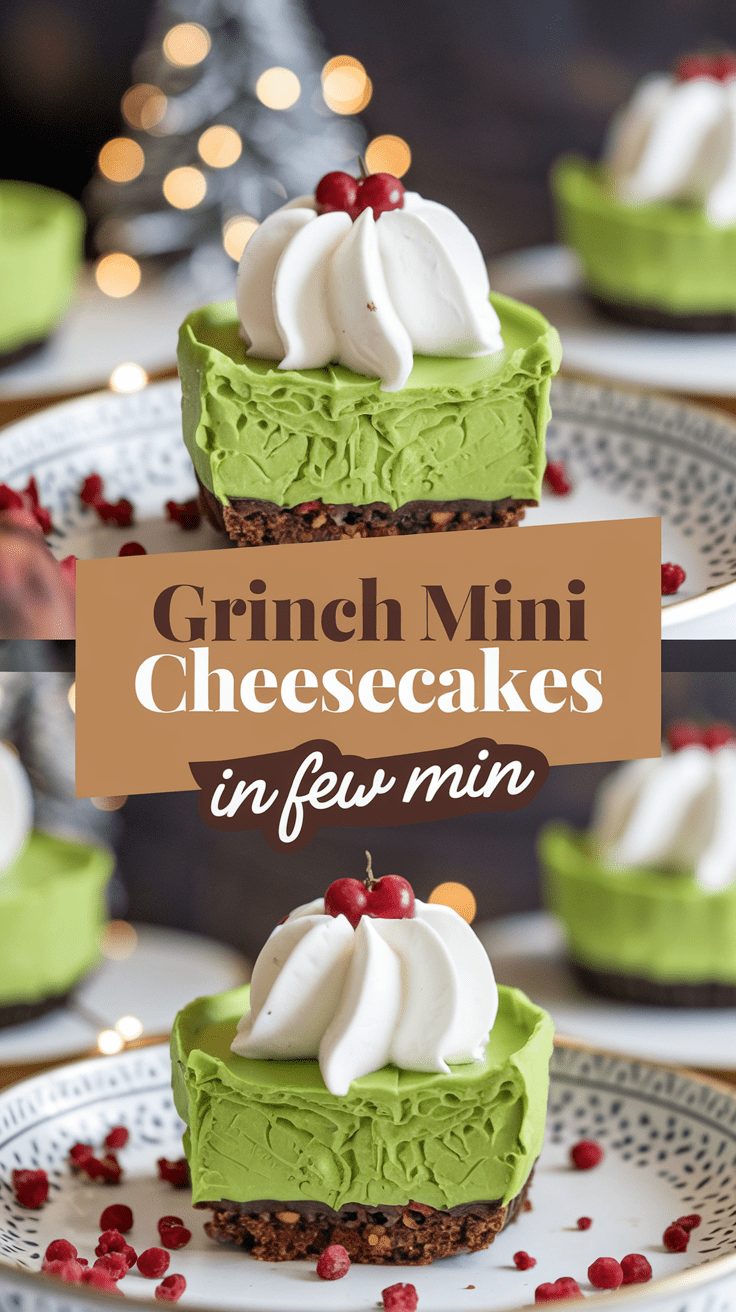
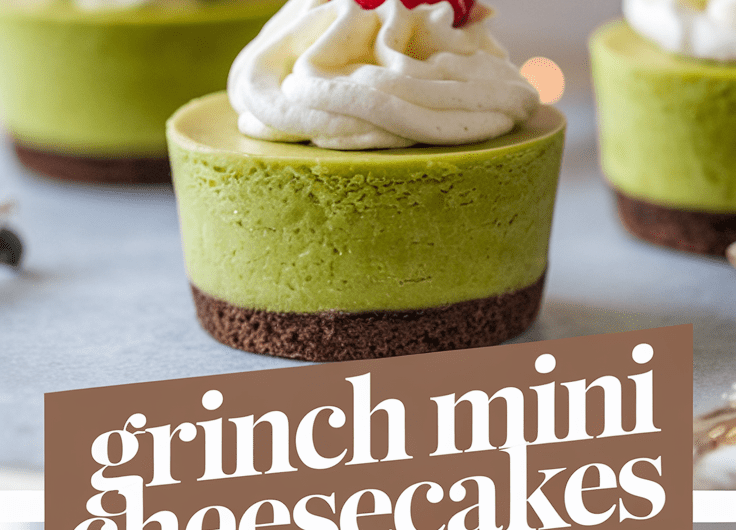
I have a soft spot for holiday treats that don’t take themselves too seriously, and these Grinch Mini Cheesecakes might be my favorite example. They’re playful, a little dramatic with their bright green color, and honestly—every time I make them, I catch myself grinning like, well… the Grinch.
These adorable cheesecakes start with a buttery cookie crust, a creamy green filling, and a tiny red heart on top that makes them instantly recognizable. They’re festive without being fussy, which is exactly how I want to feel during the holidays. I think you’ll love them because they look impressive, but secretly? They’re easy.
And what makes them special is how they bring people together. When you set a platter of these on the table, you can feel the energy shift—kids get excited, adults get nostalgic, everyone suddenly wants to know how you made them. It’s the kind of recipe that turns into a tradition without you even planning it.
Why You’ll Love This Recipe
You’re going to adore these Grinch Mini Cheesecakes because:
- They’re adorable – The green cheesecake + little red heart combo is irresistible.
- Super creamy filling – Smooth, velvety, bakery-style texture.
- Stress-free prep – Simple ingredients, no water bath, and they bake fast.
- Perfect for parties – Individually portioned and easy to serve.
- Fun to customize – Change the crust, toppings, or flavors however you like.
- Kid-friendly project – If you’ve got eager little helpers, this is a great place to let them jump in.
Tools You’ll Need
I like being upfront about tools—the right ones make everything easier. Here’s what you’ll need (and why):
- Muffin Pan (12-cup) – The best way to get perfectly portioned mini cheesecakes.
- Paper Liners – They keep the crust neat and make unmolding stress-free.
- Mixing Bowls – One for crust, one for filling.
- Hand Mixer or Stand Mixer – Helps whip the filling until it’s silky smooth.
- Rubber Spatula – For scraping every last bit of creamy filling.
- Measuring Cups & Spoons – Accuracy is your best friend with cheesecake.
- Small Cookie Scoop or Tablespoon – Makes dividing the crust and filling even.
- Food Coloring (green) – The magic that makes these Grinchy.
Ingredients
For the Crust
- 1 cup (100 g) graham cracker crumbs
- 2 tbsp (25 g) granulated sugar
- 4 tbsp (56 g) unsalted butter, melted
For the Cheesecake Filling
- 12 oz (340 g) cream cheese, softened
- 1/3 cup (67 g) granulated sugar
- 1 large egg (50 g)
- 1/4 cup (60 g) sour cream
- 1 tsp vanilla extract
- Green gel food coloring (a few drops, to taste)
For Decoration
- Red heart sprinkles or small red candies
Instructions
1. Prep your pan
Preheat your oven to 325°F (163°C). Line a muffin pan with 12 paper liners.
I always double-check that the liners are snug so the crust doesn’t creep upward.
2. Make the crust
In a bowl, stir graham crumbs, sugar, and melted butter until the mixture feels like damp sand.
If you pinch a bit between your fingers, it should hold together—if not, add a teaspoon more butter.
3. Press the crust
Using a scoop or spoon, divide the crust mixture among the liners.
Press firmly with your fingertips or the bottom of a small glass.
Don’t worry if the edges look rustic—once baked, they settle beautifully.
4. Beat the cream cheese
In a mixing bowl, beat the cream cheese on medium speed until smooth and lump-free.
If you see any stubborn lumps, keep going. Smooth filling = dreamy texture.
5. Add sugar and egg
Mix in the sugar until combined, then add the egg and beat on low.
You want the mixture cohesive but not whipped—we’re building creaminess, not fluffiness.
6. Add vanilla, sour cream & color
Stir in the sour cream and vanilla.
Add green gel color one drop at a time until you reach that perfect Grinchy green. I prefer it vibrant but not neon.
7. Fill and bake
Divide the filling evenly over the crusts.
Bake for 15–17 minutes, or until the centers jiggle slightly like set Jell-O.
If they look puffed, they’re overdone—don’t panic, they’ll still taste great.
8. Cool completely
Let the cheesecakes cool in the pan for 20 minutes, then move them to the fridge for at least 2 hours.
This part requires patience, but it’s worth it for the texture.
9. Decorate
Once chilled, top each cheesecake with a single red heart in the corner of the green surface—Grinch-style.
Serving Ideas
- Add a dollop of whipped cream.
- Serve with crushed peppermint for a minty twist.
- Drizzle with white chocolate for extra indulgence.
- Pair with hot cocoa or spiced tea.
Variations & Customization
- Chocolate crust – Swap graham crackers for Oreo crumbs.
- Mint flavor – Add 1/8 tsp peppermint extract (careful—it’s strong!).
- Swirl version – Add a few drops of white batter on top and swirl with a toothpick.
- Gluten-free – Use gluten-free graham crackers.
Storage & Make-Ahead
- Store in an airtight container in the refrigerator for up to 5 days.
- Freeze without decorations for up to 2 months. Thaw overnight in the fridge.
- Make ahead by preparing the crust and filling a day before and baking the next morning.
Pro Tips (From Me to You)
- Room-temperature cream cheese is non-negotiable for ultra-smooth filling.
- Don’t overbeat the egg—it creates air, and air causes cracks.
- Use gel food coloring, not liquid, for deeper color without altering texture.
- Let them chill fully—cheesecake needs that time to set its flavor and texture.
- If your crust is crumbly, add another teaspoon of melted butter.
Mistakes to Avoid
- Overbaking — leads to dry, crumbly cheesecake. Pull them while they’re jiggly.
- Using cold cream cheese — you’ll fight lumps the whole time.
- Adding too much color — a little gel goes a long way.
- Skipping the liners — trust me, you’ll regret the cleanup.
Yield & Timing
- Yield: 12 mini cheesecakes
- Prep Time: 15 minutes
- Cook Time: 15–17 minutes
- Chill Time: 2 hours
- Total Time: About 2 hours 30 minutes
Nutrition (Per Mini Cheesecake — Approximate)
- Calories: 185
- Carbs: 14 g
- Fat: 13 g
- Protein: 3 g
- Sugar: 10 g
I hope you have as much fun making these Grinch Mini Cheesecakes as I do. They’re playful, delicious, and surprisingly simple—my favorite holiday combo. If you give them a try, I’d genuinely love to hear how they turn out for you. Share a photo, tell me what variations you used, or drop your thoughts in a comment. Happy baking, friend!
Grinch Mini Cheesecakes
4
servings15
minutes15
minutes00
kcalAnd what makes them special is how they bring people together. When you set a platter of these on the table, you can feel the energy shift—kids get excited, adults get nostalgic, everyone suddenly wants to know how you made them. It’s the kind of recipe that turns into a tradition without you even planning it.
Ingredients
For the Crust
1 cup (100 g) graham cracker crumbs
2 tbsp (25 g) granulated sugar
4 tbsp (56 g) unsalted butter, melted
For the Cheesecake Filling
12 oz (340 g) cream cheese, softened
1/3 cup (67 g) granulated sugar
1 large egg (50 g)
1/4 cup (60 g) sour cream
1 tsp vanilla extract
Green gel food coloring (a few drops, to taste)
For Decoration
Red heart sprinkles or small red candies
Directions
- Prep your pan
- Preheat your oven to 325°F (163°C). Line a muffin pan with 12 paper liners.
- always double-check that the liners are snug so the crust doesn’t creep upward.
- Make the crust
- In a bowl, stir graham crumbs, sugar, and melted butter until the mixture feels like damp sand.
- If you pinch a bit between your fingers, it should hold together—if not, add a teaspoon more butter.
- Press the crust
- Using a scoop or spoon, divide the crust mixture among the liners.
- Press firmly with your fingertips or the bottom of a small glass.
- Don’t worry if the edges look rustic—once baked, they settle beautifully.
- Beat the cream cheese
- In a mixing bowl, beat the cream cheese on medium speed until smooth and lump-free.
- If you see any stubborn lumps, keep going. Smooth filling = dreamy texture.
- Add sugar and egg
- Mix in the sugar until combined, then add the egg and beat on low.
- You want the mixture cohesive but not whipped—we’re building creaminess, not fluffiness.
- Add vanilla, sour cream & color
- Stir in the sour cream and vanilla.
- Add green gel color one drop at a time until you reach that perfect Grinchy green. I prefer it vibrant but not neon.
- Fill and bake
- Divide the filling evenly over the crusts.
- Bake for 15–17 minutes, or until the centers jiggle slightly like set Jell-O.
- If they look puffed, they’re overdone—don’t panic, they’ll still taste great.
- Cool completely
- Let the cheesecakes cool in the pan for 20 minutes, then move them to the fridge for at least 2 hours.
- This part requires patience, but it’s worth it for the texture.
- Decorate
- Once chilled, top each cheesecake with a single red heart in the corner of the green surface—Grinch-style.