There’s something ridiculously fun about desserts that look spooky but taste heavenly—and Graveyard Dirt Cake Cups are exactly that. Every year around Halloween, I find myself coming back to this recipe. There’s something about the mix of crushed cookies, creamy pudding, and playful decorations that just makes everyone light up—kids, adults, even the “I don’t like sweets” people. Personally, I think it’s one of those recipes that proves you don’t need fancy techniques to make something unforgettable.
What Are Graveyard Dirt Cake Cups?
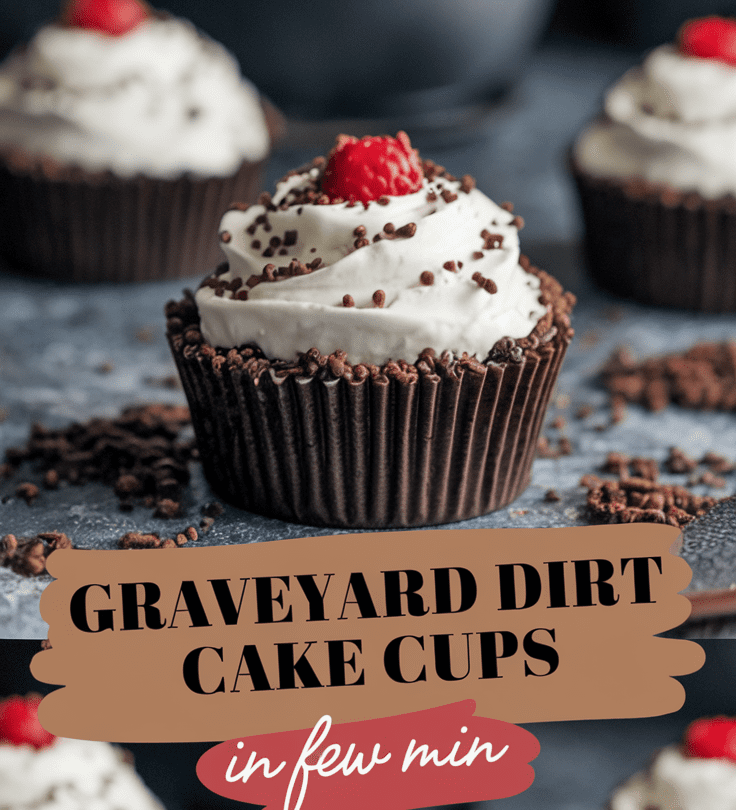
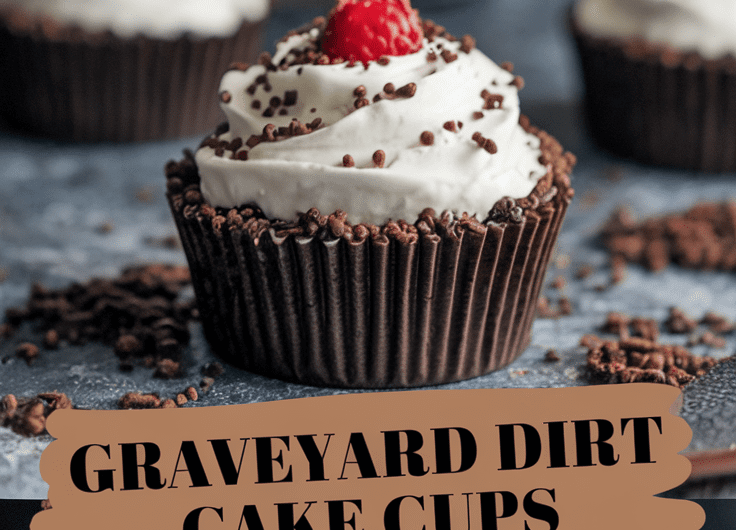
Graveyard Dirt Cake Cups are mini dessert cups made with layers of crushed chocolate cookies (“dirt”), creamy chocolate pudding, and whipped topping—decorated to look like tiny spooky graveyards. Think of it like an edible Halloween craft project. You can top them with gummy worms, candy bones, or cookies shaped like tombstones. They’re creamy, crunchy, sweet, and just the right amount of eerie.
Why This Recipe Is Special
I love this recipe because it’s pure nostalgia in a cup. It’s the kind of treat that gets everyone talking and laughing while they dig in. You don’t need baking skills or hours of prep, just a bit of creativity and a sweet tooth. Plus, it’s perfect for parties—you can make them ahead, they’re easy to serve, and they always disappear first from the dessert table.
Why You’ll Love This Recipe
- It’s no-bake: No oven, no stress—just mix, layer, and chill.
- Kid-friendly: Little hands love assembling these cups.
- Customizable: You can make them spooky, silly, or downright gross (in a good way).
- Crowd-pleasing: Creamy pudding and cookies? Always a hit.
- Make-ahead friendly: Ideal for busy Halloween parties.
Tools You’ll Need
- Mixing bowls (2): One for pudding, one for the whipped mixture.
- Hand mixer or whisk: Helps get that smooth, lump-free pudding texture.
- Zip-top bag or food processor: For crushing cookies into that “dirt” consistency.
- Rubber spatula: Great for folding whipped topping into the pudding.
- Clear cups (8 oz / 240 ml): Let everyone see the spooky layers.
- Spoons: For layering and taste-testing (you’ll need it).
Ingredients
For the Pudding Layer:
- 2 boxes (3.9 oz / 110 g each) instant chocolate pudding mix
- 3 ½ cups (830 ml) cold milk
- 1 tub (8 oz / 225 g) whipped topping, thawed
For the “Dirt”:
- 1 package (14 oz / 400 g) chocolate sandwich cookies (like Oreos), crushed
For Decorations:
- Gummy worms
- Milano cookies or rectangular biscuits (for tombstones)
- Candy pumpkins, candy bones, or crushed chocolate rocks
- Black decorating gel or melted chocolate (to write “RIP”)
Step-by-Step Instructions
1. Make the “dirt”
Place the cookies in a zip-top bag, seal it, and crush them using a rolling pin until they look like fine soil. If you’re going for less mess, toss them in a food processor. Don’t worry about making it perfect—some small chunks add texture.
2. Mix the pudding
In a large bowl, whisk together the pudding mixes and cold milk for about 2 minutes, until it thickens slightly. I like using a hand mixer for this part because it keeps everything smooth. Let it rest for 5 minutes so it can set.
3. Fold in the whipped topping
Using a rubber spatula, gently fold in the thawed whipped topping. The key here is to fold, not stir—you want it fluffy and light, not flat.
4. Layer the cups
Spoon about 2 tablespoons of crushed cookies into the bottom of each cup. Follow with a layer of pudding mixture, then repeat until the cup is about ¾ full. Finish with a thick layer of cookie “dirt” on top.
5. Decorate the graveyard
Now for the fun part—decorating! Use Milano cookies as tombstones. Write “RIP” or spooky messages using black decorating gel. Add gummy worms crawling out of the “ground,” candy bones, or pumpkins. This is where you can get creative—there’s no wrong way to decorate a dirt cup!
6. Chill before serving
Refrigerate the cups for at least 1 hour before serving. The chilling helps the layers set and the flavors meld together.
Serving Ideas
- Serve with tiny spoons for extra fun.
- Add a drizzle of chocolate syrup for extra richness.
- For adults, you can even spike the pudding layer with a splash of coffee liqueur for a “grown-up” version.
Variations and Customization Tips
- Vanilla graveyard: Use vanilla pudding and white chocolate cookies for a ghostly twist.
- Pumpkin patch theme: Add crushed graham crackers and candy pumpkins on top.
- Spider web cups: Swirl melted white chocolate over the top for a web effect and add a chocolate spider.
- Dairy-free: Swap the milk for almond or oat milk and use dairy-free whipped topping.
Storage and Make-Ahead Instructions
- Refrigerate: Keep covered in the fridge for up to 3 days.
- Make-ahead: You can prep the pudding and crushed cookies a day before. Assemble and decorate the cups the morning of your event for the freshest look.
- Freezing: Not recommended—pudding and whipped topping lose their creamy texture when frozen.
Pro Tips and Mistakes to Avoid
- Don’t overmix the pudding: It can get too runny if you over-whisk after adding the whipped topping.
- Crush the cookies finely: You want them to resemble real dirt, not chunky rocks.
- Use clear cups: It makes the layers pop visually, especially for parties.
- Write on tombstones before sticking them in: It’s much easier than trying to decorate after assembly.
- Chill long enough: A rushed chill means your pudding might feel too soft when served.
Recipe Details
- Yield: 10–12 cups
- Prep Time: 25 minutes
- Chill Time: 1 hour
- Total Time: 1 hour 25 minutes
Per Serving (approx.):
Calories: 280 | Fat: 12g | Carbs: 40g | Protein: 3g | Sugars: 28g
Final Thoughts
If you’re looking for a Halloween dessert that’s effortless, playful, and seriously good, these Graveyard Dirt Cake Cups are your go-to. I love watching people’s faces light up when they realize the “dirt” is actually crushed cookies. It’s fun, it’s messy in the best way, and it’s the kind of recipe that turns simple ingredients into an unforgettable moment.
Graveyard Dirt Cake Cups
4
servings25
minutes280
kcalGraveyard Dirt Cake Cups are mini dessert cups made with layers of crushed chocolate cookies (“dirt”), creamy chocolate pudding, and whipped topping—decorated to look like tiny spooky graveyards. Think of it like an edible Halloween craft project. You can top them with gummy worms, candy bones, or cookies shaped like tombstones. They’re creamy, crunchy, sweet, and just the right amount of eerie.
Ingredients
For the Pudding Layer:
2 boxes (3.9 oz / 110 g each) instant chocolate pudding mix
3 ½ cups (830 ml) cold milk
1 tub (8 oz / 225 g) whipped topping, thawed
For the “Dirt”:
1 package (14 oz / 400 g) chocolate sandwich cookies (like Oreos), crushed
For Decorations:
Gummy worms
Milano cookies or rectangular biscuits (for tombstones)
Candy pumpkins, candy bones, or crushed chocolate rocks
Black decorating gel or melted chocolate (to write “RIP”)
Directions
- Make the “dirt”
- Place the cookies in a zip-top bag, seal it, and crush them using a rolling pin until they look like fine soil. If you’re going for less mess, toss them in a food processor. Don’t worry about making it perfect—some small chunks add texture.
- Mix the pudding
- In a large bowl, whisk together the pudding mixes and cold milk for about 2 minutes, until it thickens slightly. I like using a hand mixer for this part because it keeps everything smooth. Let it rest for 5 minutes so it can set.
- Fold in the whipped topping
- Using a rubber spatula, gently fold in the thawed whipped topping. The key here is to fold, not stir—you want it fluffy and light, not flat.
- Layer the cups
- Spoon about 2 tablespoons of crushed cookies into the bottom of each cup. Follow with a layer of pudding mixture, then repeat until the cup is about ¾ full. Finish with a thick layer of cookie “dirt” on top.
- Decorate the graveyard
- Now for the fun part—decorating! Use Milano cookies as tombstones. Write “RIP” or spooky messages using black decorating gel. Add gummy worms crawling out of the “ground,” candy bones, or pumpkins. This is where you can get creative—there’s no wrong way to decorate a dirt cup!
- Chill before serving
- Refrigerate the cups for at least 1 hour before serving. The chilling helps the layers set and the flavors meld together.
Notes
- Don’t overmix the pudding: It can get too runny if you over-whisk after adding the whipped topping.
Crush the cookies finely: You want them to resemble real dirt, not chunky rocks.
Use clear cups: It makes the layers pop visually, especially for parties.
Write on tombstones before sticking them in: It’s much easier than trying to decorate after assembly.
Chill long enough: A rushed chill means your pudding might feel too soft when served.