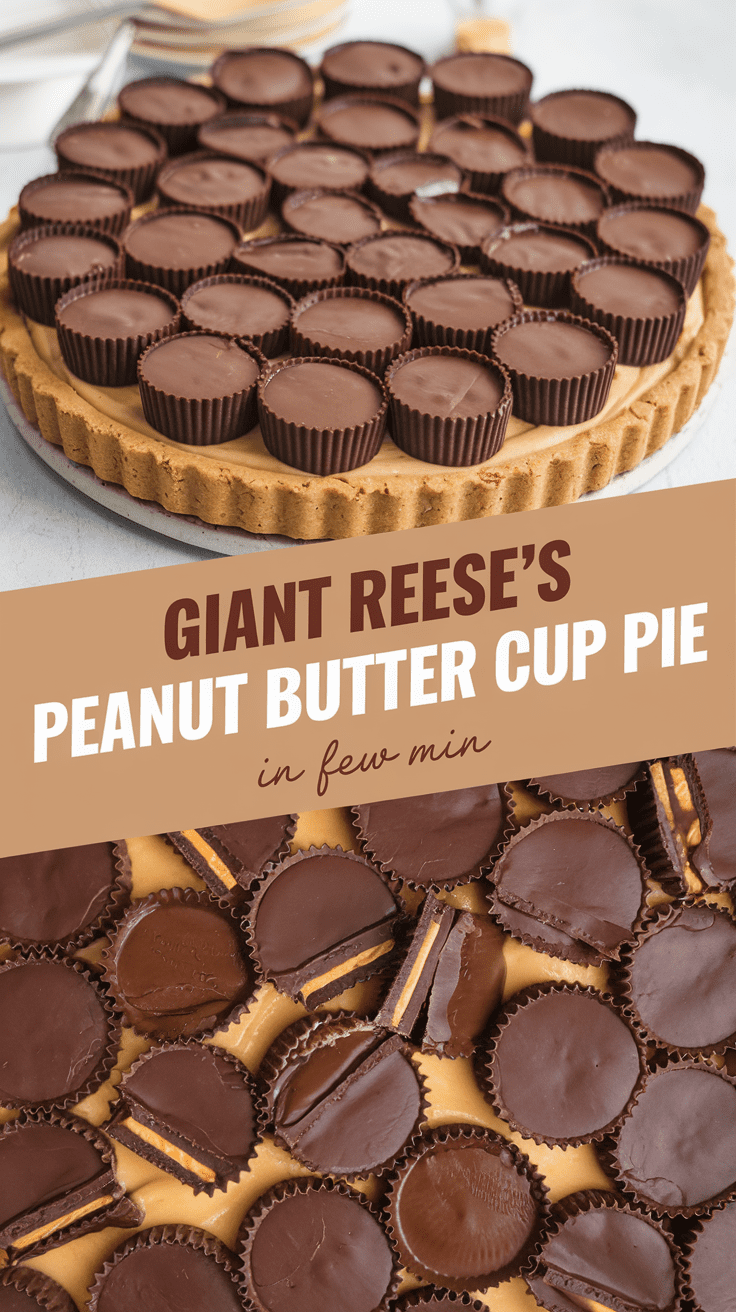
Even to be completely honest with you, this dessert is far away from the “ridiculous” side-the best kind. The first time I made a pie composed just of giant Reese’s peanut butter cups, I could hardly believe how fun it was to create something that pretended to look like a candy bar but tasted like a complete celebration. Imagine a huge Reese’s peanut butter cup, creamy filling made from peanut butter, a promising shell of rich chocolate a shareable pie that can be sliced into wedges. Over-the-top, indulgent, and very much a type of dessert where someone stops his course in the middle of a bite, grinning.
What Is Giant Reese’s Peanut Butter Cup Pie?
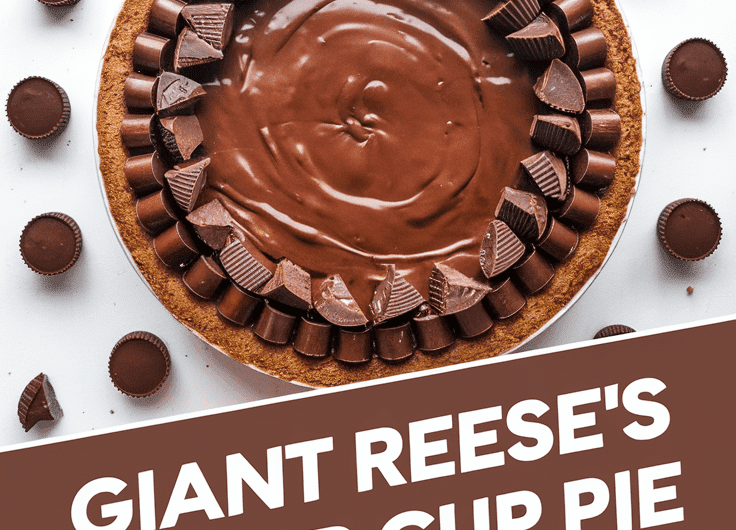
This would go the ultimate candy-bar-into-no-bake-pie hybrid. Buttery chocolate base, thick layer of sweet-salty peanut butter filling, and a glossy chocolate craquelure top when you cut through it. It’s not even fussy, and there’s no need to preheat the oven. This is just the recipe to have opened that fantastical world where you somehow think you’re Willy Wonka, but in your own kitchen-and in a relatively short time.
Why This Recipe Is Special
This pie is not only big, though. This is forgettable. Birthday? Potluck? Holiday centerpiece? People will remember this pie long past the last slice has been devoured. And it’s playful and nostalgic and surprisingly easy to throw together. And yes, it really captures the magic of indulgence.
Why You’ll Love This Recipe
Here’s why I think you’ll fall in love with it too:
- Big flavor and low effort: Chocolate and peanut butter always win, regardless, and this is one no-bake recipe.
- Special skills required? None- if you can melt the chocolate and mix the filling, then you can ace this.
- Make-ahead-friendly: This pie chills really nicely, so you can prepare it a day earlier.
- Crowd pleasing: The young and the old, and the “I don’t eat sweets” people usually cave.
- Customizable: Use other nut butter, add your toppings, or play around with the crust.
Tools You’ll Need
I’ll walk you through what you’ll actually use and why it matters:
- 9-inch (23 cm) tart or pie pan with removable bottom – This gives you the classic peanut butter cup ridged look and makes serving easy.
- Mixing bowls – At least two: One for Filling, another for Melting Chocolate.
- Rubber spatula: Perfect for scraping every last bit of filling and smoothing layers.
- Measuring cups and spoons: To maintain the ratios just right.
- Microwave-safe bowl or double boiler: For gently melting chocolate.
- Offset Spatula or Butter Knife: Helps to spread the filling nicely, fuss-free.
Ingredients (US + Metric)
For the Chocolate Shell:
- 3 cups (510 g) semisweet or milk chocolate chips
- 3 tbsp (42 g) unsalted butter or coconut oil (for smoother melting)
For the Peanut Butter Filling:
- 1 ½ cups (380 g) creamy peanut butter
- 1 cup (120 g) powdered sugar, sifted
- ½ cup (115 g) unsalted butter, softened
- ½ tsp salt (skip if peanut butter is already salted)
- 1 tsp vanilla extract
For the Chocolate Topping:
- 2 cups (340 g) semisweet or milk chocolate chips
- 2 tbsp (28 g) butter or coconut oil
Optional Garnish: Flaky sea salt, crushed peanuts, or chopped mini Reese’s cups
Step-by-Step Instructions
1. Prepare the Chocolate Base
Melt chocolate and butter together in a microwave bowl for 30 seconds each time, stirring in between or in a double boiler. Pour half of the chocolate mixture into the tart pan and spread it up the sides to create the candy cup shape. Pop it in the freezer for 10 minutes to set up. My advice: don’t rush it. A solid base will make cutting easier later. Tip from me: Don’t rush this part. A solid base makes cutting way easier later.
2. Make the Peanut Butter Filling
Beat together a thick, creamy mixture of peanut butter, powdered sugar, softened butter, salt, and vanilla. It should feel like the inside of a Reese’s – solid but gooey at the same time. Spoon filling into a cold chocolate shell and level off with an offset spatula on the top.
3. Add the Chocolate Top
Pour the rest of the melted chocolate over the peanut butter filling, spreading it out so there are no gaps where the filling peeks through. Gently tap the pan against the countertop to smooth out air bubbles.
4. Chill Until Set
Refrigerate the pie for at least 2 hours, or until firm. If you’re patient, overnight is best.
5. Slice and Serve
Cut clean slices with a sharp knife dipped in hot water (wipe it dry before slicing). It will crack satisfactorily through the chocolate.
Serving Ideas
- Pair with a cold glass of milk (classic move).
- Add a scoop of vanilla ice cream for extra indulgence.
- Drizzle with caramel sauce if you want to take it over the top.
Variations and Customizations
- Nut swap: Use almond butter, cashew butter, or even sunflower butter for nut-free.
- Crunch factor: Stir crushed pretzels or graham crackers into the filling.
- Festive twist: Top with holiday-colored candies or sprinkles.
- Mini version: Make in muffin tins for individual servings.
Storage and Make-Ahead Tips
- Fridge: Keep covered in the refrigerator for up to 5 days.
- Freezer: Wrap slices individually and freeze for up to 1 month. (Let thaw in the fridge before serving.)
- Make-ahead: Assemble the day before and store chilled until ready to serve.
Pro Tips and Mistakes to Avoid
- Don’t skip chilling the base: If it’s soft, your filling will sink.
- Go slow with melting chocolate: Burnt chocolate = bitter mess.
- Cut with a hot knife: Otherwise, you’ll get jagged edges.
- Balance the sweetness: If your peanut butter is already sweetened, cut back a bit on the sugar.
Recipe Details
- Yield: 10–12 slices
- Prep Time: 20 minutes
- Chill Time: 2 hours
- Total Time: 2 hours 20 minutes
Nutrition (per slice, based on 12 servings):
- Calories: ~480
- Fat: 31 g
- Carbs: 42 g
- Protein: 8 g
- Sugar: 32 g
Final Thoughts
If you’re all set for getting that big wowing effect, making your friends laugh at how ridiculously large the “candy” looks, then sharing the greatest chocolate-peanut butter combination in giant form-is the pie for you. I tell you, once you’ve cut into it, you’re transported into childhood wonder at the sheer magic of it all. Go try it out, share it with a loved one, and tell me how it goes-I love hearing how it turns out from everyone.
Giant Reese’s Peanut Butter Cup Pie
4
servings20
minutes2
hours480
kcalThis would go the ultimate candy-bar-into-no-bake-pie hybrid. Buttery chocolate base, thick layer of sweet-salty peanut butter filling, and a glossy chocolate craquelure top when you cut through it. It's not even fussy, and there's no need to preheat the oven. This is just the recipe to have opened that fantastical world where you somehow think you're Willy Wonka, but in your own kitchen-and in a relatively short time.
Ingredients
For the Chocolate Shell:
3 cups (510 g) semisweet or milk chocolate chips
3 tbsp (42 g) unsalted butter or coconut oil (for smoother melting)
For the Peanut Butter Filling:
1 ½ cups (380 g) creamy peanut butter
1 cup (120 g) powdered sugar, sifted
½ cup (115 g) unsalted butter, softened
½ tsp salt (skip if peanut butter is already salted)
1 tsp vanilla extract
For the Chocolate Topping:
2 cups (340 g) semisweet or milk chocolate chips
2 tbsp (28 g) butter or coconut oil
Optional Garnish: Flaky sea salt, crushed peanuts, or chopped mini Reese’s cups
Directions
- Step-by-Step Instructions
- Prepare the Chocolate Base
- Melt chocolate and butter together in a microwave bowl for 30 seconds each time, stirring in between or in a double boiler. Pour half of the chocolate mixture into the tart pan and spread it up the sides to create the candy cup shape. Pop it in the freezer for 10 minutes to set up. My advice: don't rush it. A solid base will make cutting easier later. Tip from me: Don’t rush this part. A solid base makes cutting way easier later.
- Make the Peanut Butter Filling
- Beat together a thick, creamy mixture of peanut butter, powdered sugar, softened butter, salt, and vanilla. It should feel like the inside of a Reese's - solid but gooey at the same time. Spoon filling into a cold chocolate shell and level off with an offset spatula on the top.
- Add the Chocolate Top
- Pour the rest of the melted chocolate over the peanut butter filling, spreading it out so there are no gaps where the filling peeks through. Gently tap the pan against the countertop to smooth out air bubbles.
- Chill Until Set
- Refrigerate the pie for at least 2 hours, or until firm. If you’re patient, overnight is best.
- Slice and Serve
- Cut clean slices with a sharp knife dipped in hot water (wipe it dry before slicing). It will crack satisfactorily through the chocolate.