I have a soft spot for apple desserts, and this Easy Homemade Apple Crisp sits right at the top of my list. There’s something about the smell of cinnamon, butter, and baked apples filling the house that just feels like home. The moment I take it out of the oven—the bubbling caramelized apples underneath that golden, crunchy oat topping—I know dessert time is going to be special.
A Little About This Recipe
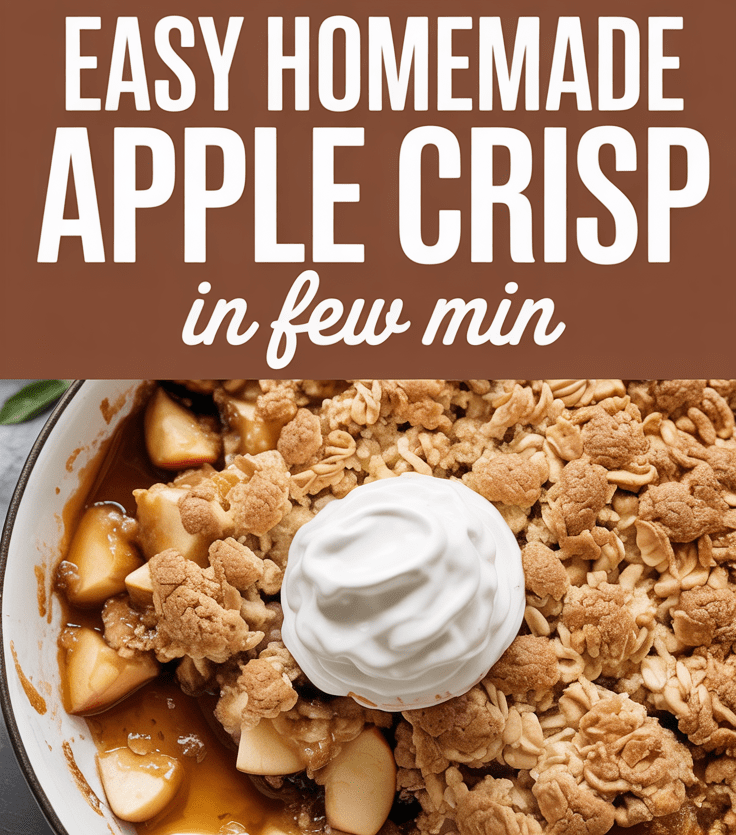
Apple crisp is that perfect middle ground between comforting and effortless. It’s not as fussy as pie but just as satisfying. Juicy, spiced apples get baked until tender, while the buttery oat topping turns golden and crisp. It’s warm, cozy, and pairs perfectly with a scoop of vanilla ice cream.
Why This Recipe Is Special
I love this version because it’s simple enough to throw together on a weeknight but delicious enough for holidays or guests. No complicated crust, no fancy tools—just everyday ingredients coming together to create something that feels like a warm hug. It’s proof that you don’t need a ton of effort to make something amazing.
Why You’ll Love This Recipe
- Simple Ingredients: You probably already have everything in your pantry.
- Quick to Make: No dough, no waiting, just mix, bake, and enjoy.
- Crispy Topping: Buttery oats that stay crunchy even over soft, juicy apples.
- Perfectly Sweet: Balanced flavors—sweet apples, warm cinnamon, and just enough sugar.
- Crowd Favorite: Comforting, nostalgic, and always a hit with everyone.
Tools You’ll Need
Before we start, gather these simple tools:
- 9×9-inch baking dish or similar-sized pan – perfect for even baking.
- Mixing bowls – one for apples, one for topping.
- Measuring cups and spoons – to keep the balance right.
- Apple peeler and corer – makes prep faster (a small knife works too).
- Wooden spoon or spatula – for mixing.
- Oven mitts – because that golden crisp comes out hot!
Ingredients
(Serves 6–8 people)
For the Apple Filling
- 6 medium apples, peeled, cored, and sliced (about 6 cups / 900g)
- 1 tablespoon lemon juice (15ml)
- ⅓ cup granulated sugar (65g)
- 1 teaspoon ground cinnamon
- ¼ teaspoon ground nutmeg
- 1 teaspoon vanilla extract
- 1 tablespoon all-purpose flour (8g)
For the Crisp Topping
- 1 cup old-fashioned oats (90g)
- ¾ cup all-purpose flour (95g)
- ¾ cup light brown sugar (150g)
- ½ cup unsalted butter, melted (115g)
- ½ teaspoon salt
- ½ teaspoon cinnamon
Step-by-Step Instructions
1. Preheat the Oven
Set your oven to 350°F (175°C). Grease your baking dish lightly with butter or nonstick spray.
2. Prepare the Apples
In a large bowl, combine sliced apples, lemon juice, sugar, cinnamon, nutmeg, vanilla, and flour. Toss until every slice is coated evenly. The flour helps thicken the juices as the apples bake. Spread this mixture evenly into your baking dish.
3. Make the Crisp Topping
In another bowl, mix oats, flour, brown sugar, salt, and cinnamon. Pour in the melted butter and stir until everything looks crumbly and evenly coated. The texture should feel like wet sand—this is what gives the topping that irresistible crunch.
4. Assemble the Crisp
Sprinkle the oat mixture evenly over the apples. Don’t pack it down—just let it sit loosely so it bakes into a golden, crisp layer.
5. Bake It Up
Bake for 35–40 minutes, or until the top is golden brown and the apples are bubbling around the edges. The smell alone will tell you when it’s ready.
6. Let It Rest
Cool for about 10–15 minutes before serving. This gives the juices time to thicken slightly so you don’t end up with a soupy crisp.
Serving Ideas
- Serve warm with vanilla ice cream for that perfect hot-and-cold contrast.
- Add a drizzle of caramel sauce if you want to get fancy.
- For breakfast vibes, top with a spoonful of Greek yogurt instead of ice cream.
- Sprinkle chopped pecans or walnuts on top before baking for extra crunch.
Variations & Customization
- Add berries: Mix in a handful of blueberries, raspberries, or cranberries for a fruity twist.
- Go nutty: Add chopped almonds, pecans, or walnuts to the topping.
- Make it gluten-free: Use certified gluten-free oats and a gluten-free flour blend.
- Low-sugar option: Swap some sugar with honey or maple syrup.
- Apple choices: Use Granny Smith for tartness or Honeycrisp for a sweeter, juicier version.
Storage & Make-Ahead Tips
- Refrigerate: Store leftovers in an airtight container for up to 4 days. Reheat in the oven at 325°F (160°C) for 10 minutes to bring back the crispness.
- Freeze: Cool completely, wrap tightly, and freeze for up to 2 months. Thaw overnight and reheat before serving.
- Make-Ahead: You can assemble the topping and store it separately in the fridge for up to 2 days. Just sprinkle it over the apples when ready to bake.
Pro Tips & Mistakes to Avoid
Here’s what I’ve learned after making this recipe too many times to count:
- Don’t overmix the topping—crumbly is what you want.
- Use cold apples, not room temperature; they hold their shape better.
- Avoid overbaking—once the top is golden and crisp, it’s done.
- Always let it rest before serving—this step keeps the texture perfect.
- A mix of tart and sweet apples (like Granny Smith + Fuji) gives the best balance.
Recipe Summary
| Yield: | 6–8 servings |
| Prep Time: | 15 minutes |
| Cook Time: | 40 minutes |
| Total Time: | 55 minutes |
| Calories per Serving: | ~320 kcal |
A Warm Closing Note
If you’ve been craving something simple, comforting, and guaranteed to please everyone at the table, this Easy Homemade Apple Crisp is it. Every bite tastes like fall, like comfort, like the best kind of homemade dessert—warm, buttery, and just sweet enough. Try it once, and I promise it’ll find a permanent spot in your recipe rotation. When you make it, share your version—I’d love to hear how you put your own twist on this classic favorite.

Easy Homemade Apple Crisp
6
servings15
minutes40
minutes320
kcalApple crisp is that perfect middle ground between comforting and effortless. It’s not as fussy as pie but just as satisfying. Juicy, spiced apples get baked until tender, while the buttery oat topping turns golden and crisp. It’s warm, cozy, and pairs perfectly with a scoop of vanilla ice cream.
Ingredients
For the Apple Filling
6 medium apples, peeled, cored, and sliced (about 6 cups / 900g)
1 tablespoon lemon juice (15ml)
⅓ cup granulated sugar (65g)
1 teaspoon ground cinnamon
¼ teaspoon ground nutmeg
1 teaspoon vanilla extract
1 tablespoon all-purpose flour (8g)
For the Crisp Topping
1 cup old-fashioned oats (90g)
¾ cup all-purpose flour (95g)
¾ cup light brown sugar (150g)
½ cup unsalted butter, melted (115g)
½ teaspoon salt
½ teaspoon cinnamon
Directions
- Set your oven to 350°F (175°C). Grease your baking dish lightly with butter or nonstick spray.
- In a large bowl, combine sliced apples, lemon juice, sugar, cinnamon, nutmeg, vanilla, and flour. Toss until every slice is coated evenly. The flour helps thicken the juices as the apples bake. Spread this mixture evenly into your baking dish.
- In another bowl, mix oats, flour, brown sugar, salt, and cinnamon. Pour in the melted butter and stir until everything looks crumbly and evenly coated. The texture should feel like wet sand—this is what gives the topping that irresistible crunch.
- Sprinkle the oat mixture evenly over the apples. Don’t pack it down—just let it sit loosely so it bakes into a golden, crisp layer.
- Bake for 35–40 minutes, or until the top is golden brown and the apples are bubbling around the edges. The smell alone will tell you when it’s ready.
- Cool for about 10–15 minutes before serving. This gives the juices time to thicken slightly so you don’t end up with a soupy crisp.
Notes
- Don’t overmix the topping—crumbly is what you want.
Use cold apples, not room temperature; they hold their shape better.
Avoid overbaking—once the top is golden and crisp, it’s done.
Always let it rest before serving—this step keeps the texture perfect.
A mix of tart and sweet apples (like Granny Smith + Fuji) gives the best balance.