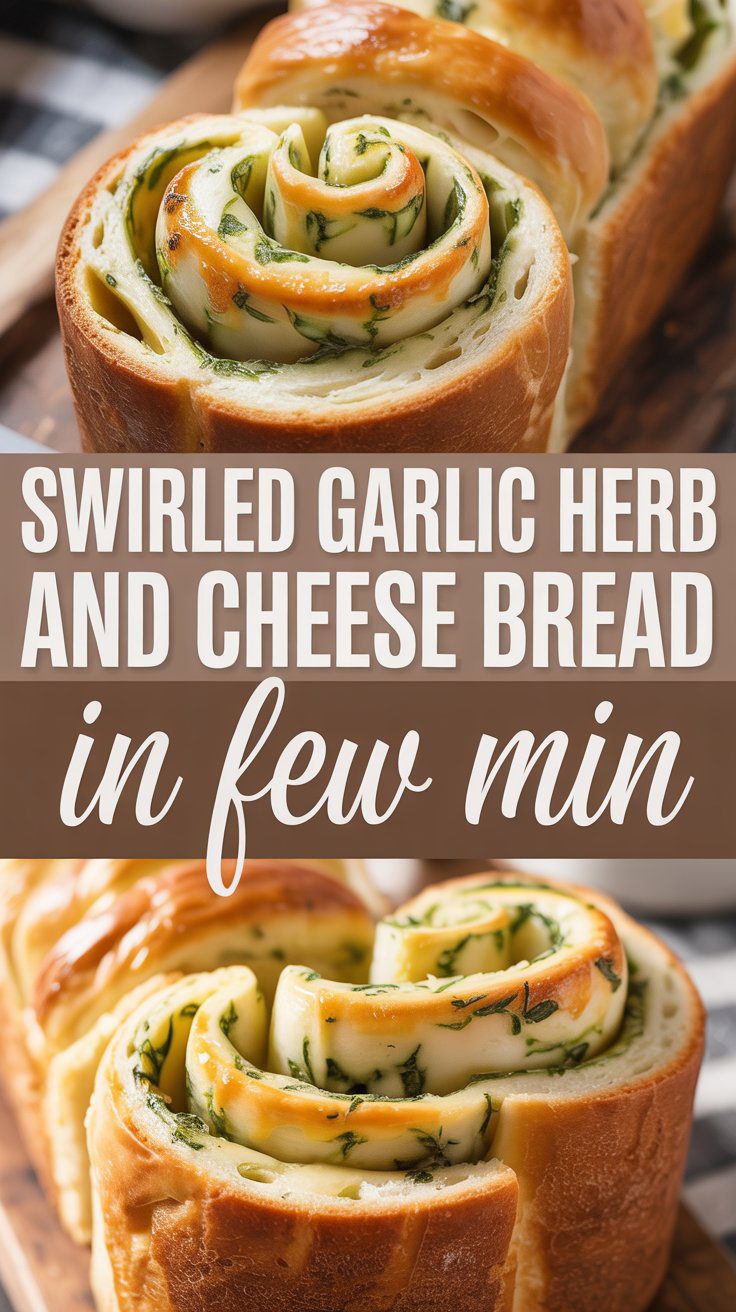
Cheesy Breadsticks Recipe

Cheesy breadsticks are simply irresistible to me. Perhaps it’s the melting cheese that doesn’t want to part with the other piece, or the buttery, garlicky smell peeling off the kitchen just before they are taking out the oven in their golden stage. To be honest, I consider them one of the most basic enjoyable things in life—and once you prepare them at home, you would not desire the store-bought ones ever again.
These breadsticks are soft and pillowy inside with crunchy and crisp edges outside, and they are all over with melted cheese that is so inviting that it wants to be dipped in marinara sauce. I usually present them together with spaghetti or soup, but they are also a great snack when eaten alone—aspecially when they are warm and fresh out of the oven.
Why This Recipe Is Special
I have made cheesy breadsticks in dozens of different ways, but this recipe will always be the best one and the reason is it is collusion-proof. The dough rises perfectly every time and the ratio of cheese to bread is exactly right—enough for you not to be bored with bread and to satisfy your craving at the same time. Moreover, you can use any cheese, for example, mozzarella, or sharp cheddar, or even a mix of three different cheeses for an extra flavor.
Why You’ll Love This Recipe
- Quick and easy: Simple ingredients, minimal effort, and no complicated steps.
- Cheesy perfection: Melty, gooey cheese layered on fluffy bread.
- Versatile: Serve it as a snack, appetizer, or side dish.
- Customizable: Mix and match your favorite cheeses and seasonings.
- Crowd-pleaser: Everyone—from kids to adults—whoever comes gets to take the second.
Tools You’ll Need
You don’t need fancy equipment, just a few kitchen basics:
- Mixing bowl: For combining and kneading the dough.
- Measuring cups and spoons: Accuracy matters when baking, especially for yeast dough.
- Whisk or fork: To mix the yeast and warm water.
- Baking sheet or pizza pan: For baking the breadsticks evenly.
- Rolling pin: Helps shape the dough into a flat rectangle.
- Pastry brush: For brushing on butter and garlic (you can use the back of a spoon if you don’t have one).
- Knife or pizza cutter: To cut even breadstick strips before baking.
Ingredients
For the Dough
- 2 ¼ tsp (7 g) active dry yeast
- ¾ cup (180 ml) warm water (about 110°F / 43°C)
- 1 tsp sugar
- 2 tbsp (30 ml) olive oil
- 1 ¾ cups (220 g) all-purpose flour, plus extra for dusting
- ½ tsp salt
For the Topping
- 2 tbsp (28 g) unsalted butter, melted
- 2 cloves garlic, finely minced (or ½ tsp garlic powder)
- 1 ½ cups (170 g) shredded mozzarella cheese
- ¼ cup (25 g) grated Parmesan cheese
- 1 tsp dried Italian herbs (or a mix of oregano, basil, and thyme)
- Pinch of red pepper flakes (optional, for a little kick)
Step-by-Step Instructions
1. Activate the Yeast
Take a big mixing bowl, pour in the warm water, add yeast, and then add sugar. Just stir lightly and leave it for brfore the foaming process, 5-10 minutes approximately, to be completed.
If nothing happens, your yeast might be expired—start over with fresh yeast and slightly warmer water.
2. Make the Dough
The dough mixture of yeast, flour, salt, and olive oil and mix until the dough is formed with a shaggy texture. After this, for about five minutes, knead the dough by hand on a lightly floured surface until it becomes smooth and elastic. It will be somewhat sticky in the beginning, but just keep kneading and it will eventually come together.
3. Let It Rise
The lightly oiled dough should be put in a bowl, a towel should cover it, and the dough should be placed in a warm place for 45-60 minutes to rise or until it doubles in size. I like to put it next to my oven or by a sunny window because it helps to speed up the yeast’s activity.
4. Preheat the Oven
After the dough has risen, the oven should be set to 425°F (220°C). A baking sheet should be lined with parchment paper.
5. Shape the Dough
The dough should be punched down to let the air bubbles out and then rolled out into a rectangle with a thickness of approximately ¼ inch (0.6 cm). The rolled-out dough should then be transferred to the prepared baking sheet.
6. Add the Toppings
In a small bowl, mix garlic and melted butter. Brush the dough evenly with the mixture. Add mozzarella, Parmesan, and Italian herbs to the top. If you would like some heat, add red pepper flakes.
This step smells heavenly—don’t be surprised if people wander into the kitchen.
7. Bake
Bake it for about 12 to 15 minutes or until the cheese is bubbly and has a golden-brown color. If you prefer crispy edges, bake for an additional one or two minutes.
8. Slice and Serve
Let it cool for around two minutes, then cut strips with the pizza cutter. Offer the pizza cutter, an accompanying sauce of your choice: marinara, ranch, or garlic butter, and hot.
Serving Ideas
- Ultimate meal deal: Pair with spaghetti, lasagna, or chicken Alfredo.
- Tomato basil or creamy broccoli are good soups to accompany this bread.
- Kids will love them as mini pizza sticks; just add the pepperoni before baking.
Variations & Customizations
- Cheese blend: Co-mingle mozzarella with cheddar, provolone, or gouda for a deeper flavor.
- Stuffed version: Before baking, put the cheese in the middle and fold the dough in half.
- Herb butter: Add fresh parsley or rosemary to the butter mixture.
- Spicy twist: Sprinkle chili flakes or drizzle hot honey after baking.
Storage & Make-Ahead Tips
- Room temperature: Store leftovers in an airtight container for up to 2 days.
- Refrigerate: Keeps well for 4–5 days. Reheat in the oven for best texture.
- Freeze: Wrap in foil and freeze for up to 2 months. Reheat directly from frozen at 350°F (175°C) for about 10 minutes.
- Make-ahead: Prepare the dough ahead, refrigerate overnight, and bake the next day.
Pro Tips & Mistakes to Avoid
- Use fresh yeast: Old yeast won’t rise properly—always check the date.
- Don’t over-flour: Too much flour makes the dough tough; keep it soft and slightly tacky.
- Warm water only: Hot water can kill the yeast. Aim for body temperature warm.
- Don’t skip resting: Letting the dough rise fully gives you that fluffy interior.
- Watch the bake time: Cheese burns fast—check around 12 minutes.
Recipe Details
- Yield: 10–12 breadsticks
- Prep time: 15 minutes
- Rise time: 1 hour
- Cook time: 15 minutes
- Total time: About 1 hour 30 minutes
Nutrition (per breadstick):
Calories: 160 | Protein: 7g | Fat: 6g | Carbs: 18g | Sodium: 220mg
Final Thoughts
There’s nothing quite like the smell of fresh cheesy breadsticks coming out of the oven—it’s that cozy, comforting aroma that makes a house feel like home. Every time I make these, I end up eating one (okay, two) straight off the pan before they even hit the table.
Cheesy Breadsticks
4
servings15
minutes15
minutes160
kcalThese breadsticks are soft and pillowy inside with crunchy and crisp edges outside, and they are all over with melted cheese that is so inviting that it wants to be dipped in marinara sauce. I usually present them together with spaghetti or soup, but they are also a great snack when eaten alone—aspecially when they are warm and fresh out of the oven.
Ingredients
For the Dough
2 ¼ tsp (7 g) active dry yeast
¾ cup (180 ml) warm water (about 110°F / 43°C)
1 tsp sugar
2 tbsp (30 ml) olive oil
1 ¾ cups (220 g) all-purpose flour, plus extra for dusting
½ tsp salt
For the Topping
2 tbsp (28 g) unsalted butter, melted
2 cloves garlic, finely minced (or ½ tsp garlic powder)
1 ½ cups (170 g) shredded mozzarella cheese
¼ cup (25 g) grated Parmesan cheese
1 tsp dried Italian herbs (or a mix of oregano, basil, and thyme)
Pinch of red pepper flakes (optional, for a little kick)
Directions
- Activate the Yeast
- Take a big mixing bowl, pour in the warm water, add yeast, and then add sugar. Just stir lightly and leave it for brfore the foaming process, 5-10 minutes approximately, to be completed.
- If nothing happens, your yeast might be expired—start over with fresh yeast and slightly warmer water.
- Make the Dough
- The dough mixture of yeast, flour, salt, and olive oil and mix until the dough is formed with a shaggy texture. After this, for about five minutes, knead the dough by hand on a lightly floured surface until it becomes smooth and elastic. It will be somewhat sticky in the beginning, but just keep kneading and it will eventually come together.
- Let It Rise
- The lightly oiled dough should be put in a bowl, a towel should cover it, and the dough should be placed in a warm place for 45-60 minutes to rise or until it doubles in size. I like to put it next to my oven or by a sunny window because it helps to speed up the yeast's activity.
- Preheat the Oven
- After the dough has risen, the oven should be set to 425°F (220°C). A baking sheet should be lined with parchment paper.
- Shape the Dough
- The dough should be punched down to let the air bubbles out and then rolled out into a rectangle with a thickness of approximately ¼ inch (0.6 cm). The rolled-out dough should then be transferred to the prepared baking sheet.
- Add the Toppings
- In a small bowl, mix garlic and melted butter. Brush the dough evenly with the mixture. Add mozzarella, Parmesan, and Italian herbs to the top. If you would like some heat, add red pepper flakes.
- This step smells heavenly—don’t be surprised if people wander into the kitchen.
- Bake
- Bake it for about 12 to 15 minutes or until the cheese is bubbly and has a golden-brown color. If you prefer crispy edges, bake for an additional one or two minutes.
- Slice and Serve
- Let it cool for around two minutes, then cut strips with the pizza cutter. Offer the pizza cutter, an accompanying sauce of your choice: marinara, ranch, or garlic butter, and hot.
Notes
- Use fresh yeast: Old yeast won’t rise properly—always check the date.
Don’t over-flour: Too much flour makes the dough tough; keep it soft and slightly tacky.
Warm water only: Hot water can kill the yeast. Aim for body temperature warm.
Don’t skip resting: Letting the dough rise fully gives you that fluffy interior.
Watch the bake time: Cheese burns fast—check around 12 minutes.


