Introduction
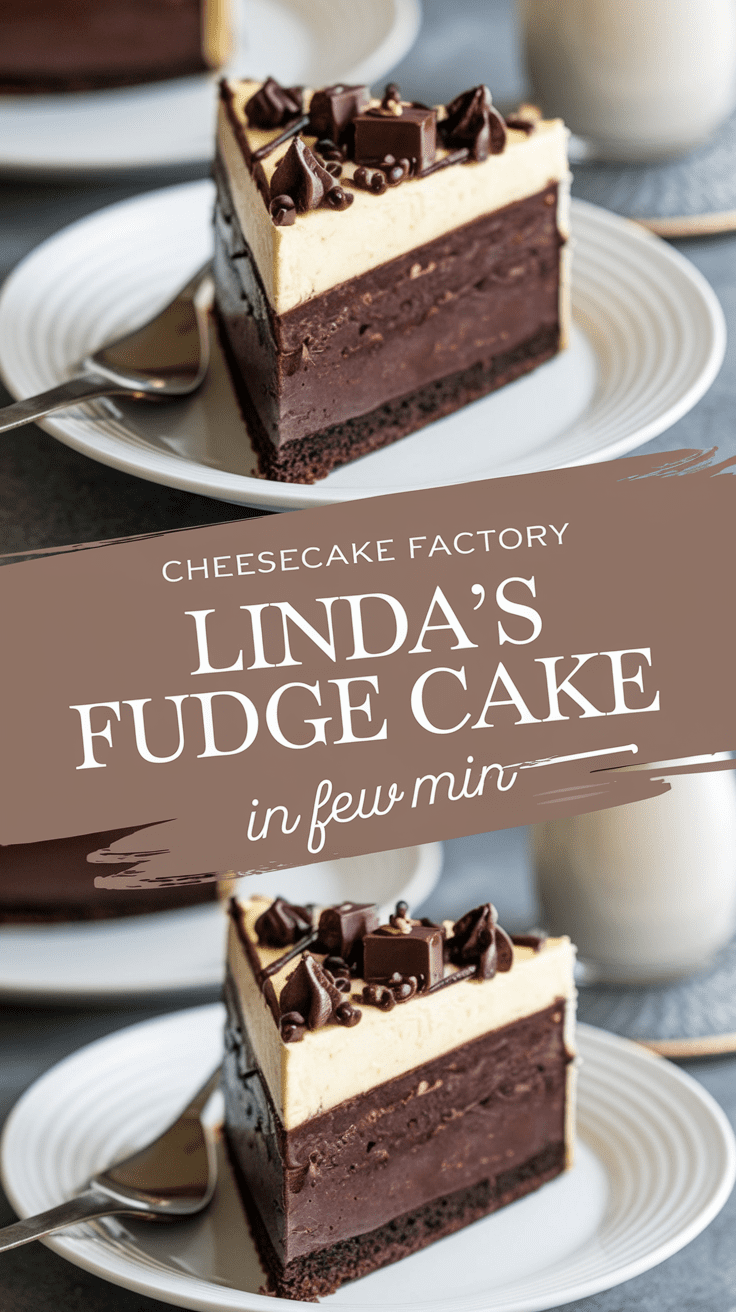
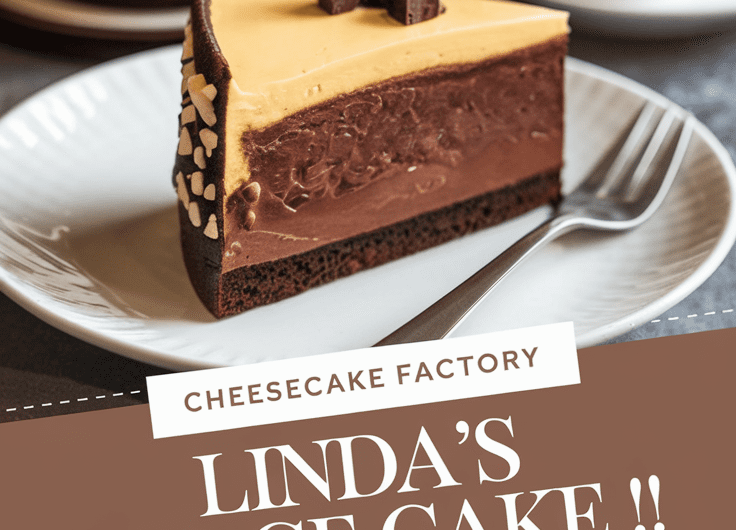
I’ll be honest with you — there’s something magical about a slice of Cheesecake Factory’s Linda’s Fudge Cake. It’s not just chocolate cake; it’s the chocolate cake. Every bite is a deep, rich experience — soft, moist layers of chocolate sponge hugged by thick, glossy fudge frosting. Whenever I order it, I feel like time pauses for a moment. And now, I’m going to show you how to recreate that same indulgent experience right in your kitchen.
This recipe is my personal take on the iconic dessert — the one you might have shared after dinner, or secretly ordered “for the table” (but really, for yourself). It’s wonderfully rich, surprisingly simple to make, and tastes like something straight out of a professional bakery.
What Is Linda’s Fudge Cake?
Linda’s Fudge Cake is a Cheesecake Factory classic — a triple-layer chocolate fudge cake with dense, moist texture and creamy chocolate frosting between every layer. It’s sweet, yes, but not cloying. It’s that perfect balance of tender crumb and melt-in-your-mouth chocolate.
This version keeps all the soul of the original but uses simple pantry ingredients and easy techniques you can handle right at home. You don’t need fancy pastry tools or professional equipment — just your love for chocolate and a little patience.
Why This Cake Is So Special
What sets Linda’s Fudge Cake apart from your typical chocolate cake is its texture. It’s rich without being heavy, fudgey without being gooey, and perfectly layered with silky, ganache-like frosting. Each bite feels like a celebration — of cocoa, butter, and pure happiness.
And honestly? Making it from scratch feels so rewarding. The moment you spread that glossy fudge frosting over the final layer, you’ll feel like a pro.
💖 Why You’ll Love This Recipe
- Deep, chocolatey flavor – Every layer is packed with cocoa goodness and real chocolate richness.
- Moist and tender crumb – The texture is perfectly soft thanks to buttermilk and oil.
- Restaurant-quality frosting – Smooth, shiny, and fudge-thick, just like the Cheesecake Factory’s version.
- Simple ingredients, big reward – No complicated techniques or fancy tools.
- Make-ahead friendly – Tastes even better the next day!
🧰 Tools You’ll Need
Don’t worry — nothing fancy here. Just the basics:
- 3 (8-inch / 20 cm) round cake pans – for those tall, gorgeous layers.
- Mixing bowls (large and medium) – one for dry ingredients, one for wet.
- Electric mixer or whisk – to get your batter nice and smooth.
- Rubber spatula – perfect for scraping every bit of chocolatey goodness.
- Measuring cups and spoons – precision matters with baking!
- Wire cooling rack – helps cool the cakes evenly.
- Offset spatula or butter knife – for spreading that luscious fudge frosting.
🧁 Ingredients
For the Cake Layers
- 2 cups (250 g) all-purpose flour
- 1 ¾ cups (350 g) granulated sugar
- ¾ cup (90 g) unsweetened cocoa powder (I prefer Dutch-process for deeper flavor)
- 2 tsp baking soda
- 1 tsp baking powder
- 1 tsp salt
- 2 large eggs, room temperature
- 1 cup (240 ml) buttermilk, room temperature
- 1 cup (240 ml) hot coffee (brings out the chocolate flavor!)
- ½ cup (120 ml) vegetable oil
- 2 tsp vanilla extract
For the Fudge Frosting
- 1 cup (230 g) unsalted butter
- 1 cup (90 g) unsweetened cocoa powder
- 5 cups (600 g) powdered sugar
- ⅔ cup (160 ml) heavy cream
- 2 tsp vanilla extract
- Pinch of salt
👩🍳 Step-by-Step Instructions
1. Prep the pans and preheat.
Preheat your oven to 350°F (175°C). Grease and line your cake pans with parchment paper — trust me, this makes removing the cakes stress-free later.
2. Mix the dry ingredients.
In a large bowl, whisk together flour, sugar, cocoa powder, baking soda, baking powder, and salt. I always sift my cocoa first — it helps prevent little clumps of bitterness.
3. Combine wet ingredients.
In another bowl, whisk eggs, buttermilk, oil, and vanilla. Once smooth, pour in the hot coffee (it’ll look thin — that’s good!).
4. Make the batter.
Pour the wet ingredients into the dry mixture and whisk until just combined. Don’t overmix — you want a smooth, pourable batter, not a dense one.
5. Bake.
Divide the batter evenly among the pans. Bake for 28–32 minutes, or until a toothpick comes out clean.
Let the cakes cool for 10 minutes in the pans, then transfer them to a wire rack to cool completely.
6. Make the fudge frosting.
In a saucepan over medium heat, melt butter. Stir in cocoa powder until smooth. Gradually alternate adding powdered sugar and cream, whisking continuously. Finish with vanilla and salt. You’ll end up with a silky, spreadable frosting that feels like chocolate heaven.
7. Assemble the cake.
Place one layer on your serving plate, spread frosting generously. Repeat with the second and third layers. Finally, coat the top and sides with the remaining frosting. Smooth it out (or go rustic — both look stunning).
🍰 Serving Ideas
- Serve with a scoop of vanilla ice cream for a hot-and-cold contrast.
- Add a drizzle of salted caramel for a gourmet twist.
- Top with chocolate curls or shaved dark chocolate for that Cheesecake Factory look.
🔄 Variations & Customizations
- Mocha Fudge Cake: Replace half the coffee with espresso.
- Peanut Butter Fudge Cake: Add a layer of peanut butter frosting between the chocolate ones.
- Mini Fudge Cakes: Bake in cupcake tins for individual servings — perfect for parties.
🧊 Storage & Make-Ahead
- Refrigerate: Store covered for up to 5 days. Let it come to room temperature before serving.
- Freeze: Wrap individual slices in plastic wrap, then foil. Freeze up to 3 months.
- Make-Ahead Tip: Bake the cake layers a day in advance, wrap tightly, and frost the next day.
💡 Pro Tips & Secrets to Success
- Use hot coffee – It deepens the cocoa flavor without tasting like coffee.
- Don’t rush cooling – Warm cakes will melt the frosting (I’ve learned this the hard way).
- Sift your cocoa – Always. It makes a noticeable difference in texture.
- Frost in two rounds – Do a “crumb coat” first (thin layer), chill for 15 minutes, then finish with the final coat for that bakery-smooth look.
- Use good chocolate – The flavor really shines, so don’t skimp!
⏱️ Recipe Details
- Yield: 12 generous slices
- Prep Time: 30 minutes
- Cook Time: 30 minutes
- Total Time: 1 hour (plus cooling time)
Per Serving (approx.):
- Calories: 580
- Fat: 28g
- Carbs: 77g
- Protein: 6g
❤️ Final Thoughts
Making Cheesecake Factory’s Linda’s Fudge Cake at home is more than just baking — it’s an act of joy. You’ll feel the anticipation as the cakes rise, the satisfaction of spreading the glossy frosting, and the pride when you take that first bite.
Cheesecake Factory Linda’s Fudge Cake
4
servings30
minutes30
minutes580
kcalLinda’s Fudge Cake is a Cheesecake Factory classic — a triple-layer chocolate fudge cake with dense, moist texture and creamy chocolate frosting between every layer. It’s sweet, yes, but not cloying. It’s that perfect balance of tender crumb and melt-in-your-mouth chocolate.
Ingredients
For the Cake Layers
2 cups (250 g) all-purpose flour
1 ¾ cups (350 g) granulated sugar
¾ cup (90 g) unsweetened cocoa powder (I prefer Dutch-process for deeper flavor)
2 tsp baking soda
1 tsp baking powder
1 tsp salt
2 large eggs, room temperature
1 cup (240 ml) buttermilk, room temperature
1 cup (240 ml) hot coffee (brings out the chocolate flavor!)
½ cup (120 ml) vegetable oil
2 tsp vanilla extract
For the Fudge Frosting
1 cup (230 g) unsalted butter
1 cup (90 g) unsweetened cocoa powder
5 cups (600 g) powdered sugar
⅔ cup (160 ml) heavy cream
2 tsp vanilla extract
Pinch of salt
Directions
- Prep the pans and preheat.
- Preheat your oven to 350°F (175°C). Grease and line your cake pans with parchment paper — trust me, this makes removing the cakes stress-free later.
- Mix the dry ingredients.
- In a large bowl, whisk together flour, sugar, cocoa powder, baking soda, baking powder, and salt. I always sift my cocoa first — it helps prevent little clumps of bitterness.
- Combine wet ingredients.
- In another bowl, whisk eggs, buttermilk, oil, and vanilla. Once smooth, pour in the hot coffee (it’ll look thin — that’s good!).
- Make the batter.
- Pour the wet ingredients into the dry mixture and whisk until just combined. Don’t overmix — you want a smooth, pourable batter, not a dense one.
- Bake.
- Divide the batter evenly among the pans. Bake for 28–32 minutes, or until a toothpick comes out clean.
- Let the cakes cool for 10 minutes in the pans, then transfer them to a wire rack to cool completely.
- Make the fudge frosting.
- In a saucepan over medium heat, melt butter. Stir in cocoa powder until smooth. Gradually alternate adding powdered sugar and cream, whisking continuously. Finish with vanilla and salt. You’ll end up with a silky, spreadable frosting that feels like chocolate heaven.
- Assemble the cake.
- Place one layer on your serving plate, spread frosting generously. Repeat with the second and third layers. Finally, coat the top and sides with the remaining frosting. Smooth it out (or go rustic — both look stunning).
Notes
- Use hot coffee – It deepens the cocoa flavor without tasting like coffee.
Don’t rush cooling – Warm cakes will melt the frosting (I’ve learned this the hard way).
Sift your cocoa – Always. It makes a noticeable difference in texture.
Frost in two rounds – Do a “crumb coat” first (thin layer), chill for 15 minutes, then finish with the final coat for that bakery-smooth look.
Use good chocolate – The flavor really shines, so don’t skimp!