Introduction
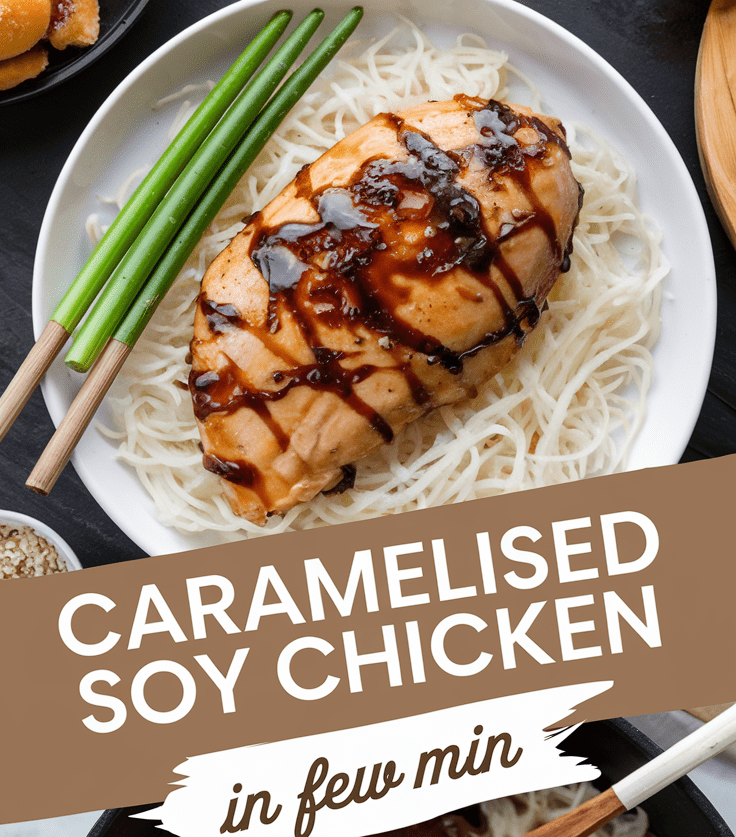
I have this little ritual: whenever I need a dinner that feels comforting but still a touch special, I reach for my caramelised soy chicken recipe. There’s just something about that glossy, sticky sauce—sweet, savory, a little smoky—that makes me feel like I’ve pulled off something way fancier than the effort required. And you? You’re about to have that exact same oh wow, I made this? moment in your kitchen.
What This Recipe Is All About
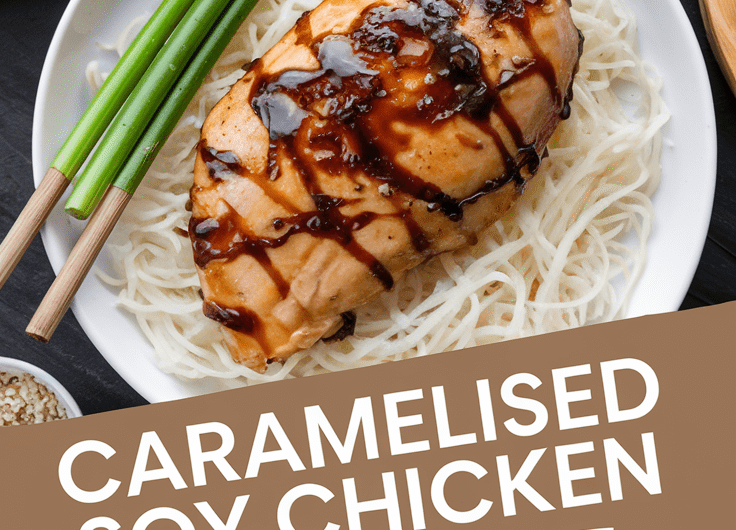
This is a simple stovetop chicken dish simmered in a deeply flavorful mix of soy sauce, caramelised sugar, garlic, and ginger until the meat turns tender and the sauce reduces into a shiny lacquer. It’s comforting, cozy, and ridiculously satisfying.
Why This Recipe Is Special
For me, it’s the kind of meal that bridges “weeknight quick” with “restaurant-level tasty.” It uses pantry ingredients, comes together in under an hour, and fills the kitchen with an aroma that makes everyone hover around the stove.
Why You’ll Love This Recipe
- It’s incredibly flavorful – you get sweet caramel notes, umami depth, and a hint of warmth from garlic and ginger.
- It’s easy enough for busy evenings – minimal tools, simple steps, and very forgiving.
- It’s customizable – want it spicier? stickier? saucier? You can do that.
- It’s meal-prep friendly – it reheats beautifully without drying out.
- It makes your kitchen smell amazing – the “people wander into the kitchen asking what you’re cooking” kind of amazing.
Tools You’ll Need
(I’ll tell you what each is for, just like if we were cooking together.)
- Large skillet or sauté pan – You want a wide surface so the sauce reduces evenly and the chicken browns nicely.
- Wooden spoon or spatula – This lets you gently scrape up the caramelized bits without damaging your pan.
- Tongs – Super helpful for flipping the chicken cleanly.
- Measuring cups & spoons – Accuracy matters when balancing sweet and salty flavors.
- Cutting board and knife – For prepping garlic, ginger, and any optional aromatics.
Ingredients (US & Metric)
(Nothing fancy—just pantry staples working extra hard.)
Chicken
- 2 lbs boneless chicken thighs (about 900 g), trimmed
- 1 tbsp neutral oil (15 ml)
Sauce
- ¼ cup soy sauce (60 ml)
- 3 tbsp brown sugar (40 g)
- 1 tbsp rice vinegar (15 ml)
- 1 tbsp water (15 ml)
- 4 cloves garlic, minced
- 1-inch piece fresh ginger, grated (about 1 tbsp / 15 g)
- Optional: ½–1 tsp red pepper flakes for heat
Finishing
- 1–2 green onions, sliced
- Sesame seeds (optional)
Recipe Time & Yield
- Yield: 4 servings
- Prep Time: 10 minutes
- Cook Time: 25 minutes
- Total Time: 35 minutes
Step-by-Step Instructions
(I’ll walk you through everything—nothing tricky here.)
1. Prep the sauce
In a small bowl, whisk together the soy sauce, brown sugar, vinegar, water, garlic, ginger, and (if you’re feeling bold today) red pepper flakes.
You’ll see the sugar doesn’t fully dissolve—that’s okay. It melts beautifully later.
2. Sear the chicken
Heat the oil in your skillet over medium-high. Add the chicken thighs in a single layer.
Let them get a nice golden sear—don’t fuss with them too much. You’ll want 3–4 minutes per side.
If they stick a little at first, resist the urge to pry—when they’re ready, they’ll release.
3. Pour in the sauce
Reduce heat to medium. Slowly pour the sauce over the chicken. The smell right here? That’s the good part beginning.
4. Simmer until sticky
Let everything bubble gently for 10–15 minutes. Flip the chicken once or twice. The sauce will start to darken and thicken.
If it seems too watery, don’t panic—give it a couple more minutes. If it thickens too fast, add a splash of water.
5. Reduce for a glossy finish
When the sauce reaches a syrupy consistency and coats the chicken, turn off the heat.
Tilt the pan and spoon that gorgeous glaze over the top.
6. Garnish and serve
Sprinkle with green onions and sesame seeds.
Pause. Admire the shine. You did that!
Serving Ideas
You’ve got options depending on your mood:
- Over hot jasmine rice
- With garlicky noodles
- On top of steamed veggies (broccoli loves this sauce)
- With a crisp cucumber salad to balance the sweetness
- Sliced into bao buns with pickled carrots
Variations & Customizations
- Extra sticky: Add an extra tablespoon of sugar.
- Spicier: Toss in sliced fresh chili or a teaspoon of chili crisp at the end.
- Citrusy: Add the zest of one lime to the sauce for brightness.
- Herby twist: Stir in chopped cilantro before serving.
- Crispier outside: After simmering, broil the chicken for 2–3 minutes.
Storage & Make-Ahead
- Fridge: Keeps 3–4 days in an airtight container.
- Freezer: Freeze up to 2 months; thaw overnight and reheat gently.
- Make-ahead tip: Mix the sauce ingredients 1–2 days early and store in a jar—half the work done!
Pro Tips (My Little Secrets)
- Don’t rush the simmer. The sauce transforms in the last few minutes—it goes from thin to glossy almost suddenly.
- Use thighs, not breasts. They hold moisture better and won’t dry out.
- Let the chicken brown properly. That early browning creates the base flavor for the whole dish.
- Taste at the end. If it’s too salty, add a tiny splash of water. Too sweet? A splash more vinegar brings balance.
- Avoid high heat once the sauce is in. Sugar burns fast, and you want caramel, not char.
Nutrition (Per Serving, Approximate)
- Calories: 320
- Protein: 28 g
- Carbohydrates: 14 g
- Fat: 16 g
- Sodium: 910 mg
(Will vary depending on sauce reduction and optional add-ins.)
Final Thoughts
I hope you cook this caramelised soy chicken and feel the same spark of kitchen confidence it gives me every time. There’s something incredibly satisfying about transforming simple ingredients into a dish that tastes like you put way more effort in than you actually did.
Caramelised Soy Chicken Recipe
4
servings10
minutes25
minutes320
kcalThis is a simple stovetop chicken dish simmered in a deeply flavorful mix of soy sauce, caramelised sugar, garlic, and ginger until the meat turns tender and the sauce reduces into a shiny lacquer. It’s comforting, cozy, and ridiculously satisfying.
Ingredients
Chicken
2 lbs boneless chicken thighs (about 900 g), trimmed
1 tbsp neutral oil (15 ml)
Sauce
¼ cup soy sauce (60 ml)
3 tbsp brown sugar (40 g)
1 tbsp rice vinegar (15 ml)
1 tbsp water (15 ml)
4 cloves garlic, minced
1-inch piece fresh ginger, grated (about 1 tbsp / 15 g)
Optional: ½–1 tsp red pepper flakes for heat
Finishing
1–2 green onions, sliced
Sesame seeds (optional)
Directions
- Prep the sauce
- In a small bowl, whisk together the soy sauce, brown sugar, vinegar, water, garlic, ginger, and (if you’re feeling bold today) red pepper flakes.
- You’ll see the sugar doesn’t fully dissolve—that’s okay. It melts beautifully later.
- Sear the chicken
- Heat the oil in your skillet over medium-high. Add the chicken thighs in a single layer.
- Let them get a nice golden sear—don’t fuss with them too much. You'll want 3–4 minutes per side.
- If they stick a little at first, resist the urge to pry—when they’re ready, they’ll release.
- Pour in the sauce
- Reduce heat to medium. Slowly pour the sauce over the chicken. The smell right here? That’s the good part beginning.
- Simmer until sticky
- Let everything bubble gently for 10–15 minutes. Flip the chicken once or twice. The sauce will start to darken and thicken.
- If it seems too watery, don’t panic—give it a couple more minutes. If it thickens too fast, add a splash of water.
- Reduce for a glossy finish
- When the sauce reaches a syrupy consistency and coats the chicken, turn off the heat.
- Tilt the pan and spoon that gorgeous glaze over the top.
- Garnish and serve
- Sprinkle with green onions and sesame seeds.
- Pause. Admire the shine. You did that!
Notes
- Don’t rush the simmer. The sauce transforms in the last few minutes—it goes from thin to glossy almost suddenly.
Use thighs, not breasts. They hold moisture better and won’t dry out.
Let the chicken brown properly. That early browning creates the base flavor for the whole dish.
Taste at the end. If it’s too salty, add a tiny splash of water. Too sweet? A splash more vinegar brings balance.
Avoid high heat once the sauce is in. Sugar burns fast, and you want caramel, not char.