I’ll be honest with you: this is one of those recipes I make when I want something that tastes like I spent hours in the kitchen—even though I barely did. Every time I cook caramelised soy chicken, I find myself hovering over the pan, watching the sauce turn glossy and sticky, smelling that warm mix of soy, garlic, and sugar melting into pure magic. And when you make it, I’m pretty sure you’ll feel the same way.
A quick look at this recipe
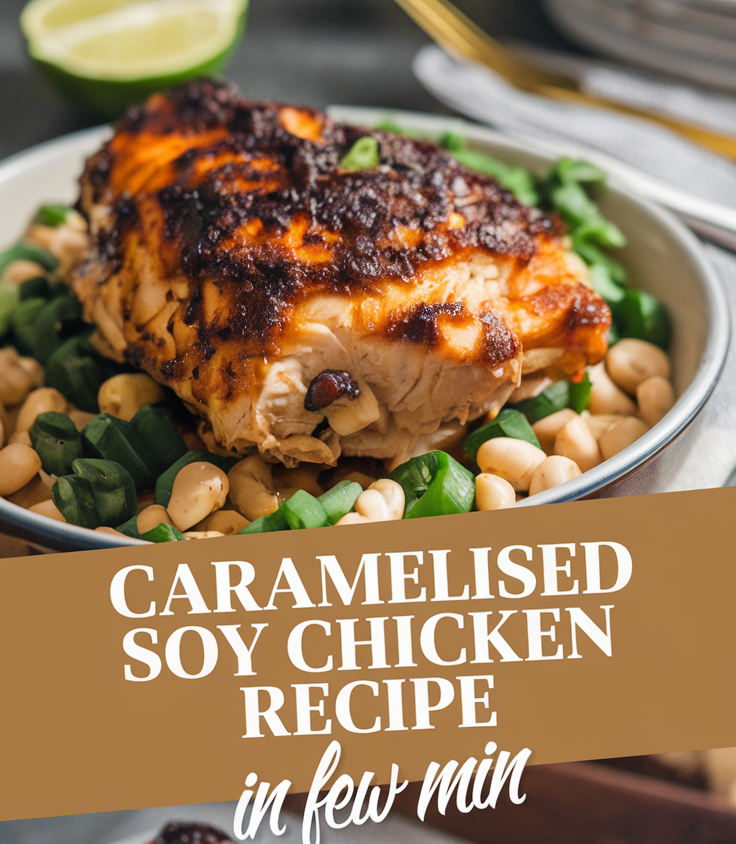
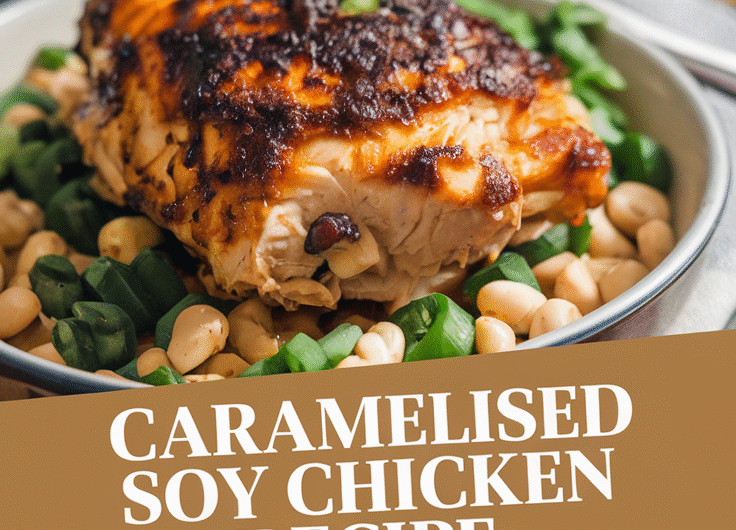
Caramelised soy chicken is juicy chicken simmered in a sweet, salty, sticky glaze made with soy sauce, brown sugar, garlic, and a touch of acidity. It’s simple, fast, and packed with flavor, which makes it perfect for weeknights but impressive enough for guests.
What makes this recipe special
For me, it’s the contrast. The chicken stays tender on the inside while the outside gets a lacquered coating that clings to every bite. The sauce thickens at just the right moment, turning into a caramel-like glaze that you can spoon over rice or vegetables. You get deep flavor without complicated steps, fancy ingredients, or long marinating times.
Why You’ll Love This Recipe
- Rich, balanced flavor that feels restaurant-worthy
- Quick enough for busy nights
- Uses everyday pantry ingredients
- Works with chicken thighs, drumsticks, or even wings
- Naturally adjustable for sweetness, saltiness, or spice
- Great for meal prep because the sauce reheats beautifully
Tools You’ll Need
Here’s what I reach for and why you’ll want them too:
- Large skillet or sauté pan – Wide surface helps the sauce reduce evenly and caramelize instead of steaming.
- Tongs – Makes flipping the chicken easy and keeps your hands safe from hot oil.
- Measuring cups and spoons – Accuracy really helps balance the sweet and salty flavors.
- Small bowl – For mixing the sauce before adding it to the pan.
- Wooden spoon or silicone spatula – Perfect for gently scraping the caramelised bits from the pan.
Ingredients (US + Metric)
Chicken:
- 2 lb (900 g) chicken thighs, bone-in or boneless
- 1 tbsp (15 ml) oil, any neutral variety
- Salt and pepper, to taste
Sauce:
- 1/4 cup (60 ml) soy sauce
- 1/4 cup (50 g) brown sugar
- 3 cloves garlic, minced (or 3 tsp / 9 g pre-minced)
- 1 tbsp (15 ml) rice vinegar or apple cider vinegar
- 1/2 cup (120 ml) water
- 1 tsp (5 g) grated ginger (optional but lovely)
- 1/2–1 tsp chili flakes (optional for heat)
Finish:
- 1–2 green onions, sliced
- Sesame seeds (optional)
How to Make Caramelised Soy Chicken
Step-by-step Instructions
- Season and sear the chicken
- Heat your skillet over medium heat and add the oil. Once it’s warm, place the chicken in the pan and season lightly with salt and pepper. Let it sear for a few minutes until one side gets a nice golden color. Don’t rush this—color means flavor.
- Flip and brown the other side
- Turn the chicken over with your tongs. If it sticks a bit, give it another minute; it’ll release naturally once it’s browned.
- Mix the sauce
- While the chicken cooks, whisk together soy sauce, brown sugar, garlic, vinegar, water, and ginger in a small bowl. You’ll see the sugar start dissolving almost instantly.
- Pour the sauce into the pan
- Carefully add the sauce around the chicken (not directly on top). The pan will sizzle a bit—this is your flavor base waking up.
- Simmer and reduce
- Lower the heat and let everything simmer uncovered for about 12–15 minutes. You’ll see the liquid slowly thicken and darken. Give it an occasional spoon-around to help the glaze form evenly.
- Caramelise the finish
- When the sauce turns syrupy and clings to the chicken, gently flip and spoon the glaze over the top. The surface will look shiny and deep brown—this is exactly what you want. If it thickens too quickly, add a splash of water.
- Serve and garnish
- Turn off the heat, sprinkle with green onions and sesame seeds, and breathe in that sweet-salty aroma before serving.
Serving Ideas
- Spoon it over steamed rice so it can absorb the sticky sauce.
- Pair with sautéed greens, like bok choy or spinach.
- Add noodles and toss everything together for a quick bowl dinner.
- Serve with roasted vegetables for a complete plate.
Variations and Customizations
- Use chicken wings for a snack-style version.
- Swap brown sugar for honey to get a lighter, floral sweetness.
- Add a splash of lime juice at the end if you prefer tangy over sweet.
- Toss in chili oil or sliced red chilies for a spicy kick.
- Add a teaspoon of sesame oil for deeper aroma.
Storage and Make-Ahead
- Fridge: Keeps well for 3–4 days in an airtight container.
- Freezer: Store cooked chicken in a freezer-safe container for up to 2 months.
- Reheating: Warm on the stove with a splash of water to loosen the glaze.
- Make-ahead tip: Mix the sauce 3 days ahead and store it in the fridge so dinner comes together faster.
Pro Tips and Mistakes to Avoid
- Let the chicken brown before adding the liquid—this step adds layers of flavor.
- Don’t walk away once the sauce starts reducing. It can go from perfect to burnt quickly.
- If your sauce tastes too salty, add a teaspoon of brown sugar or a splash of water.
- If using skin-on thighs, crisp the skin first for extra texture.
- Keep heat medium-low during the reduction to avoid scorching the sugar.
Recipe Details
- Yield: 4 servings
- Prep Time: 10 minutes
- Cook Time: 25 minutes
- Total Time: 35 minutes
- Nutrition (per serving, approx.): 310 calories, 22 g protein, 18 g fat, 12 g carbs
If you end up making this caramelised soy chicken, I’d genuinely love to hear how it turned out for you. Share it with someone who loves quick comfort food, or leave a comment with the tweaks you tried. Happy cooking—you’re going to love this one.
Caramelised Soy Chicken Recipe
4
servings10
minutes25
minutes310
kcalCaramelised soy chicken is juicy chicken simmered in a sweet, salty, sticky glaze made with soy sauce, brown sugar, garlic, and a touch of acidity. It’s simple, fast, and packed with flavor, which makes it perfect for weeknights but impressive enough for guests.
Ingredients
Chicken:
2 lb (900 g) chicken thighs, bone-in or boneless
1 tbsp (15 ml) oil, any neutral variety
Salt and pepper, to taste
Sauce:
1/4 cup (60 ml) soy sauce
1/4 cup (50 g) brown sugar
3 cloves garlic, minced (or 3 tsp / 9 g pre-minced)
1 tbsp (15 ml) rice vinegar or apple cider vinegar
1/2 cup (120 ml) water
1 tsp (5 g) grated ginger (optional but lovely)
1/2–1 tsp chili flakes (optional for heat)
Finish:
1–2 green onions, sliced
Sesame seeds (optional)
Directions
- Season and sear the chicken
- Heat your skillet over medium heat and add the oil. Once it’s warm, place the chicken in the pan and season lightly with salt and pepper. Let it sear for a few minutes until one side gets a nice golden color. Don’t rush this—color means flavor.
- Flip and brown the other side
- Turn the chicken over with your tongs. If it sticks a bit, give it another minute; it’ll release naturally once it's browned.
- Mix the sauce
- While the chicken cooks, whisk together soy sauce, brown sugar, garlic, vinegar, water, and ginger in a small bowl. You’ll see the sugar start dissolving almost instantly.
- Pour the sauce into the pan
- Carefully add the sauce around the chicken (not directly on top). The pan will sizzle a bit—this is your flavor base waking up.
- Simmer and reduce
- Lower the heat and let everything simmer uncovered for about 12–15 minutes. You’ll see the liquid slowly thicken and darken. Give it an occasional spoon-around to help the glaze form evenly.
- Caramelise the finish
- When the sauce turns syrupy and clings to the chicken, gently flip and spoon the glaze over the top. The surface will look shiny and deep brown—this is exactly what you want. If it thickens too quickly, add a splash of water.
- Serve and garnish
- Turn off the heat, sprinkle with green onions and sesame seeds, and breathe in that sweet-salty aroma before serving.
Notes
- Let the chicken brown before adding the liquid—this step adds layers of flavor.
Don’t walk away once the sauce starts reducing. It can go from perfect to burnt quickly.
If your sauce tastes too salty, add a teaspoon of brown sugar or a splash of water.
If using skin-on thighs, crisp the skin first for extra texture.
Keep heat medium-low during the reduction to avoid scorching the sugar.