There are certain dishes that just make you happy with the mere thought of them—and this one? It’s among them. Honestly speaking, I did not expect the Bacon Cheeseburger Tater Tot Cones to become a thing when I first made them. But I was so thrilled to bite into that cone of crispy, cheesy, meaty joy that I was already addicted. It is like your favorite bacon cheeseburger received a party upgrade. And if you are anything like me, you will be making these cones way more often than you intended.
What Are Bacon Cheeseburger Tater Tot Cones?
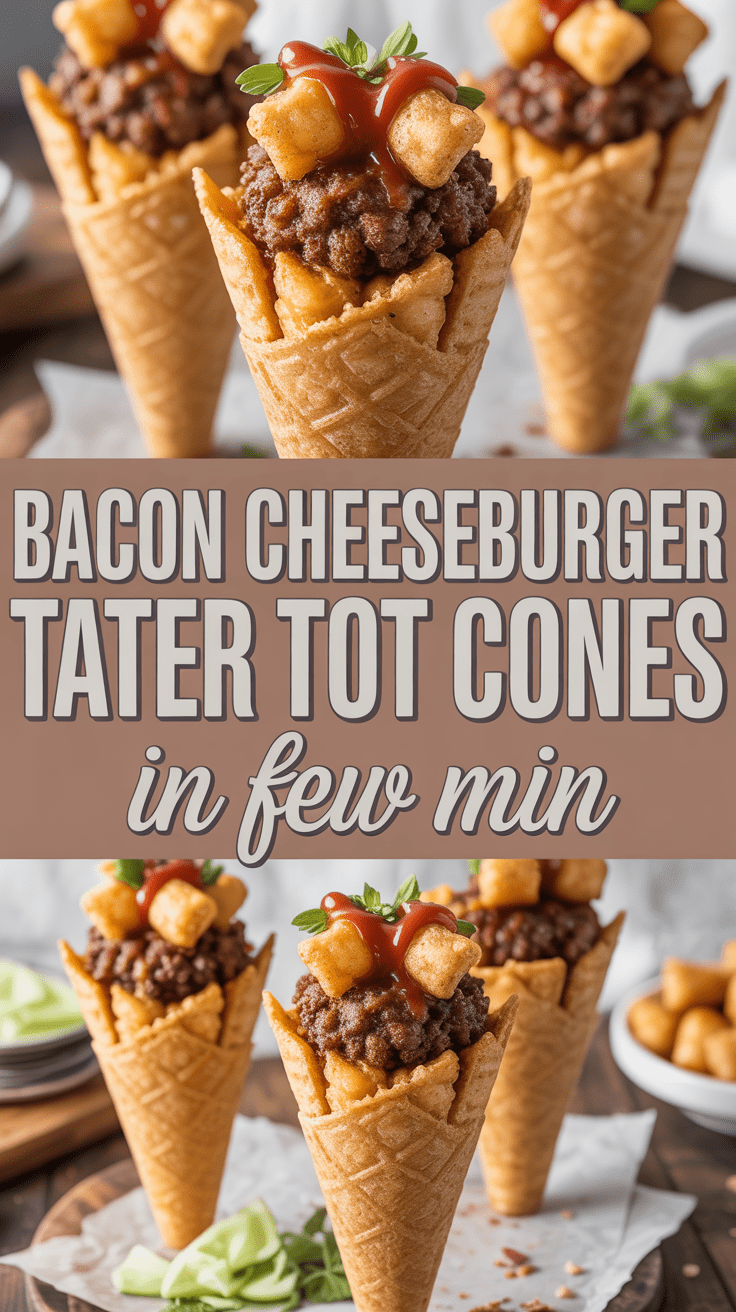
Picture a partially melted, golden cone made solely of tater tots—yes, that’s right. Then think of it overflowing with seasoned ground beef, melted cheese, and smoky bacon. It’s as if the most comforting parts of food were bundled into a handheld snack that is as fun to eat as it is to create. Regardless of whether you are preparing them for a bash, game day, or just a nice evening at home, these cones will never fail to delight.
Why This Recipe Is Special
The recipe’s uniqueness is the playful twist that turns a classic burger-and-fries duo into something entirely different yet familiar. While the crunchy tater tot fries serve as both the cone and the fries, the inside is juicy, cheesy, and savory perfection. The most interesting thing is that you can make it all your own—you can choose to smother it with your favorite toppings or sauces.
Why You’ll Love This Recipe
- Fun to Make: Building the tater tot cones feels like a little food project, and once you get the hang of it, it’s surprisingly easy.
- Crispy & Cheesy: The combination of the crunchy tots and creamy melted cheese is unbeatable.
- Customizable: You can change the beef to chicken, turkey, or even veggie crumbles.
- Crowd-Pleaser: Everybody will want more—perfect for game days, parties, or family dinners!
- Portable & Mess-Free: You can actually eat it with one hand!
Tools You’ll Need
Here’s everything you’ll need to make these golden beauties, with a few notes on why each tool matters:
- Baking Sheet: To crisp up the tater tots before shaping them into cones.
- Parchment Paper: Keeps your tots from sticking and makes cleanup easier.
- Cone Molds or Aluminum Foil: You can buy stainless-steel cone molds or make your own by shaping foil into cones. They’re the secret to getting that perfect shape.
- Skillet (10-inch / 25 cm): For cooking the beef and bacon mixture.
- Mixing Bowls: To toss ingredients or prep toppings.
- Tongs or Spatula: To flip, mix, and fill your cones neatly.
Ingredients
For the Tater Tot Cones:
- 1 bag (32 oz / 900 g) frozen tater tots
- Olive oil spray or melted butter, for brushing
- Salt and black pepper, to taste
For the Filling:
- 1 lb (450 g) ground beef (80/20 blend works best)
- 6 slices bacon, chopped
- 1 small onion, diced
- 1 tsp garlic powder
- 1 tbsp ketchup
- 1 tbsp yellow mustard
- 1 cup (120 g) shredded cheddar cheese
- Salt and pepper, to taste
Optional Toppings:
- Pickles, diced tomatoes, shredded lettuce, or extra cheese
- Burger sauce or mayo drizzle
Step-by-Step Instructions
1. Preheat and Prep
Preheat your oven to 425°F (220°C). Cover a baking sheet with parchment paper. Spread the tater tots in one layer and bake for approximately 15 minutes, until they are a little bit golden but not completely crunchy.
(You’re par-baking here so they’ll stick together better later—trust me, it makes shaping much easier.)
2. Shape the Cones
After the tots have slightly cooled, take your foil or cone molds and give them a light spray with cooking spray. Put the tater tots around each cone, overlapping a little bit to make a solid layer. In case you need it, use a little bit of shredded cheese as “glue”—it helps them stick together.
(Don’t worry if it’s not perfect; the tots crisp up and seal beautifully once baked again.)
3. Bake Until Crispy
Put your cones upright (tip down or they could be supported in a muffin tin) and bake for about 20 to 25 minutes or until they are deep golden brown and crunchy all around. Allow them a few minutes to cool, then take the mould or foil off them carefully.
4. Cook the Bacon and Beef
Meanwhile, the cones bake, cook your bacon cut into small pieces in a pan over medium heat until crispy. Take out the bacon and keep it set aside, but retain one tablespoon of the bacon fat in the pan.
Put the ground beef and diced onion. Ensure the onion is soft and the beef is brown, while stirring the beef as it cooks breaking it into smaller pieces. Discard any excess fat. Add garlic powder, ketchup, and mustard. Stir well and add the bacon and ¾ of the shredded cheese, then switch off the heat.
(When that cheese melts into the beef, it smells heavenly—this is where you’ll want to sneak a taste.)
5. Fill the Cones
Gently spoon the warm cheeseburger mixture into the tater tot cones and pack gently to fill all the corners. Place the remaining cheese on top and bake it for another 3 to 5 minutes just to melt the cheese and bubble.
6. Serve and Enjoy
Finally, add your preferred toppings these could be: pickles, lettuce, or a drizzle of ketchup.
Serving Ideas
You can serve these cones standing in a mug or cup (for that diner vibe) or lay them flat on a platter for easy grabbing. They’re perfect with:
- A little ranch or spicy mayonnaise for dipping
- Sweet potato fries for pairing
- A fresh coleslaw or garden salad to cut the richness
Variations & Customizations
- Tex-Mex Style: Jalapeños, taco seasoning, and pepper jack cheese do the trick.
- BBQ Bacon: Turn ketchup and mustard into barbecue sauce.
- Veggie Option: Eliminate bacon and use plant-based crumbles.
- Breakfast Version: Change beef with scrambled eggs and sausage, then sprinkle with cheese and chives.
Storage & Make-Ahead
- Make-Ahead: The tater tot cones can be baked and shaped a few hours early and then filled before serving.
- Storage: Keep the leftovers in an airtight container in the refrigerator and consume them within 3 days.
- To reheat, place in an oven at 375°F (190°C) for 10–12 minutes to regain crunchiness.
- Freezing: Unfilled cones can be frozen for a month. Bake directly from frozen at 400°F (200°C) for 15–18 minutes.
Pro Tips & Mistakes to Avoid
- Don’t Overbake the Tots Initially: If they are too hard when sculpting, they will break instead of sticking together.
- Use Cheese as Glue: Shredded cheese that is sprinkled holds the cone intact—it melts and merges the tots just right.
- Let the Cones Cool a Bit: Should you take out the mold too early, they might collapse a little.
- Here, patience pays off. Drain the Beef Well: Excess fat will make the cones moist inside.
- Serve Immediately: When the tots are crunchy and the filling is piping hot, these cones are simply irresistible.
Recipe Details
- Yield: 6–8 cones
- Prep Time: 20 minutes
- Cook Time: 35 minutes
- Total Time: 55 minutes
- Calories (per serving): ~420 kcal
If you are preparing these Bacon Cheeseburger Tater Tot Cones, kindly inform me of their outcome—I truly enjoy listening to the different ways people customize them. Take a picture, and share it among your friends, or write a comment regarding your favorite topping combination.
Bacon Cheeseburger Tater Tot Cones
4
servings20
minutes25
minutes420
kcalPicture a partially melted, golden cone made solely of tater tots—yes, that’s right. Then think of it overflowing with seasoned ground beef, melted cheese, and smoky bacon. It’s as if the most comforting parts of food were bundled into a handheld snack that is as fun to eat as it is to create. Regardless of whether you are preparing them for a bash, game day, or just a nice evening at home, these cones will never fail to delight.
Ingredients
For the Tater Tot Cones:
1 bag (32 oz / 900 g) frozen tater tots
Olive oil spray or melted butter, for brushing
Salt and black pepper, to taste
For the Filling:
1 lb (450 g) ground beef (80/20 blend works best)
6 slices bacon, chopped
1 small onion, diced
1 tsp garlic powder
1 tbsp ketchup
1 tbsp yellow mustard
1 cup (120 g) shredded cheddar cheese
Salt and pepper, to taste
Optional Toppings:
Pickles, diced tomatoes, shredded lettuce, or extra cheese
Burger sauce or mayo drizzle
Directions
- Preheat and Prep
- Preheat your oven to 425°F (220°C). Cover a baking sheet with parchment paper. Spread the tater tots in one layer and bake for approximately 15 minutes, until they are a little bit golden but not completely crunchy.
- (You’re par-baking here so they’ll stick together better later—trust me, it makes shaping much easier.)
- Shape the Cones
- After the tots have slightly cooled, take your foil or cone molds and give them a light spray with cooking spray. Put the tater tots around each cone, overlapping a little bit to make a solid layer. In case you need it, use a little bit of shredded cheese as “glue”—it helps them stick together.
- (Don’t worry if it’s not perfect; the tots crisp up and seal beautifully once baked again.)
- Bake Until Crispy
- Put your cones upright (tip down or they could be supported in a muffin tin) and bake for about 20 to 25 minutes or until they are deep golden brown and crunchy all around. Allow them a few minutes to cool, then take the mould or foil off them carefully.
- Cook the Bacon and Beef
- Meanwhile, the cones bake, cook your bacon cut into small pieces in a pan over medium heat until crispy. Take out the bacon and keep it set aside, but retain one tablespoon of the bacon fat in the pan.
- Put the ground beef and diced onion. Ensure the onion is soft and the beef is brown, while stirring the beef as it cooks breaking it into smaller pieces. Discard any excess fat. Add garlic powder, ketchup, and mustard. Stir well and add the bacon and ¾ of the shredded cheese, then switch off the heat.
- (When that cheese melts into the beef, it smells heavenly—this is where you’ll want to sneak a taste.)
- Fill the Cones
- Gently spoon the warm cheeseburger mixture into the tater tot cones and pack gently to fill all the corners. Place the remaining cheese on top and bake it for another 3 to 5 minutes just to melt the cheese and bubble.
- Serve and Enjoy
- Finally, add your preferred toppings these could be: pickles, lettuce, or a drizzle of ketchup.
Notes
- Don’t Overbake the Tots Initially: If they are too hard when sculpting, they will break instead of sticking together.
Use Cheese as Glue: Shredded cheese that is sprinkled holds the cone intact—it melts and merges the tots just right.
Let the Cones Cool a Bit: Should you take out the mold too early, they might collapse a little.
Here, patience pays off. Drain the Beef Well: Excess fat will make the cones moist inside.
Serve Immediately: When the tots are crunchy and the filling is piping hot, these cones are simply irresistible.