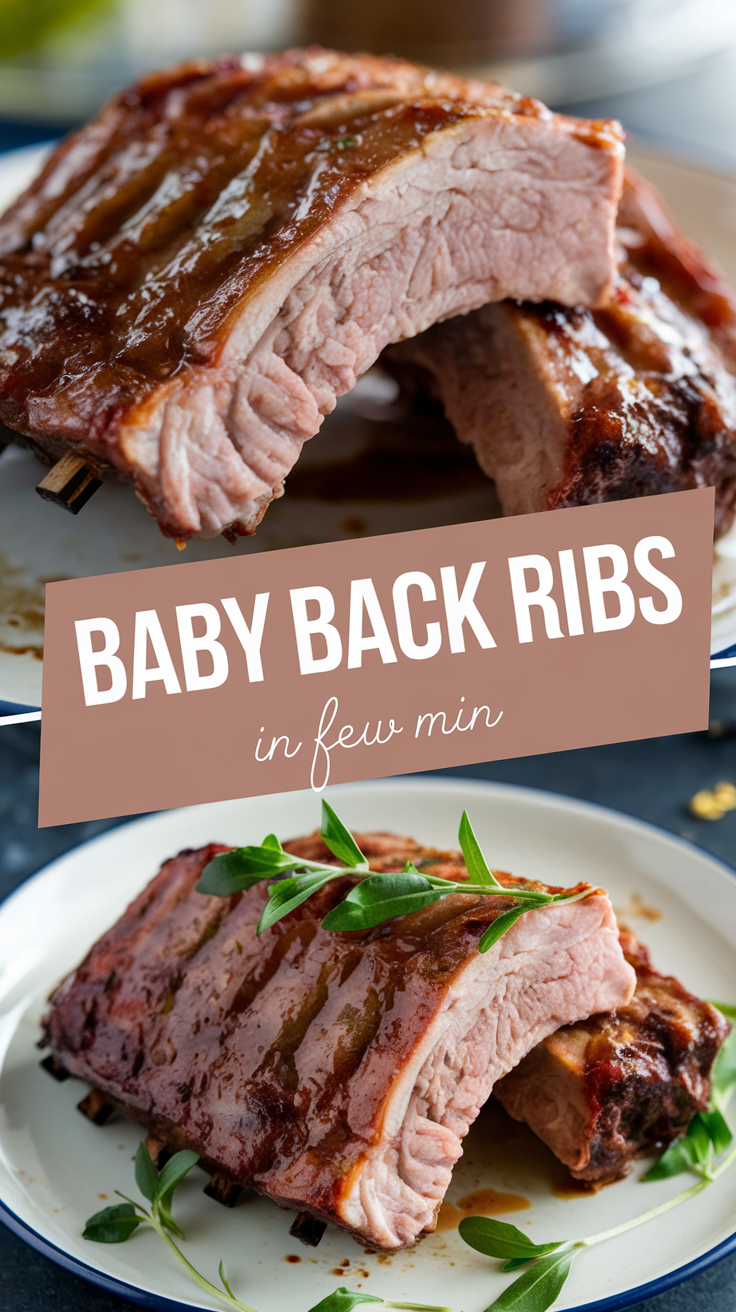
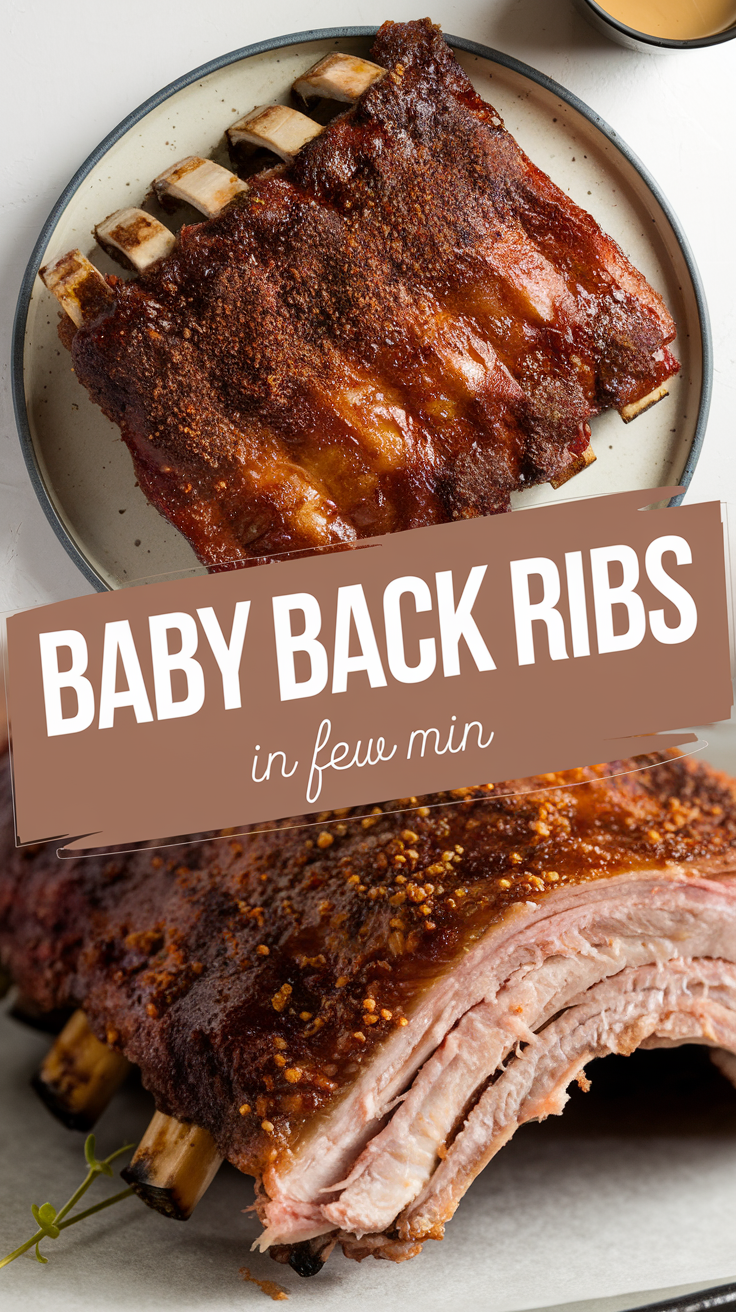
Baby back ribs have a kind of magic about them. To me, they scream comfort food: the kind of food that makes you forget about everything, right after that first juicy, smoky, fall-off-the-bone bite. Every time I make ribs, it seems like giving a gift to me (and anyone lucky enough to eat along with me). And I assure you, you-once you master it, you will feel it similar.
A Short Introduction
Depending on where they lie in the rib cage, baby back ribs are the ribs closely attached to the backbone, making them tenderer than spare ribs area most people prefer for oven, grill, or smoker preparations. This irresistible slow-baked classic barbecue flavor with a perfect blend of smoky sweetness and spicy savor gives it that classic slow-cooked caramel taste.
Why This Recipe Is Special
I have tried numerous rib recipes over the years, but this is the one that gets it done for me. Foolproof and incredibly flavorful, it works beautifully with both barbecue novices and rib veterans. What sets it apart is the classic low-and-slow method, where time does most of the work, bringing irresistibly layers of flavor with simple spice rub and glaze.
The best part? You don’t need a fancy smoker or professional setup. Just patience, love, and maybe a little nap while the ribs do their thing.
Why You’ll Love This Recipe
- Tender and fall-off-the-bone perfect: No knife required.
- Customizable flavor: sweet, smoky, spicy-you decide.
- Minimal effort, restaurant-quality results: super easy prep, huge payoff.
- Ideal for any occasion: backyard barbecue, family dinner, or weekend treat.
- Oven and grill-compatible: works beautifully either way.
Tools You’ll Need
- Baking Sheet or Grill Pan – For even heat distribution.
- Wire Rack – Keeps the ribs elevated so they cook evenly.
- Aluminum Foil – Traps moisture for tender ribs during baking.
- Tongs – For flipping and glazing without burning your hands.
- Basting Brush – Helps apply the BBQ sauce evenly.
- Meat Thermometer – Optional, but great for checking doneness (around 190°F / 88°C for fall-apart ribs).
Ingredients
For the Ribs
- 2 racks baby back ribs (about 4 pounds / 1.8 kg total)
- 1 tablespoon olive oil (15 ml)
For the Dry Rub
- 2 tablespoons brown sugar (30 g)
- 1 tablespoon paprika (7 g)
- 1 teaspoon garlic powder (3 g)
- 1 teaspoon onion powder (3 g)
- 1 teaspoon salt (6 g)
- 1 teaspoon black pepper (4 g)
- ½ teaspoon cayenne pepper (optional, 1 g)
For the BBQ Glaze
- 1 cup barbecue sauce (240 ml, your favorite brand or homemade)
- 1 tablespoon apple cider vinegar (15 ml)
- 1 tablespoon honey (15 ml)
- 1 teaspoon Worcestershire sauce (5 ml)
Step-by-Step Instructions
1. Prep the Ribs
Dry the ribs thoroughly using paper towels. Pull the thin silver membrane against the back of the ribs: just slide a knife under it, grab with a paper towel, and pull. Do not skip this; it tenderizes the meat.
2. Apply the Dry Rub
Rub the ribs lightly with olive oil. Mix all of the dry rub ingredients together and rub them into the meat on both sides really well. Next, wrap in cling film and leave in the fridge for at least 1 hour (better, overnight).
3. Preheat and Prep
For baking, preheat your oven to 300°F (150°C). Line your baking tray with foil and place a wire rack on top. If using the grill, heat your grill to medium-low and arrange it for indirect cooking.
4. Cook Low and Slow
Place the ribs bone-side-down on the rack or grill. Tightly seal with foil and bake (or grill) for 2½ to 3 hours. You will know they are ready when the meat pulls away from the bone.
5. Glaze Time
Combine the barbecue sauce, apple cider vinegar, honey, and Worcestershire sauce in a bowl. Brush half of the glaze over the ribs.
6. Caramelize
Raise the oven temperature to 425 °F (220 °C); otherwise, move the ribs to direct heat on the grill. Uncover and let cook for an additional 15-20 minutes, brushing occasionally with the remaining glaze, until glossy, sticky, and utterly irresistible.
7. Rest and Serve
Allow ribs to rest for 10 minutes, slice, and serve. That keeps all the juices where they’re supposed to be-in the meat.
Serving Ideas
- Creamy coleslaw, cornbread, and baked beans complete the BBQ feast.
- Or serve with grilled corn on the cob and wash down with a cold drink on a summer day.
- For a twist, drizzle extra honey or sprinkle chopped green onions just before serving.
Variations and Customization
- Spicy: Add cayenne or chili flakes to the rub to kick it up a notch.
- Smoky: Mix in a teaspoon of liquid smoke with your BBQ glaze.
- Sweet & Sour: Use maple syrup or molasses in place of honey.
Make-Ahead and Storage
- Make-Ahead: Cook the ribs through step 4, then refrigerate (up to 2 days). When ready, reheat, glaze, and caramelize as usual.
- Storage: Store leftovers in an airtight container in the fridge for up to 4 days.
- Reheat: Wrap in foil and warm in a 300°F (150°C) oven for 15 minutes, or microwave briefly.
Pro Tips & Mistakes to Avoid
Pro Tips:
- Use fresh ribs, not frozen-the texture counts.
- The rest afterward is nonnegotiable: It locks in the moisture.
- For maximum flavor, rub and soak overnight in the refrigerator.
Mistakes to Avoid:
Don’t hurry cooking. Ribs need time to break down and get tender.
Do not boil ribs first before baking or grilling; it drains flavor.
Don’t sauce them too much; you want to glaze, not drown.
Recipe Details
- Yield: 4–6 servings
- Prep Time: 20 minutes
- Cook Time: 3 hours 15 minutes
- Total Time: About 3½ hours
- Calories: ~520 per serving (varies by BBQ sauce used)
Final Thoughts
If you’ve never made baby back ribs before, I get it—it seems intimidating. But trust me, once you see that deep golden glaze and taste that tender meat falling apart under your fork, you’ll realize it’s totally worth it.
Give this recipe a try next weekend. Snap a photo, share it, and let me know how it turned out. I have a feeling these ribs will become one of your new go-to comfort meals.
Baby Back Ribs
4
servings15
minutes3
hours15
minutes520
kcalDepending on where they lie in the rib cage, baby back ribs are the ribs closely attached to the backbone, making them tenderer than spare ribs area most people prefer for oven, grill, or smoker preparations. This irresistible slow-baked classic barbecue flavor with a perfect blend of smoky sweetness and spicy savor gives it that classic slow-cooked caramel taste.
Ingredients
For the Ribs
2 racks baby back ribs (about 4 pounds / 1.8 kg total)
1 tablespoon olive oil (15 ml)
For the Dry Rub
2 tablespoons brown sugar (30 g)
1 tablespoon paprika (7 g)
1 teaspoon garlic powder (3 g)
1 teaspoon onion powder (3 g)
1 teaspoon salt (6 g)
1 teaspoon black pepper (4 g)
½ teaspoon cayenne pepper (optional, 1 g)
For the BBQ Glaze
1 cup barbecue sauce (240 ml, your favorite brand or homemade)
1 tablespoon apple cider vinegar (15 ml)
1 tablespoon honey (15 ml)
1 teaspoon Worcestershire sauce (5 ml)
Directions
- Prep the Ribs
- Dry the ribs thoroughly using paper towels. Pull the thin silver membrane against the back of the ribs: just slide a knife under it, grab with a paper towel, and pull. Do not skip this; it tenderizes the meat.
- Apply the Dry Rub
- Rub the ribs lightly with olive oil. Mix all of the dry rub ingredients together and rub them into the meat on both sides really well. Next, wrap in cling film and leave in the fridge for at least 1 hour (better, overnight).
- Preheat and Prep
- For baking, preheat your oven to 300°F (150°C). Line your baking tray with foil and place a wire rack on top. If using the grill, heat your grill to medium-low and arrange it for indirect cooking.
- Cook Low and Slow
- Place the ribs bone-side-down on the rack or grill. Tightly seal with foil and bake (or grill) for 2½ to 3 hours. You will know they are ready when the meat pulls away from the bone.
- Glaze Time
- Combine the barbecue sauce, apple cider vinegar, honey, and Worcestershire sauce in a bowl. Brush half of the glaze over the ribs.
- Caramelize
- Raise the oven temperature to 425 °F (220 °C); otherwise, move the ribs to direct heat on the grill. Uncover and let cook for an additional 15-20 minutes, brushing occasionally with the remaining glaze, until glossy, sticky, and utterly irresistible.
- Rest and Serve
- Allow ribs to rest for 10 minutes, slice, and serve. That keeps all the juices where they're supposed to be-in the meat.