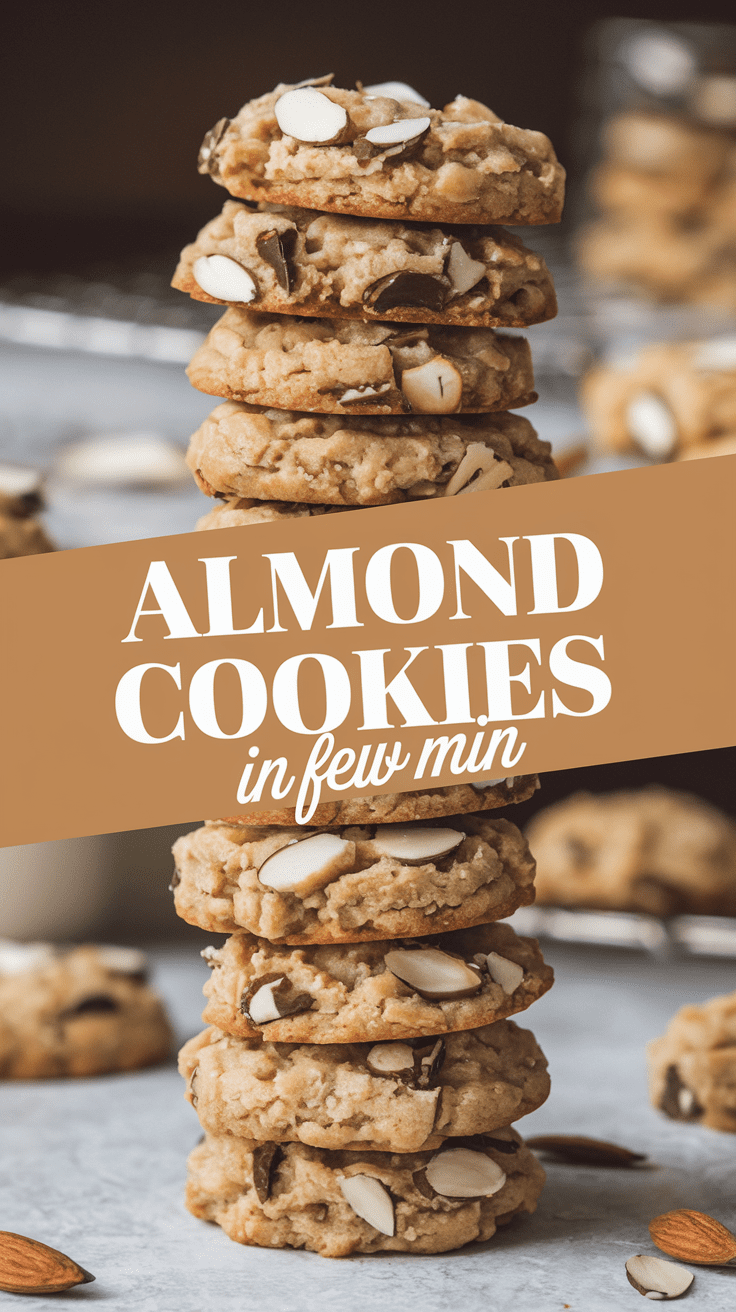
These almond cookies are crisp on the edges, soft in the center, lightly chewy, and deeply nutty. They’re the kind of treat you can whip up when you’re craving something homemade but don’t feel like wrestling with complicated steps or ingredients. You’ll be done before you know it. and the payoff tastes like you spent way more time than you did.
Why these almond cookies feel special
I think what sets this recipe apart is the balance. The almond flavor is full but not overpowering. The texture is tender but not fragile. And because the ingredients are so simple, the taste stays clean and pure. It’s the cookie version of a warm hug.
Why you’ll love this recipe
- Big almond flavor with simple everyday ingredients
- No chilling required, so you can bake right away
- Naturally gluten-free if you use almond flour only
- Perfect for gifting or holiday cookie boxes
- Quick to make. quicker to eat
- Easy enough for beginners. satisfying enough for experienced bakers
Almond Cookies Recipe
Yield: About 20 cookies
Prep Time: 10 minutes
Cook Time: 12–15 minutes
Total Time: 25 minutes
Nutrition (per cookie): ~105 calories, 6g fat, 11g carbs, 2g protein
Tools you’ll need
I’ll keep it simple. every tool here earns its place.
- Mixing Bowl
- You’ll stir everything together here. any medium bowl works great.
- Whisk or Fork
- Helps break up the egg and mix the sugar smoothly.
- Rubber Spatula
- Makes combining the almond flour much easier and keeps things gentle.
- Baking Sheet
- Line it with parchment so cleanup feels like a reward.
- Cookie Scoop or Spoon
- This keeps the cookies the same size so they bake evenly.
- Cooling Rack
- The cookies crisp up nicely on the edges when air can flow under them.
Ingredients (US + metric)
Dry ingredients
- 2 cups (200g) almond flour
- 3/4 cup (150g) granulated sugar
- Pinch of salt
Wet ingredients
- 1 large egg (50g)
- 1 tsp almond extract (5ml)
- 1/2 tsp vanilla extract (2.5ml)
Optional toppings
- Sliced almonds
- Powdered sugar for dusting
Step-by-step instructions
Follow me. I’ll walk you through it like we’re baking side by side.
- Preheat your oven to 350°F (175°C)
- Get your oven warmed up first. it keeps the baking time accurate.
- Mix the sugar, egg, and extracts
- In your bowl, whisk the egg until smooth. add the sugar, almond extract, and vanilla. It should look thick and glossy at this point. If it feels too stiff, don’t worry. the almond flour will balance it out.
- Add the almond flour and salt
- Switch to your spatula now. Fold in the almond flour gently. You’ll feel the dough come together into a soft, slightly sticky ball. That’s exactly what we want.
- Shape the cookies
- Scoop about 1 tablespoon of dough for each cookie. Roll lightly between your palms if you like them rounder. I normally press sliced almonds on top because it makes them look bakery fancy with zero effort.
- Bake
- Slide the tray in the oven and bake for 12–15 minutes. You’re looking for light golden edges. If they look a bit pale in the center, that’s intentional. they’ll finish setting as they cool.
- Cool completely
- This is the tough part. but give them at least 10–15 minutes on the rack. That cooling time gives you the perfect chewy-soft center.
Serving ideas
- Pair with coffee or chai for that nutty-sweet contrast
- Dip half the cookie in melted chocolate for a fancier vibe
- Crumble them over yogurt or ice cream
- Add them to holiday gift tins. they travel really well
Variations and add-ins
- Lemon almond cookies. add 1 tsp lemon zest for a bright lift
- Coconut almond cookies. stir in 2 tbsp desiccated coconut
- Chocolate almond cookies. mix in 1/4 cup mini chocolate chips
- Honey-almond twist. replace 2 tbsp sugar with honey for a deeper sweetness
Storage and make-ahead
These cookies store like champs.
- Room temperature: 5–6 days in an airtight jar
- Freezer: up to 2 months
- To freeze dough balls: scoop, freeze solid, then bake straight from frozen (add 1–2 extra minutes)
Pro tips and mistakes to avoid
Alright. friend-to-friend honesty here.
- Don’t overbake. almond cookies can go from perfect to dry pretty fast
- Almond extract is strong. don’t eyeball it unless you trust your hand
- If your dough feels too sticky, give it 2–3 minutes to rest. almond flour absorbs moisture
- Want prettier cookies? wet your fingertips and smooth the tops before baking
- Let them cool completely. the texture depends on it
A warm little send-off
I hope you make these almond cookies soon because I genuinely think you’re going to love how easy and comforting they are. If you bake them, tell me how they turned out or what twist you added. Sharing your kitchen wins always makes my day.

almond cookies
4
servings10
minutes15
minutes105
kcalI think what sets this recipe apart is the balance. The almond flavor is full but not overpowering. The texture is tender but not fragile. And because the ingredients are so simple, the taste stays clean and pure. It’s the cookie version of a warm hug.
Ingredients
Dry ingredients
2 cups (200g) almond flour
3/4 cup (150g) granulated sugar
Pinch of salt
Wet ingredients
1 large egg (50g)
1 tsp almond extract (5ml)
1/2 tsp vanilla extract (2.5ml)
Optional toppings
Sliced almonds
Powdered sugar for dusting
Directions
- Preheat your oven to 350°F (175°C)
- Get your oven warmed up first. it keeps the baking time accurate.
- Mix the sugar, egg, and extracts
- In your bowl, whisk the egg until smooth. add the sugar, almond extract, and vanilla. It should look thick and glossy at this point. If it feels too stiff, don’t worry. the almond flour will balance it out.
- Add the almond flour and salt
- Switch to your spatula now. Fold in the almond flour gently. You’ll feel the dough come together into a soft, slightly sticky ball. That’s exactly what we want.
- Shape the cookies
- Scoop about 1 tablespoon of dough for each cookie. Roll lightly between your palms if you like them rounder. I normally press sliced almonds on top because it makes them look bakery fancy with zero effort.
- Bake
- Slide the tray in the oven and bake for 12–15 minutes. You’re looking for light golden edges. If they look a bit pale in the center, that’s intentional. they’ll finish setting as they cool.
- Cool completely
- This is the tough part. but give them at least 10–15 minutes on the rack. That cooling time gives you the perfect chewy-soft center.