Fried Ice Cream Delight
A Crispy, Creamy Dessert You’ll Fall in Love With
Introduction
Honestly, I must say that I was a doubter at first when I heard of fried ice cream for the very first time. Just consider it, how could a frozen item survive a plunge into boiling oil and not become a miserable puddle? But, to my surprise, the first bite of it made me change my mind completely. Just think of it as a crispy, golden outer layer giving way to a cold, creamy ice cream scoop inside. It is magic, pure—like opposites falling in love and making it work perfectly. In case you are a newbie to the idea of deep-frying ice cream, you need not be concerned—I’m here for you. This recipe is surprisingly simple once you get to know the secret: temperatures and timing are the key factors. Then, going with the success of this technique will make you prepare this again and again (especially when you need to show your guests how good you are, or if you would like to pamper yourself with something sweet).
What Is Fried Ice Cream?
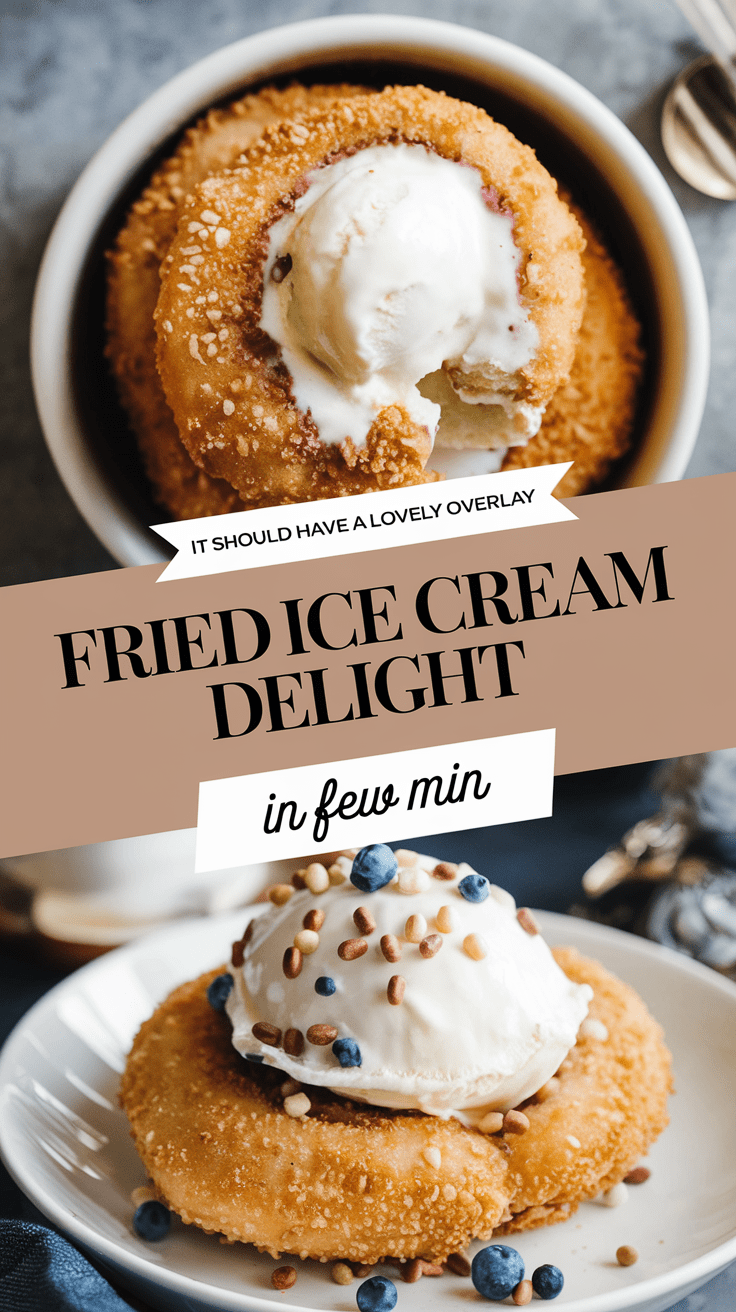
Fried ice cream is a fun-loving dessert that serves hot and cold, crunchy and creamy—all in one mouthful. By tradition, it’s a scoop of ice cream enveloped in a crispy shell (often consisting of crushed cornflakes or cookies), frozen rock-solid, and then quickly fried such that the coating acquires a beautifully golden hue while the ice cream inside remains frozen. This modification—my Fried Ice Cream Delight—is from the versions I used to order at my all-time favorite Mexican restaurant as a child, with the addition of a little bit more buttery crunch and a sprinkling of cinnamon warmth.
Why This Recipe Is Special
The specialness lies in the balance of texture and flavors of the fried ice cream. You experience the deep, toasty crunch of the coating, the silky chill of the ice cream, and that note of buttery sweetness over the whole that binds them together. It seems opulent yet at the same time, it has the feeling of the past—like the exhibition of fair food in fine dining at home. What’s more? Your dessert does not need to be made using sophisticated tools or a professional chef’s skills. If you possess a pot, a scoop, and a freezer, then you are already halfway there.
Why You’ll Love This Recipe
You’ll fall for this Fried Ice Cream Delight because it’s:
- 🍦 Crispy outer layer and creamy ice cream core – This great contrast turns every nibble into an adventure.
- ⏱ Quick frying and hassle-free preparation – The largest part of the job is done in the freezer and not on the stove.
- 🎉 Everybody’s favorite and amusing activity – The expression of surprise and joy is on everyone’s face when it is taken out of the oil.
- ✨ Variety of choices – Change the flavor of the ice cream, that of the coating, or the toppings to tailor it to your liking.
- 🧈 Cozy feeling and reminiscence – A bit of crusty, a bit of melting but absolutely pleasing.
Tools You’ll Need
Let’s talk tools—nothing too fancy, I promise:
- Ice Cream Scoop: To shape perfect, even scoops. You can use a regular spoon, but a scoop helps with consistent size.
- Baking Sheet: To hold the scoops while freezing. Line it with parchment paper to prevent sticking.
- Plastic Wrap or Freezer Bag: Keeps the scoops from absorbing freezer odors.
- Mixing Bowls: For crushing cornflakes, mixing the coating, and whisking eggs.
- Deep Fryer or Heavy Pot: For frying. A heavy-bottomed pot like a Dutch oven works perfectly.
- Slotted Spoon or Tongs: To safely lift the fried scoops from the oil.
- Thermometer (optional but helpful): Ensures the oil stays at 375°F (190°C) for that perfect fry.
Ingredients
For the Ice Cream Balls:
- 1 pint (about 470 mL) vanilla ice cream (or any flavor you love)
- 2 cups (60 g) cornflakes, crushed
- 1 teaspoon ground cinnamon
- 2 tablespoons (28 g) butter, melted
- 2 large eggs
- 2 tablespoons (30 mL) milk
- Oil for frying (about 3–4 cups / 720–950 mL, depending on pot size)
Optional Toppings:
- Whipped cream
- Honey or chocolate syrup
- Chopped nuts or shredded coconut
- Maraschino cherries
Step-by-Step Instructions
Step 1: Scoop and Freeze
- With an ice cream scoop, shape 4-6 balls of ice cream of the same size.
- The balls of ice cream should go on a baking sheet lined with parchment paper and be frozen for 2 hours or more until firm.
- Tip: Ice cream that is very hard is less prone to melting during frying.
Step 2: Prepare the Coating
- In a mixing bowl, mix together the crushed cornflakes, the cinnamon, and the melted butter.
- And then stir them all until each cornflake shines a little bit. Crushing the cornflakes with hands is my favorite method since it allows one to get some bigger bits for more crunch.
Step 3: First Coat
- Each frozen ice cream ball is to be dipped into the cornflake mixture, being a bit forceful to ensure the cornflakes adhere. Place it back on the baking sheet and freeze again for one hour.
Step 4: Second Coat (for Extra Crunch)
- Take a small bowl and stir the eggs and milk together with a whisk.
- Then take each coated ball, dip it in the egg mixture, and roll it once more in the cornflake crumbs.
- Freeze for another one to two hours or all night if that’s what you prefer.
- The dual-freezing technique is your magic trick—it keeps all the goodness when you fry.
Step 5: Fry Time!
- Bring the oil to 375°F (190°C). Now, with a slotted spoon, very carefully put one ice cream ball into the hot oil. Fry for about 10–15 seconds – just till golden. Then take it off right away and let it sit on a paper towel to get rid of extra oil.
Don’t blink—the frying happens fast!
Step 6: Serve Immediately
Each ball should be served in a bowl that has been chilled. Pour honey or chocolate syrup over them,, add whipped cream, and top with a cherry.
You’ll want to dive in right away—the magic moment is when the crust is still hot and the ice cream is still icy.
Serving Ideas
- Mexican-Style: Drizzle with honey and sprinkle with cinnamon sugar.
- Chocolate Lover’s Dream: Use chocolate ice cream and drizzle with fudge sauce.
- Tropical Twist: Roll in crushed coconut flakes instead of cornflakes and top with pineapple syrup.
- Mini Bites: Use a melon baller for tiny, one-bite fried ice cream treats—perfect for parties!
Make-Ahead & Storage
- Make-Ahead: You can prep and freeze the coated ice cream balls up to 2 weeks ahead. Just fry them straight from the freezer.
- Storage: Keep tightly wrapped in a freezer bag to prevent freezer burn. Don’t refreeze after frying—they’re best enjoyed fresh and hot.
Pro Tips & Mistakes to Avoid
Here’s the part where I share what I wish someone had told me when I started:
- Freeze longer than you think. Soft ice cream is your enemy—it’ll melt instantly in the oil.
- Don’t overload the pot. Fry one or two at a time to keep the oil temperature steady.
- Use a thermometer. If the oil isn’t hot enough, your coating will absorb oil and turn soggy.
- Crush but don’t powder your coating. You want texture—think “crunchy cereal,” not “breadcrumbs.”
- Serve fast! Fried ice cream waits for no one; it’s a dessert meant for the moment.
Recipe Details
- Yield: 4 servings
- Prep Time: 20 minutes (plus freezing time)
- Cook Time: 5 minutes total
- Total Time: About 4 hours (including freezing)
- Calories: ~320 per serving (without toppings)
Final Thoughts
There’s something joyful about making Fried Ice Cream Delight—it feels like breaking a rule, but in the sweetest way. You’ll feel that thrill when you crack through the crispy shell and see the ice cream still perfectly cold inside.

Fried Ice Cream Delight
4
servings2
minutes5
minutes320
kcalHonestly, I must say that I was a doubter at first when I heard of fried ice cream for the very first time. Just consider it, how could a frozen item survive a plunge into boiling oil and not become a miserable puddle? But, to my surprise, the first bite of it made me change my mind completely. Just think of it as a crispy, golden outer layer giving way to a cold, creamy ice cream scoop inside. It is magic, pure—like opposites falling in love and making it work perfectly. In case you are a newbie to the idea of deep-frying ice cream, you need not be concerned—I'm here for you. This recipe is surprisingly simple once you get to know the secret: temperatures and timing are the key factors. Then, going with the success of this technique will make you prepare this again and again (especially when you need to show your guests how good you are, or if you would like to pamper yourself with something sweet).
Ingredients
For the Ice Cream Balls:
1 pint (about 470 mL) vanilla ice cream (or any flavor you love)
2 cups (60 g) cornflakes, crushed
1 teaspoon ground cinnamon
2 tablespoons (28 g) butter, melted
2 large eggs
2 tablespoons (30 mL) milk
Oil for frying (about 3–4 cups / 720–950 mL, depending on pot size)
Optional Toppings:
Whipped cream
Honey or chocolate syrup
Chopped nuts or shredded coconut
Maraschino cherries
Directions
- Step 1: Scoop and Freeze
- With an ice cream scoop, shape 4-6 balls of ice cream of the same size.
- The balls of ice cream should go on a baking sheet lined with parchment paper and be frozen for 2 hours or more until firm.
- Tip: Ice cream that is very hard is less prone to melting during frying.
- Step 2: Prepare the Coating
- In a mixing bowl, mix together the crushed cornflakes, the cinnamon, and the melted butter.
- And then stir them all until each cornflake shines a little bit. Crushing the cornflakes with hands is my favorite method since it allows one to get some bigger bits for more crunch.
- Step 3: First Coat
- Each frozen ice cream ball is to be dipped into the cornflake mixture, being a bit forceful to ensure the cornflakes adhere. Place it back on the baking sheet and freeze again for one hour.
- Step 4: Second Coat (for Extra Crunch)
- Take a small bowl and stir the eggs and milk together with a whisk.
- Then take each coated ball, dip it in the egg mixture, and roll it once more in the cornflake crumbs.
- Freeze for another one to two hours or all night if that’s what you prefer.
- The dual-freezing technique is your magic trick—it keeps all the goodness when you fry.
- Step 5: Fry Time!
- Bring the oil to 375°F (190°C). Now, with a slotted spoon, very carefully put one ice cream ball into the hot oil. Fry for about 10–15 seconds - just till golden. Then take it off right away and let it sit on a paper towel to get rid of extra oil.
- Don’t blink—the frying happens fast!
- Step 6: Serve Immediately
- Each ball should be served in a bowl that has been chilled. Pour honey or chocolate syrup over them,, add whipped cream, and top with a cherry.
- You’ll want to dive in right away—the magic moment is when the crust is still hot and the ice cream is still icy.