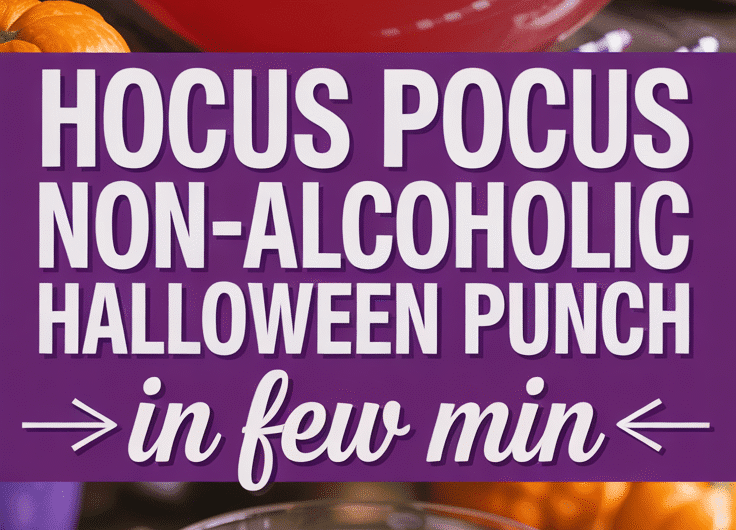
Hocus Pocus Non-Alcoholic Halloween Punch
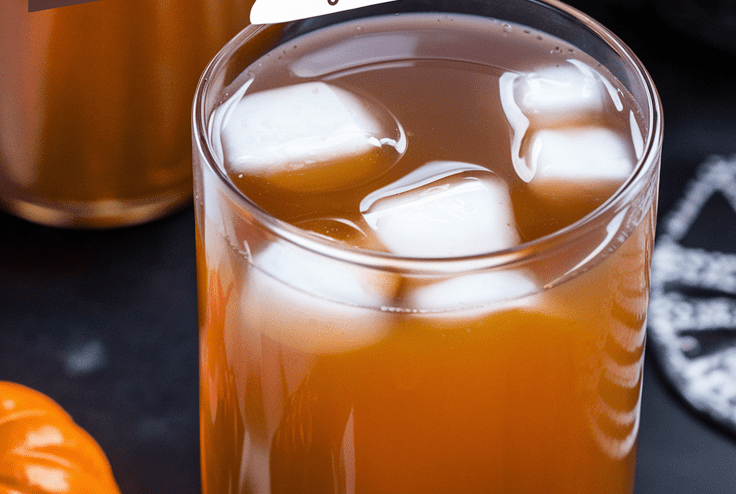
There’s something about Halloween that brings out my inner kid. Maybe it’s the candy. Maybe it’s the costumes. But honestly? It’s the food and drinks that make the night magical. And this Hocus Pocus Non-Alcoholic Halloween Punch is one of those show-stopper recipes that makes everyone’s eyes light up the second you pour it.
This isn’t your average party punch—it’s sweet, spooky, and bubbling with personality (literally, if you add a little dry ice). I’ve made this punch for family parties, kids’ nights, and even adult gatherings where everyone secretly wanted the “fun drink.” Every time, it’s the same reaction: a mix of “Whoa, that looks awesome!” and “Can I have more?”
What Is Hocus Pocus Punch?
Think of this as a witchy cauldron full of fruity, fizzy magic—a colorful, non-alcoholic punch that combines fruit juices, lemon-lime soda, and a swirl of sherbet to create a potion that looks as good as it tastes. The best part? You can tweak the flavors, colors, and garnishes to fit your Halloween theme perfectly.
It’s family-friendly, simple to make, and instantly turns any gathering into a little celebration.
Why This Recipe Is Special
I love this recipe because it’s not just a drink—it’s an experience. When the punch starts bubbling and foaming, you can’t help but smile. It looks like something straight out of Hocus Pocus, and kids go absolutely wild for it. Plus, you can make a huge batch without spending much time or effort.
It’s also super flexible—you can use any juice combo you love, swap the soda for sparkling water, or use themed sherbet colors (like lime green or orange) to match your party vibe.
Why You’ll Love This Recipe
- No alcohol, all fun – Everyone can enjoy it, from kids to grandparents.
- Tastes amazing – Sweet, fizzy, and fruity with a creamy twist.
- Ridiculously easy – Mix, stir, and serve—no special skills needed.
- Visually stunning – That foamy sherbet top looks straight out of a witch’s cauldron.
- Customizable – Change the colors, juices, and decorations to match your theme.
- Make-ahead friendly – Mix the base early, then add fizz right before serving.
Tools You’ll Need
- Large Punch Bowl or Drink Dispenser – The star of the show. You want room for bubbles and that sherbet foam.
- Ladle – For serving those perfect scoops without splashing everywhere.
- Measuring Cups (US and Metric) – Keep your juice ratios on point.
- Mixing Spoon – A long-handled spoon helps you blend everything gently.
- Ice Ring or Ice Cubes – Optional, but great for keeping the punch cool.
- Optional Dry Ice (handled carefully) – For that eerie, smoky effect—just don’t let anyone touch or ingest it directly.
Ingredients
(Makes about 12 servings)
- 4 cups (950 ml) orange juice, chilled
- 4 cups (950 ml) pineapple juice, chilled
- 2 liters (8 cups) lemon-lime soda (like Sprite or 7Up), chilled
- 2 cups (475 ml) ginger ale, chilled (for extra fizz and spice)
- 1 pint (475 ml) lime sherbet or orange sherbet (your choice of color)
- 1/4 cup (60 ml) grenadine syrup (for that deep, spooky hue)
- Orange and lime slices – for garnish
- Gummy worms, candy eyeballs, or plastic spiders – optional but fun!
Step-by-Step Instructions
1. Chill Everything
Before you start, make sure all your juices and sodas are cold. This keeps the punch refreshing without needing too much ice (which can water it down).
2. Mix the Base
In your punch bowl, pour in the orange juice and pineapple juice. Give it a quick stir. These two form your fruity, golden base.
3. Add the Fizz
Gently pour in the lemon-lime soda and ginger ale. I like to tilt the bowl slightly as I pour to keep the fizz alive—it’s all about that sparkle.
4. Create the “Potion”
Now for the fun part! Slowly add scoops of sherbet on top. The second it hits the liquid, it’ll bubble and foam, creating that classic witch’s brew effect.
5. Add the Magic Touch
Drizzle in the grenadine syrup—it’ll sink and swirl, making a mesmerizing color effect. Toss in your fruit slices and candy garnishes for extra flair.
6. Serve and Enjoy
Ladle into clear cups so everyone can see the color and foam. Top each glass with a gummy worm or candy eyeball for fun.
Serving Ideas
- Halloween Party Centerpiece: Serve it in a black cauldron for full witchy vibes.
- Kids’ Trick-or-Treat Drink: Pour into mini mason jars with striped straws.
- Movie Night Magic: Enjoy it while watching Hocus Pocus or The Nightmare Before Christmas.
Variations and Customizations
- Color Swap: Use grape juice and raspberry sherbet for a purple potion.
- Citrus Kick: Add a splash of lime or lemon juice for extra tang.
- Healthy Version: Use sparkling water instead of soda and 100% fruit juice.
- Winter Twist: Mix in cranberry juice and raspberry sherbet for a holiday version.
Storage and Make-Ahead Tips
- Make-Ahead: Mix all the juices up to a day ahead and refrigerate. Add soda and sherbet just before serving.
- Leftovers: Store in a covered pitcher in the fridge for up to 2 days. The fizz fades, but the flavor stays bright.
- No Dry Ice? Totally fine—regular ice cubes or frozen fruit work perfectly.
Pro Tips and Mistakes to Avoid
- Don’t over-stir after adding soda—you’ll lose the bubbles.
- Use chilled ingredients instead of adding ice directly. It keeps flavor strong.
- Add sherbet last so it foams dramatically right before guests see it.
- If using dry ice, handle with gloves and use small pieces—never let anyone drink it directly.
- Avoid too much grenadine, or it’ll overpower the citrus notes.
Recipe Details
- Yield: About 12 servings
- Prep Time: 10 minutes
- Cook Time: None
- Total Time: 10 minutes
- Calories per serving: ~140 kcal
Final Thoughts
Every Halloween party needs a little magic—and this Hocus Pocus Non-Alcoholic Halloween Punch delivers it by the ladle. It’s colorful, crowd-pleasing, and just plain fun to make. Whether you’re hosting a costume bash or a cozy movie night, this punch brings a touch of enchantment to the table.
So grab your cauldron, stir up this bubbly potion, and watch everyone’s faces light up. If you make it, I’d love to hear how it went—share your version, your twists, or your favorite spooky garnishes in the comments.
15 Easy Pumpkin Carving Ideas for Beginners and Experts
Halloween is the perfect time to unleash your creativity, and what better way to do that than by carving pumpkins that impress everyone who walks by? Whether you’re a beginner with a carving knife or a seasoned pumpkin artist, we’ve got 15 easy pumpkin carving ideas that range from simple to expert-level masterpieces.
These designs will help you create pumpkins that light up your porch, wow your guests, and become the talk of the neighborhood this Halloween.
1. Classic Jack-O’-Lantern Face
Nothing beats the traditional Jack-O’-Lantern look. It’s the timeless pumpkin face with triangular eyes, a toothy grin, and plenty of spooky charm.
How to make it:
- Cut a lid at an angle to keep it from falling in.
- Scoop out the seeds and pulp.
- Use a stencil or freehand the face with a marker.
- Carve with a serrated knife for smooth lines.
This design is perfect for beginners and can be done in under 30 minutes.
2. Ghostly Glow Pumpkin
For a haunting yet elegant design, try carving a ghost silhouette on your pumpkin.
Steps:
- Trace a ghost outline with chalk.
- Carve only the inside shape, leaving the pumpkin intact around the ghost.
- Place a white LED light inside to make it glow eerily through the cut-out.
This design gives off spooky vibes without being too complicated.
3. Starry Night Pumpkin
Turn your pumpkin into a night sky full of stars.
What you need:
- A drill or metal skewer.
- Pencil to mark random dots.
Instructions:
Drill holes all around your pumpkin in a scattered pattern. When lit, your pumpkin will sparkle like a mini galaxy, perfect for a magical Halloween look.
4. Cat Silhouette Pumpkin
If you love black cats, this one’s for you.
How to do it:
- Draw a sitting cat with an arched back or curled tail.
- Carve out the shape cleanly.
- Add yellow LED lights inside for an eerie glow.
It’s classy, Halloween-themed, and perfect for cat lovers.
5. Haunted House Pumpkin
Create your own mini haunted house scene.
You’ll need:
- A fine carving tool or X-Acto knife.
- A printed stencil for precision.
Cut out a tiny haunted house, windows, and bats. The flickering light from inside gives it a chilling effect that captures Halloween perfectly.
6. Spooky Tree Design
A spooky tree adds mystery to your pumpkin.
Steps:
- Sketch a tree with twisted branches reaching upward.
- Carve it carefully using a precision knife.
- Leave thin lines to let the light peek through the branches.
It’s a great choice for those wanting something dramatic but not overly difficult.
7. Smiling Skeleton Pumpkin
Skeleton faces are both creepy and fun.
How to make it:
- Draw large round eyes, a triangle nose, and a wide, toothy grin.
- Carve the teeth with detail to make it pop.
This one’s a hit with kids and adults alike — classic and bold.
8. Bat Swarm Pumpkin
Want a pumpkin that feels alive? Try carving bats in flight.
Steps:
- Use a stencil or freehand several small bat outlines around your pumpkin.
- Vary their sizes to create movement.
- Add a black light or purple LED inside for extra drama.
The result is a dynamic, spooky masterpiece.
9. Mummy Pumpkin
This one doesn’t require advanced carving skills — just creativity.
How to make it:
- Wrap your pumpkin in strips of white gauze or fabric, leaving space for two eye holes.
- Add glow-in-the-dark eyes or LED lights.
It’s the perfect no-carve pumpkin idea that still steals attention.
10. Spider Web Pumpkin
Spider webs are easy and look intricate when done right.
Instructions:
- Draw a web starting from the center, creating lines outward.
- Connect them with curved lines.
- Add a plastic or carved spider for the finishing touch.
When lit, this pumpkin gives off an elegant yet creepy glow.
11. Witch Hat Pumpkin
Combine two Halloween icons — pumpkins and witches.
Steps:
- Carve a simple smiling face.
- Paint or place a mini witch hat on top.
- Add fake hair or a broom beside it for flair.
It’s a fun design that’s perfect for decorating your front steps.
12. Moon and Owl Pumpkin
This idea mixes nature and magic beautifully.
How to create it:
- Draw a crescent moon and carve it out.
- Inside the moon, carve an owl silhouette perched on a branch.
- Use a flickering candle for a natural glow effect.
It’s perfect for intermediate carvers looking to impress.
13. Toothless Monster Pumpkin
A funny twist on the usual scary face.
Steps:
- Carve large uneven eyes and a goofy open mouth.
- Leave the teeth uncarved or add candy corn for a fun detail.
This design is especially fun for kids and family carving nights.
14. Pumpkin-on-Pumpkin Stack
Take things up a notch with a stacked pumpkin display.
How to make it:
- Carve three pumpkins, each with different faces — happy, scary, surprised.
- Stack them using wooden dowels or skewers for stability.
- Add LED lights inside each for layered illumination.
It’s visually striking and makes an excellent centerpiece.
15. Intricate Lace Pumpkin (Expert Level)
For seasoned carvers who want a challenge, the lace design offers elegance.
Instructions:
- Draw a lace or mandala pattern using a marker.
- Use a fine carving tool to cut out small, delicate holes.
- Light it from inside to highlight every detail.
This design looks stunning both indoors and outdoors, offering a mix of sophistication and spooky charm.
Tips for Perfect Pumpkin Carving
- Always choose a firm pumpkin with a flat base.
- Scoop out the inside completely for longer-lasting results.
- Use LED lights instead of candles for safety and a brighter glow.
- Preserve your pumpkin by rubbing the edges with petroleum jelly.
- Sketch your design before carving to avoid mistakes.
These tips ensure your pumpkins last longer and look their best throughout Halloween.
Final Thoughts
Pumpkin carving is more than just a Halloween tradition — it’s an art form that lets your creativity shine. Whether you’re carving your first simple Jack-O’-Lantern or attempting a detailed lace pattern, every pumpkin tells a story.
12
servings10
minutes140
kcalThink of this as a witchy cauldron full of fruity, fizzy magic—a colorful, non-alcoholic punch that combines fruit juices, lemon-lime soda, and a swirl of sherbet to create a potion that looks as good as it tastes. The best part? You can tweak the flavors, colors, and garnishes to fit your Halloween theme perfectly.
Ingredients
4 cups (950 ml) orange juice, chilled
4 cups (950 ml) pineapple juice, chilled
2 liters (8 cups) lemon-lime soda (like Sprite or 7Up), chilled
2 cups (475 ml) ginger ale, chilled (for extra fizz and spice)
1 pint (475 ml) lime sherbet or orange sherbet (your choice of color)
1/4 cup (60 ml) grenadine syrup (for that deep, spooky hue)
Orange and lime slices – for garnish
Gummy worms, candy eyeballs, or plastic spiders – optional but fun!
Directions
- Before you start, make sure all your juices and sodas are cold. This keeps the punch refreshing without needing too much ice (which can water it down).
- In your punch bowl, pour in the orange juice and pineapple juice. Give it a quick stir. These two form your fruity, golden base.
- Gently pour in the lemon-lime soda and ginger ale. I like to tilt the bowl slightly as I pour to keep the fizz alive—it’s all about that sparkle.
- Now for the fun part! Slowly add scoops of sherbet on top. The second it hits the liquid, it’ll bubble and foam, creating that classic witch’s brew effect.
- Drizzle in the grenadine syrup—it’ll sink and swirl, making a mesmerizing color effect. Toss in your fruit slices and candy garnishes for extra flair.
- Ladle into clear cups so everyone can see the color and foam. Top each glass with a gummy worm or candy eyeball for fun.
Notes
- Don’t over-stir after adding soda—you’ll lose the bubbles.
Use chilled ingredients instead of adding ice directly. It keeps flavor strong.
Add sherbet last so it foams dramatically right before guests see it.
If using dry ice, handle with gloves and use small pieces—never let anyone drink it directly.
Avoid too much grenadine, or it’ll overpower the citrus notes.


