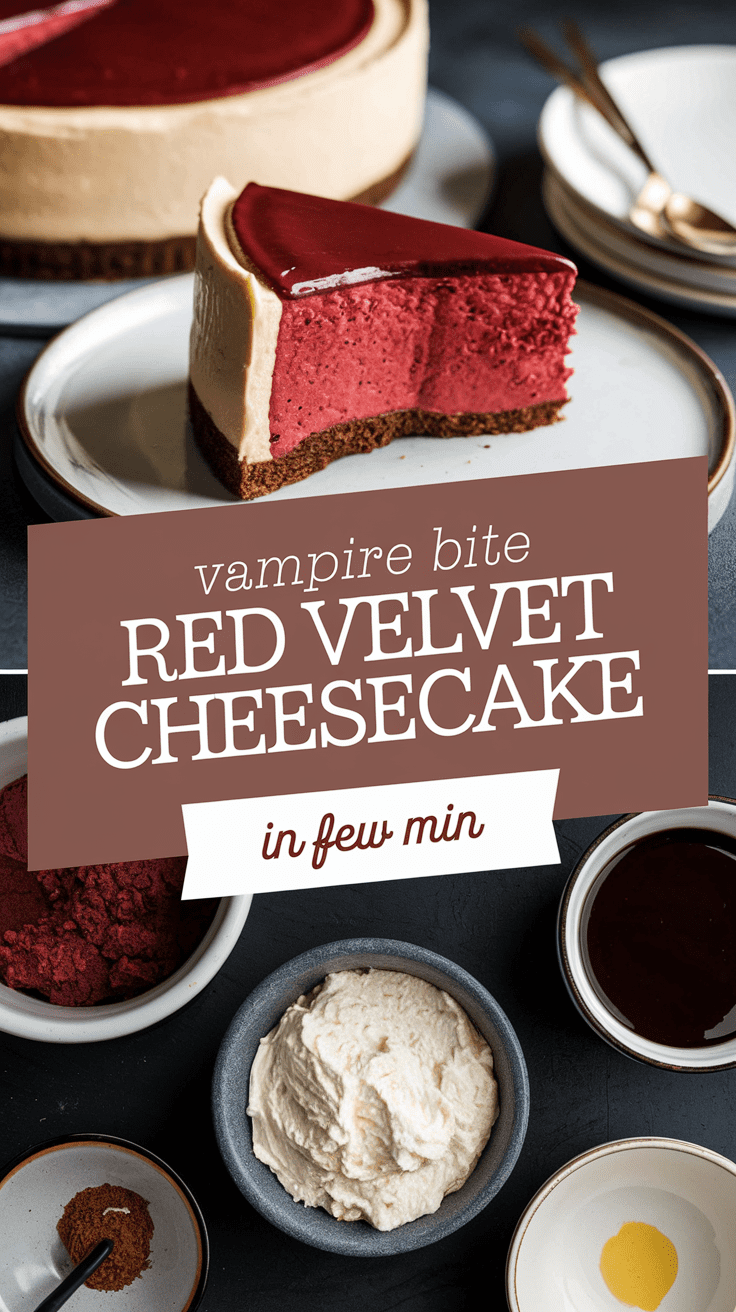
Vampire Bite Red Velvet Cheesecake
Let me confess that this Vampire Bite Red Velvet Cheesecake wakes up the demure and polite people into whisperers, “Who made it?” You can just look on innocently, eyes half laughing like a vampire who happens to have discovered one of their secret ingredients. It is a delightful mix of spooky allure and succulence—hauntingly gorgeous, deeply indulgent, and a real Halloween conversation piece or drama dessert scene-maker.
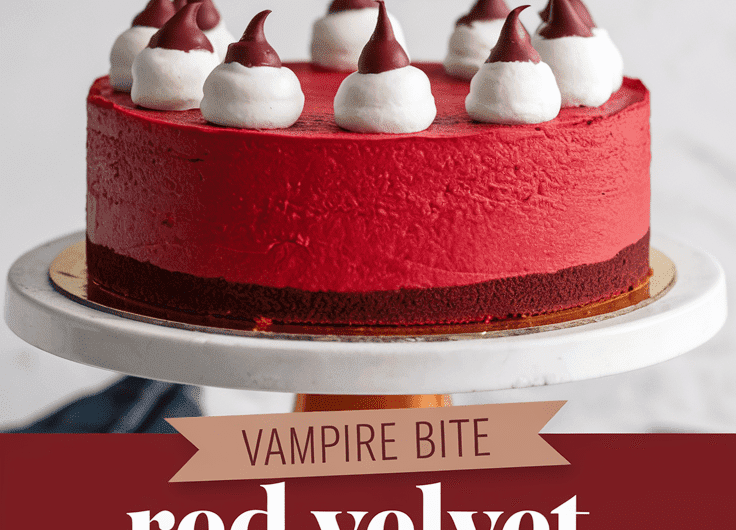
I’ve always loved the contrast of silky cheesecake and moist red velvet cake. It’s like luxury meets comfort. But when you drizzle that glossy red “blood” sauce over the top—it’s pure edible theater. The bite marks? Just the finishing touch that turns this classic dessert into a story on a plate.
A Little About the Recipe
The Vampire Bite Red Velvet Cheesecake is made by pouring the cheesecake batter into an already formed red velvet cake crust, which makes this treat the indulgent, best-of-both-worlds dessert that those with a sweet tooth dream about. And then there is a drizzle of raspberry/strawberry reduction on top for maximal effect when the cheesecake cracks beneath the knife cutting through. It is adorably refined and improvised—the type of dessert Dracula might serve at his dinner party.
Why This Recipe Is Special
It’s not the look alone that makes this cheesecake special. In maintaining its integrity, the velvety texture of the red velvet cake created a really dependable base for the rich and creamy layer of cheesecake. Sweetness is contrasted with acidity, and the faint cocoa depth in every bite keeps them in perfect balance. And when the cake is sliced, the sight is just so hypnotizing—the deep crimson overflowing with muted ivories, interspersed with dabs of ruby red.
Why You’ll Love This Recipe
- It’s a conversation starter. Everyone will ask about those “bites” and that dramatic sauce.
- Perfect balance of flavors. Tangy cream cheese meets cocoa-rich red velvet and fruity “blood.”
- Fun to make and decorate. You can get creative with the sauce splatter and presentation.
- Make-ahead friendly. Cheesecake actually tastes better after a night in the fridge.
- Foolproof texture. I’ll walk you through every step so your cheesecake comes out smooth and crack-free.
Tools You’ll Need
Each tool here has a job, and I’ll tell you why it matters.
- 9-inch (23 cm) springform pan: Essential for easy release and clean edges.
- Electric mixer or stand mixer: To beat the cream cheese until perfectly smooth.
- Mixing bowls: One for your cheesecake, one for your cake batter, and one for the “blood” sauce.
- Rubber spatula: Helps scrape every bit of batter—no waste.
- Measuring cups and spoons: Accuracy makes the texture perfect.
- Offset spatula: For smoothing out layers neatly.
- Baking sheet: To catch drips or to use as a water bath base.
- Toothpick or skewer: For testing the cake layer or creating swirl patterns.
Ingredients
For the Red Velvet Crust
- 1 ¼ cups (150 g) crushed red velvet cake crumbs or baked red velvet cake
- ¼ cup (60 g) melted butter
- 1 tbsp (12 g) sugar
For the Cheesecake Layer
- 24 oz (680 g) cream cheese, softened
- 1 cup (200 g) sugar
- 3 large eggs, room temperature
- 1 cup (240 g) sour cream
- 1 tsp (5 ml) vanilla extract
- 1 tbsp (8 g) all-purpose flour
- A pinch of salt
For the “Vampire Blood” Sauce
- ½ cup (120 ml) raspberry or strawberry puree
- 2 tbsp (25 g) sugar
- 1 tsp (5 ml) lemon juice
- 1 tsp (2.5 g) cornstarch mixed with 1 tbsp (15 ml) water
Step-by-Step Instructions
Step 1: Prep the Pan and Crust
- The oven is preheated to 325°F (163°C).
- Springform pans are greased with butter and the bottom lined with parchment. Red velvet crumbs, melted butter, and sugar are mixed together until a damp sand texture.
- It gets pressed very hard into the bottom of the pan- a glass can be used to press it all even.
- Bake for 10 minutes and cool while you prep the filling.
Step 2: Make the Cheesecake Batter
- Cream cheese is beaten in the mixer to make it smooth and creamy with no lumps. Do not take any shortcuts.
- Add the sugar, mixing for 1 more minute.
- Add the eggs one at a time, incorporating each egg just until combined.
- Stir in the sour cream, vanilla, flour, and salt. The final batter is silky and glossy.
- Pour over the cooled crust, tapping the pan gently to release any trapped air bubbles.
Step 3: Bake the Cheesecake
- Set the springform pan on a baking tray and bake it for about 55 to 65 minutes until set at the edges but slightly jiggly in the middle.
- Turn off the oven, leave the door ajar, and allow the cheesecake to cool for an hour.
- This prevents cracks from forming.
- Let it cool completely before refrigerating for at least 6 hours or preferably overnight.
Step 4: Make the “Blood” Sauce
- In a small pot, mix puree, sugar, and lemon juice, and bring to a simmer.
- Stir in the cornstarch slurry and cook until it thickens slightly.
- Let it cool—it’ll thicken more as it stands.
Step 5: Decorate Like a Vampire
- Use a skewer to poke two “bite marks” into the cheesecake.
- Drizzle the red sauce to look like blood dripping from the marks.
- Add a few artistic splatters for drama.
- Chill again before serving.
Serving Ideas
- Let people put how much sauce they want on top of everything-popular item-“blood.”
- Pair with black coffee or dark red wine for an astute, gothic pairing.
- For some style, put whipped cream ghosts or dark chocolate shavings on top.
Variations and Customizations
- Mini cheesecakes: individual servings with muffin tins.
- Chocolate “Bite Marks”: Melt some dark chocolate into drips instead of fruit sauce for a riper flavor.
- Red Velvet Swirl: plop spoonfuls of red velvet batter over the cheesecake and swirl it before baking.
- No Bake Version: Crush some red velvet cookies and don’t bother with the oven-chill overnight.
Storage and Make-Ahead
- Refrigerate: Seal tightly and keep for 5 days.
- Freeze: Wrap slices in plastic and freeze for as much as 2 months. Defrost for a night in the fridge.
- Make Ahead: The cheesecake actually tastes much better the next day since flavors meld wonderfully.
Pro Tips and Mistakes to Avoid
- Don’t overmix after adding eggs—it traps air and causes cracks.
- Always cool slowly—temperature shock ruins the texture.
- Use full-fat cream cheese for that creamy, dreamy mouthfeel.
- Line your pan well—red velvet crumbs like to stick.
- Test the sauce thickness before drizzling; too thin and it runs off, too thick and it clumps.
These are the little details that turn a good cheesecake into a great one.
Recipe Details
- Yield: 10–12 slices
- Prep Time: 30 minutes
- Cook Time: 1 hour
- Chill Time: 6 hours
- Total Time: About 7½ hours
- Calories: ~420 per slice
When you finally cut into this cheesecake and see that rich red crust under a smooth white layer with ruby drips down the sides, you’ll know it was worth every minute. It’s elegant, a little eerie, and a total crowd-pleaser.
I would like to hear from you how this Vampire Bite Red Velvet Cheesecake fared with you. Tag and share with your pals. You can even tell me your best reaction story, as every great dessert deserves claps (or may be a bite before sunrise).
Vampire Bite Red Velvet Cheesecake
4
servings30
minutes1
hour420 per slice
kcalThe Vampire Bite Red Velvet Cheesecake is made by pouring the cheesecake batter into an already formed red velvet cake crust, which makes this treat the indulgent, best-of-both-worlds dessert that those with a sweet tooth dream about. And then there is a drizzle of raspberry/strawberry reduction on top for maximal effect when the cheesecake cracks beneath the knife cutting through. It is adorably refined and improvised—the type of dessert Dracula might serve at his dinner party.
Ingredients
For the Red Velvet Crust
1 ¼ cups (150 g) crushed red velvet cake crumbs or baked red velvet cake
¼ cup (60 g) melted butter
1 tbsp (12 g) sugar
For the Cheesecake Layer
24 oz (680 g) cream cheese, softened
1 cup (200 g) sugar
3 large eggs, room temperature
1 cup (240 g) sour cream
1 tsp (5 ml) vanilla extract
1 tbsp (8 g) all-purpose flour
A pinch of salt
For the “Vampire Blood” Sauce
½ cup (120 ml) raspberry or strawberry puree
2 tbsp (25 g) sugar
1 tsp (5 ml) lemon juice
1 tsp (2.5 g) cornstarch mixed with 1 tbsp (15 ml) water
Directions
- Step 1: Prep the Pan and Crust
- The oven is preheated to 325°F (163°C).
- Springform pans are greased with butter and the bottom lined with parchment. Red velvet crumbs, melted butter, and sugar are mixed together until a damp sand texture.
- It gets pressed very hard into the bottom of the pan- a glass can be used to press it all even.
- Bake for 10 minutes and cool while you prep the filling.
- Step 2: Make the Cheesecake Batter
- Cream cheese is beaten in the mixer to make it smooth and creamy with no lumps. Do not take any shortcuts.
- Add the sugar, mixing for 1 more minute.
- Add the eggs one at a time, incorporating each egg just until combined.
- Stir in the sour cream, vanilla, flour, and salt. The final batter is silky and glossy.
- Pour over the cooled crust, tapping the pan gently to release any trapped air bubbles.
- Step 3: Bake the Cheesecake
- Set the springform pan on a baking tray and bake it for about 55 to 65 minutes until set at the edges but slightly jiggly in the middle.
- Turn off the oven, leave the door ajar, and allow the cheesecake to cool for an hour.
- This prevents cracks from forming.
- Let it cool completely before refrigerating for at least 6 hours or preferably overnight.
- Step 4: Make the “Blood” Sauce
- In a small pot, mix puree, sugar, and lemon juice, and bring to a simmer.
- Stir in the cornstarch slurry and cook until it thickens slightly.
- Let it cool—it’ll thicken more as it stands.
- Step 5: Decorate Like a Vampire
- Use a skewer to poke two “bite marks” into the cheesecake.
- Drizzle the red sauce to look like blood dripping from the marks.
- Add a few artistic splatters for drama.
- Chill again before serving.