Light Fluffy Sourdough Focaccia
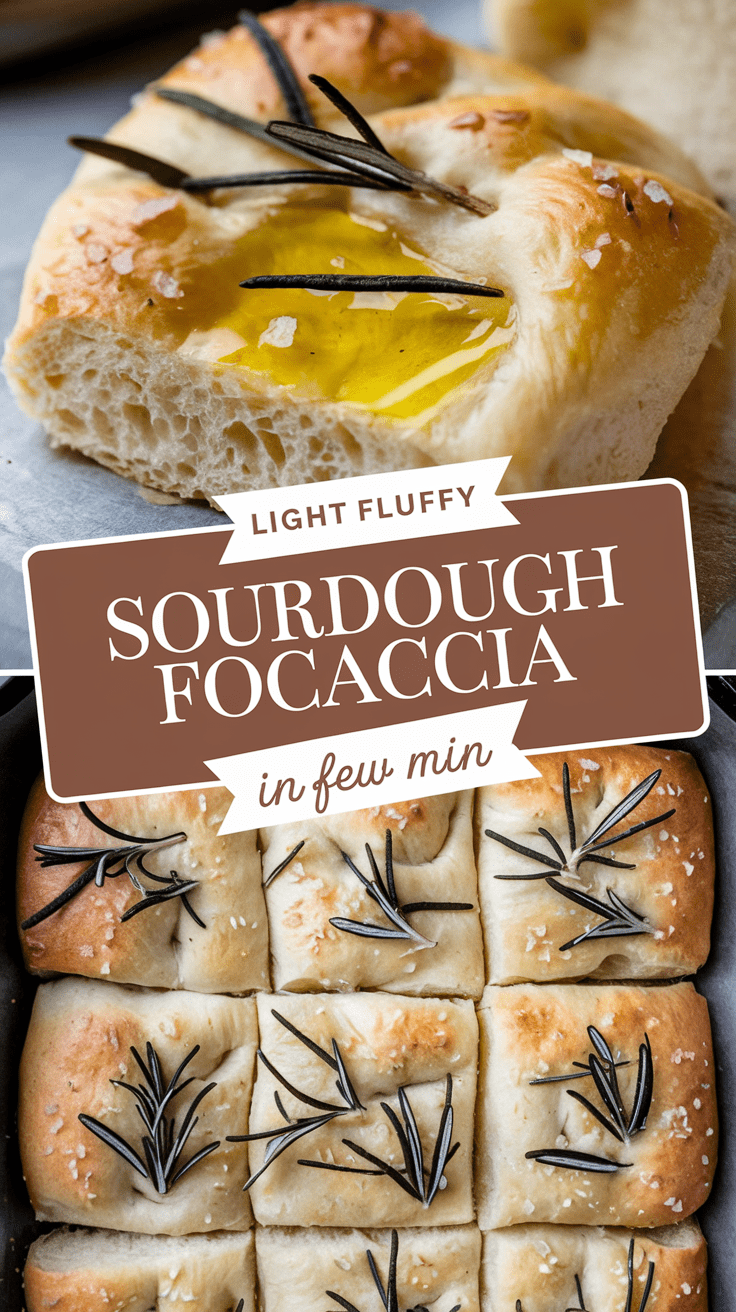
I have been quite frank with you; thus, as far as sourdough, I have baked lots of it. Yet, there is this focaccia recipe from my collection which is a definite returner for me. It is fluffy, soft, and well-tasting, perfectly compared to all the sourness in the mouth and then that golden crisp crust above. It feels like a little celebration every time I pull it out of the oven.
This is bread that won’t break your heart because it forgives itself, it would rather be fun, and it pays you off with something that feels more than wonderful for the labor involved. This is definitely the recipe if you were looking for a bread recipe that makes you feel like a rockstar baker without needing a bakery setup.
What Makes This Focaccia Special?
Sourdough focaccia is unlike any other of the many old-fashioned bread styles: it is actually the fusion of rustic sourdough with that airy fluffiness of Italian focaccia. Get the fluffy, light crumb, the richness of olive oil, and the possible topping combinations (rosemary, the fantastic sea salt, everyone will love!) all using your bubbly starter. Bread is not only filling; it also takes your breath away.
Why You’ll Love This Recipe
Here’s why I think you’re going to fall for this focaccia:
- Depth of flavor will be mild with the sourness; that’s important for its perception as complex rather than simply as one more flat yeast bread.
- Fluffy texture-a cloud-like, airy interior that readily absorbs the olive oil.
- Customizable toppings – Keep it classic with salt and rosemary, or go wild with tomatoes, garlic, or olives.
- No kneading stress – It’s a mostly hands-off process, letting time and fermentation do the heavy lifting.
- Beginner-friendly – If you’ve been intimidated by sourdough, this is a very approachable place to start.
Tools You’ll Need
Think of these as your sidekicks in the kitchen. Nothing fancy, just the essentials.
- Large mixing bowl – To combine and ferment your dough. Glass or stainless steel works great.
- Kitchen scale – Trust me, weighing ingredients makes bread baking so much easier and more reliable.
- For measuring the olive oil, salt, and smaller add-ins, cups would do just fine.
- These are handy for folding dough or helping you move it around.
- A 9×13-inch (23×33 cm) baking pan is the traditional focaccia pan. If you are into smaller loaves, you could also use two 9-inch (23 cm) round pans.
- Plastic wrap or a damp tea towel is needed to prevent the dough from drying out during fermentation.
- Parchment paper is optional, but it makes it easy to clean up.
Ingredients
Here’s what you’ll need for one 9×13-inch pan of focaccia.
- 500 g (4 cups) bread flour
- 400 g (1 2/3 cups) water, room temperature
- 100 g (about 1/2 cup) active sourdough starter, bubbly and fed
- 10 g (2 tsp) fine sea salt
- 40 g (3 tbsp) olive oil, plus more for greasing and topping
- Optional toppings: fresh rosemary, flaky sea salt, sliced cherry tomatoes, olives, or caramelised onions
Step-by-Step Instructions
Step 1: Mix the dough
- In a large bowl, combine your starter, water, and olive oil. Stir until the starter dissolves.
- Add flour and salt. Mix with a spoon or your hand until no dry patches remain. Don’t worry about smoothness—it’ll look shaggy.
(Tip: At this stage, don’t overthink it. Imperfect dough is totally fine. The magic happens during fermentation.)
Step 2: Bulk fermentation
- Cover with plastic wrap or a damp towel and let rest for 30 minutes.
- Perform 3–4 sets of stretches and folds every 30 minutes. To do this, grab one edge of the dough, stretch it up, and fold it over itself. Rotate the bowl and repeat. This builds strength without kneading.
- After the last fold, let the dough rest, covered, for 4–6 hours at room temperature, until it doubles in size and looks airy.
Step 3: Cold proof
- Transfer the bowl to the fridge and let it ferment overnight (8–12 hours). This develops flavour and makes the dough easier to handle.
Step 4: Pan and shape
- The next day, generously oil your baking pan.
- Gently tip the dough into the pan. Don’t punch it down—handle it like a soft pillow.
- Drizzle a little olive oil on top, then gently stretch the dough to fit the pan. If it resists, let it rest 10 minutes and stretch again.
Step 5: Final proof
- Cover and let the dough rest at room temperature for 2–3 hours, until puffy and airy.
Step 6: Dimple and top
- 450°F is hot enough for anyone.
- Oil them and press your fingers deep into the dough to create dimples; this forms those classic focaccia pockets.
- Throw on some toppings: flaky salt, rosemary…whatever you fancy.
Step 7: Bake
- Bake for 20 to 25 minutes until they are nice and golden.
- Remove from the oven and glaze with more olive oil for shine and flavour.
(This is the moment I always sneak a corner piece—it’s irresistible.)
Serving Ideas
- Serve warm with olive oil and balsamic for dipping.
- Use as sandwich bread (it makes unreal panini).
- Cut pieces into strips for soups or stews.
- Top with burrata and tomatoes for a 10-minute appetiser.
Variations and Customisation
- Roasted garlic is a flavour bomb in the dough.
- Caramelised onions and thyme for sweet and savoury.
- Make it cheesy—grate parmesan or mozzarella on top before baking.
Storage and Make-Ahead
- Keep leftovers in a sealed container at room temperature for no longer than 2 days.
- For longer storage, wrap them up very tightly and put them in the freezer for as long as 1 month. Heat the oven to bring about the best texture.
- You can prepare the dough up to 24 hours in advance; just bake it when ready.
Pro Tips (From My Kitchen to Yours)
- Always use an active starter. If it’s sluggish, your focaccia will be dense.
- Don’t skimp on olive oil—focaccia should feel indulgent.
- Be patient with fermentation. If your dough hasn’t doubled, give it more time.
- When dimpling, press down with confidence! Those pockets are where flavour pools.
- Avoid too many wet toppings (like fresh tomatoes without draining) or you’ll risk soggy bread.
Common Mistakes to Avoid
- Rushing the bulk fermentation—underproofed dough = flat bread.
- Skipping the cold proof—you’ll miss out on flavour and structure.
- Using all-purpose flour only—bread flour gives the best chew and rise.
Recipe Details
- Yield: 12 servings
- Prep Time: 20 minutes (active)
- Fermentation Time: 12–16 hours
- Bake Time: 25 minutes
- Total Time: About 14–18 hours (mostly hands-off)
Nutrition (per serving): Approx. 180 calories, 6 g fat, 28 g carbs, 5 g protein
Try It!
Making sourdough focaccia at home is one of those projects that seems like an act of self-care. It doesn’t ask for much, but an incredibly generous return is given in each fluffy bite. If you try this recipe out, I would love to hear how it turned out for you-shared with friends and family or kept all to yourself (we’re not judging!).
Light Fluffy Sourdough Focaccia
4
servings20
minutes25
minutes180
kcalThis is bread that won't break your heart because it forgives itself, it would rather be fun, and it pays you off with something that feels more than wonderful for the labor involved. This is definitely the recipe if you were looking for a bread recipe that makes you feel like a rockstar baker without needing a bakery setup.
Ingredients
500 g (4 cups) bread flour
400 g (1 2/3 cups) water, room temperature
100 g (about 1/2 cup) active sourdough starter, bubbly and fed
10 g (2 tsp) fine sea salt
40 g (3 tbsp) olive oil, plus more for greasing and topping
Optional toppings: fresh rosemary, flaky sea salt, sliced cherry tomatoes, olives, or caramelised onions
Directions
- Step 1: Mix the dough
- In a large bowl, combine your starter, water, and olive oil. Stir until the starter dissolves.
- Add flour and salt. Mix with a spoon or your hand until no dry patches remain. Don’t worry about smoothness—it’ll look shaggy.
- (Tip: At this stage, don’t overthink it. Imperfect dough is totally fine. The magic happens during fermentation.)
- Step 2: Bulk fermentation
- Cover with plastic wrap or a damp towel and let rest for 30 minutes.
- Perform 3–4 sets of stretches and folds every 30 minutes. To do this, grab one edge of the dough, stretch it up, and fold it over itself. Rotate the bowl and repeat. This builds strength without kneading.
- After the last fold, let the dough rest, covered, for 4–6 hours at room temperature, until it doubles in size and looks airy.
- Step 3: Cold proof
- Transfer the bowl to the fridge and let it ferment overnight (8–12 hours). This develops flavour and makes the dough easier to handle.
- Step 4: Pan and shape
- The next day, generously oil your baking pan.
- Gently tip the dough into the pan. Don’t punch it down—handle it like a soft pillow.
- Drizzle a little olive oil on top, then gently stretch the dough to fit the pan. If it resists, let it rest 10 minutes and stretch again.
- Step 5: Final proof
- Cover and let the dough rest at room temperature for 2–3 hours, until puffy and airy.
- Step 6: Dimple and top
- 450°F is hot enough for anyone.
- Oil them and press your fingers deep into the dough to create dimples; this forms those classic focaccia pockets.
- Throw on some toppings: flaky salt, rosemary...whatever you fancy.
- Step 7: Bake
- Bake for 20 to 25 minutes until they are nice and golden.
- Remove from the oven and glaze with more olive oil for shine and flavour.
- (This is the moment I always sneak a corner piece—it’s irresistible.)


